A horizontal wood slat wall transforms any flat, forgettable surface into a room’s defining feature — and it costs a fraction of what most renovation projects demand. I’ve installed these in three different spaces over the past four years, and the visual shift is immediate: the room feels designed rather than decorated. Whether you’re eyeing the living room accent wall, a bedroom headboard moment, or a home office backdrop, horizontal wood slat walls deliver both tactile warmth and real structural drama.
The reason horizontal wood slats read as premium is the shadow play. Each slat catches light differently throughout the day, so your wall looks different at 9am versus 6pm — that’s a level of dynamism you cannot get from wallpaper or paint. You’ll notice this most in rooms with natural side-lighting or a single pendant positioned at an angle.
Oak, walnut, and pine all behave differently on a wall — and the gap spacing matters as much as the wood species. I’ve seen $800 installs look cheaper than $200 DIY projects simply because of poor spacing decisions. This breakdown covers every variable so your first attempt looks intentional.
- Horizontal wood slat walls suit living rooms, bedrooms, and offices for different structural reasons — the section on each room explains which wood species and gap width actually works
- Gap spacing between 0.5″ and 1.5″ is the functional sweet spot; wider gaps look unfinished, tighter gaps kill the shadow effect
- Pre-made slat panels from brands like Luxul or USA Builders Depot start around $12–$18/sq ft and cut install time by 60%
- A DIY horizontal wood slat wall on a 10×10 wall runs $200–$350 in materials using furring strips from Lowe’s or Home Depot
- The back wall color matters — dark paint behind the slats adds depth; white flattens the whole effect
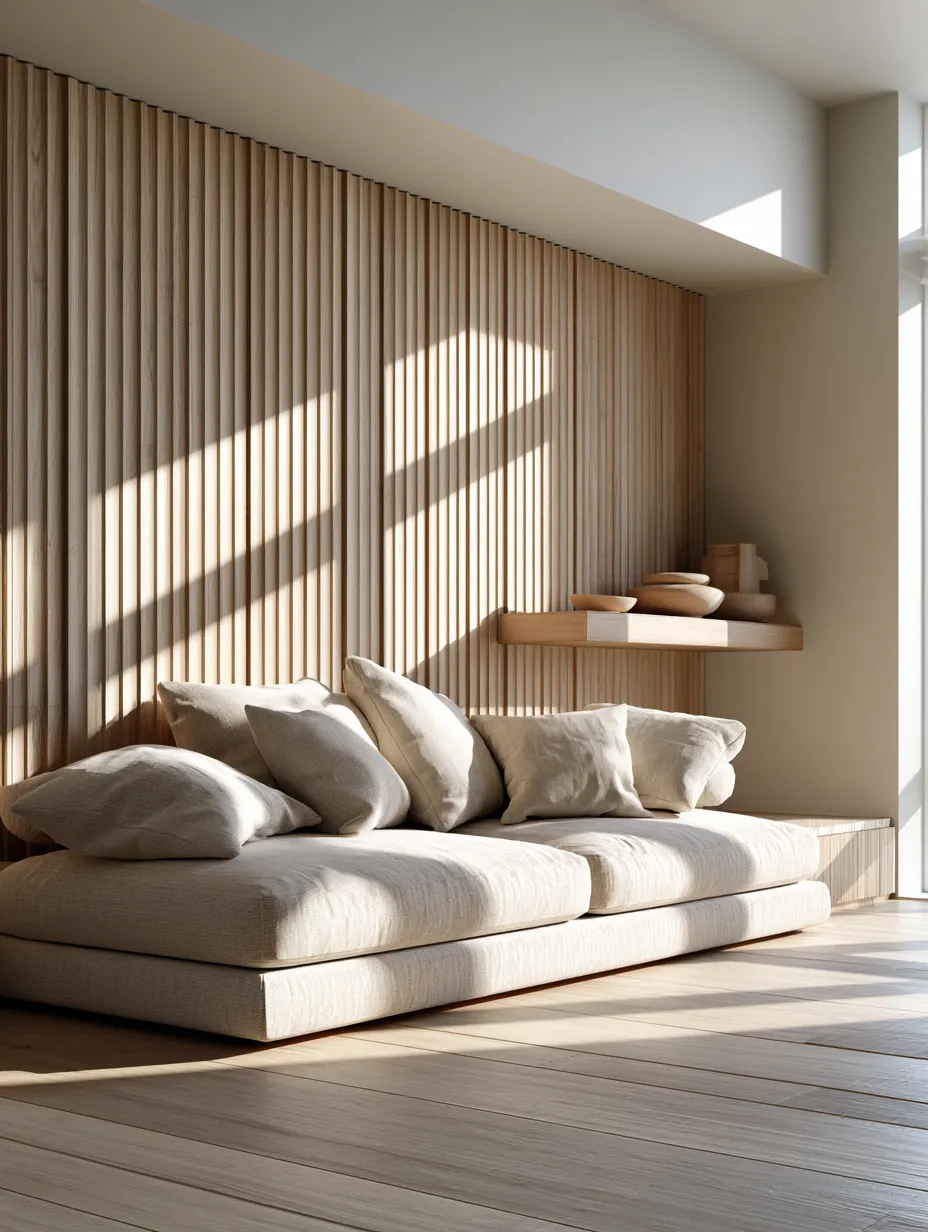
Horizontal Wood Slat Walls in the Living Room Pull More Weight Than Any Sofa


Horizontal wood slat walls in a living room do what no other single element can: they add warmth, acoustic texture, and visual structure simultaneously. My go-to recommendation is white oak with a 1″ gap — the pale golden tone reads warm without being yellow, and the gap is tight enough to feel intentional but wide enough to cast visible shadows by mid-afternoon. You need a wall that measures at least 8 feet wide for the horizontal rhythm to register properly; anything narrower and the slats just read as planks.
The wood species question trips up more people than installation itself. Walnut runs $6–$10 per linear foot and gives you a deep chocolate tone that photographs beautifully against cream linen sofas. Oak lands around $3–$5 per linear foot and handles stain better if you want a custom color. Pine is the budget move at $1–$2 per linear foot, but it dents, so skip it if you have kids or pets near the wall. I stole this finish trick from a designer I follow: seal pine with a satin polyurethane, then wax over it — the layered sheen reads like a more expensive wood from across the room.
Does the wall color behind the slats matter? Yes, more than most tutorials admit. Painting the backing wall in a deep matte — Sherwin-Williams Tricorn Black SW 6258 or Benjamin Moore Onyx 2133-10 — turns the gaps into shadow lines that add serious depth. Paint it white and the wall looks flat, almost unfinished. I’ve redone one install entirely because I skipped this step, and the before-and-after difference was embarrassing.
Integrated lighting is where horizontal slat walls in living rooms get genuinely clever. A recessed LED strip mounted behind the bottom edge of every third slat creates an upward wash that feels architectural rather than decorative. Govee’s RGBIC LED strips at around $35 for 16 feet give you color temperature control from warm amber to cool white — useful if you use the living room for both movies and video calls. Avoid spotlights aimed directly at the wall face: the slats will create harsh striped shadows rather than the soft gradient you want.
- Don’t skip the backing paint. A white or light-grey backing wall kills the depth effect entirely — the slats just look like applied trim instead of a three-dimensional surface.
- Don’t use mixed wood widths without a pattern plan. Randomly alternating 1×2 and 1×4 slats looks like a mistake, not a design choice, unless you map out the rhythm in advance.
- Don’t install all the way to the ceiling on a low room. In rooms under 8’6″, stopping the slat wall 6–8 inches below the ceiling creates a natural reveal that makes the ceiling feel higher rather than pressing down.
- Don’t use reclaimed wood with high moisture content. Warping begins within weeks in a climate-controlled interior, and gaps become uneven. Kiln-dried lumber only.
For more wood wall treatment options that work alongside slat installations, this collection of wood slat wall design ideas covers additional material combinations and room configurations worth studying before you commit to a direction.
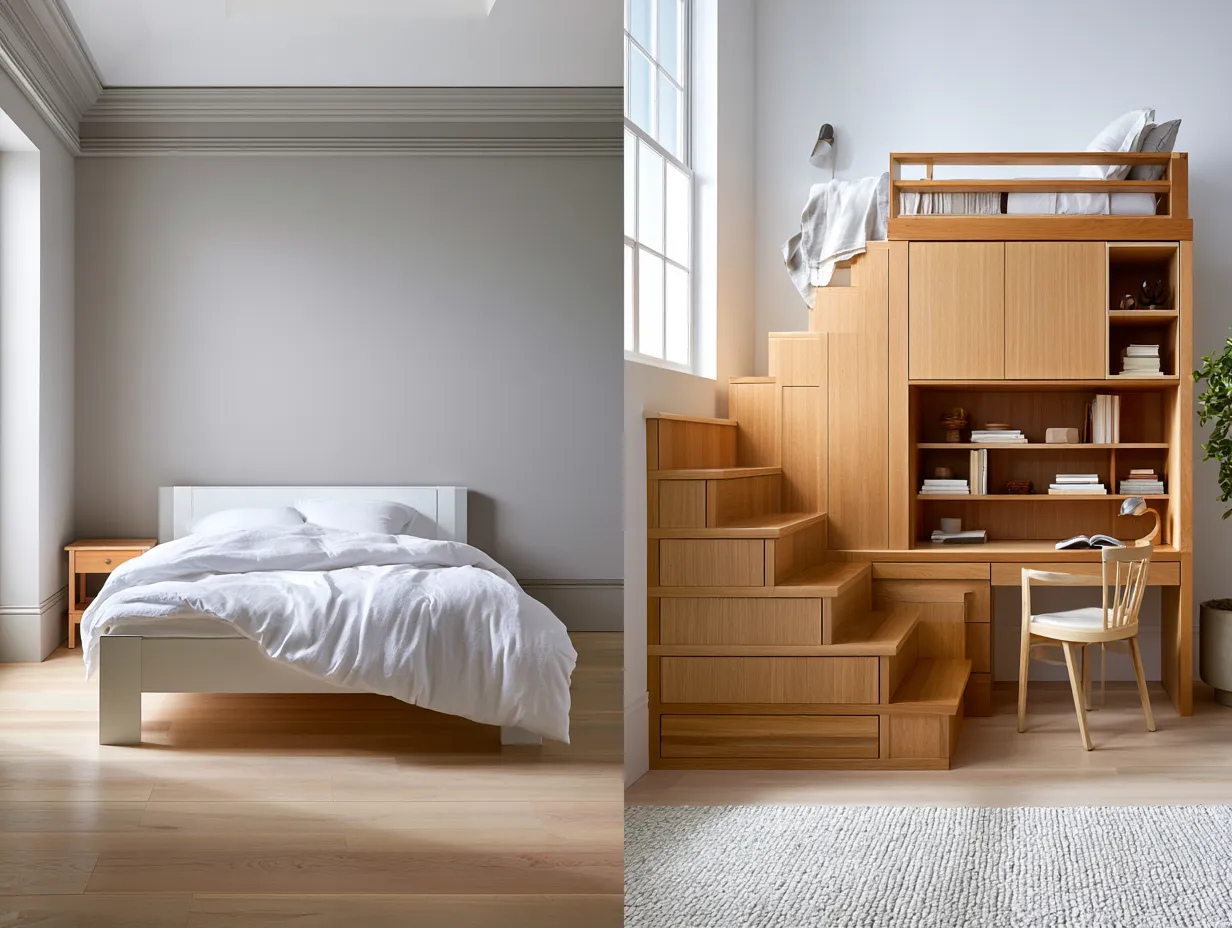
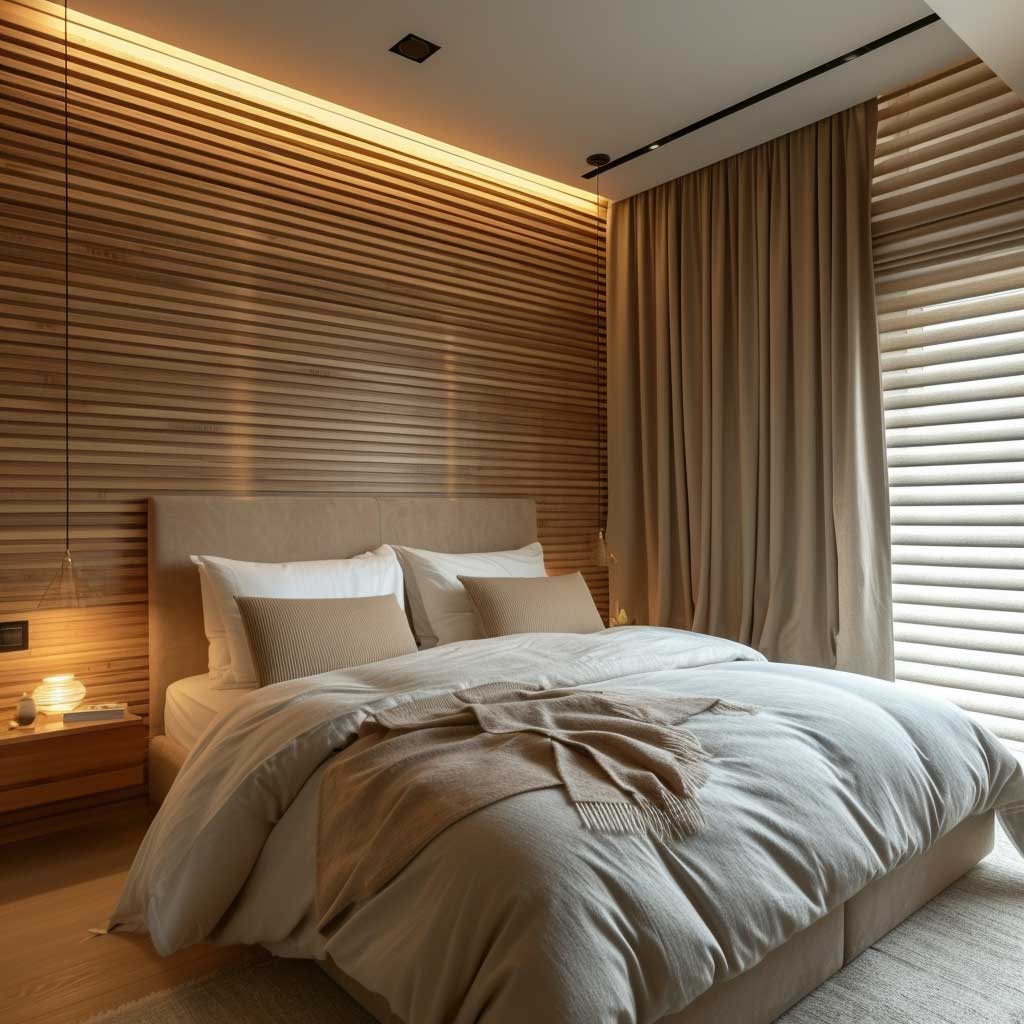
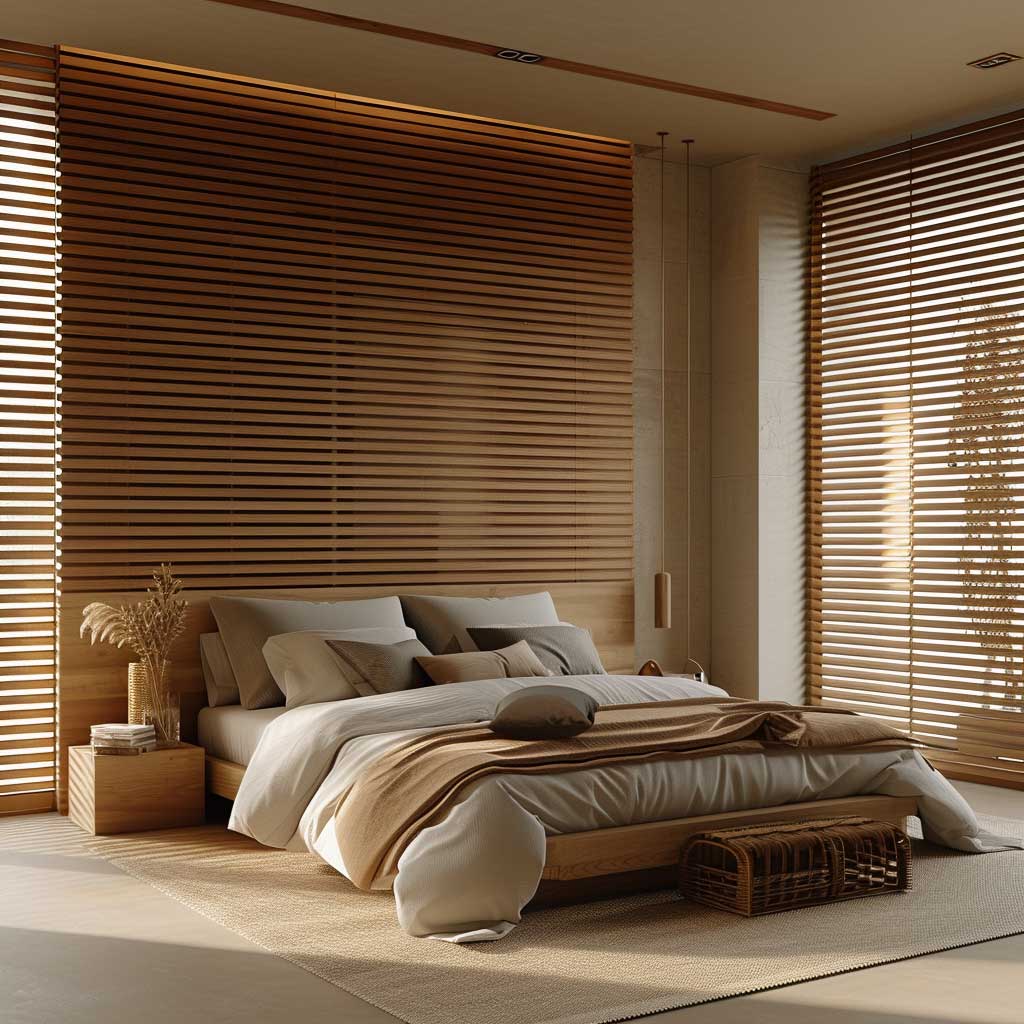
Horizontal Wood Slat Accent Walls in the Bedroom Replace the Headboard Entirely


A horizontal wood slat wall behind the bed is the single highest-impact bedroom upgrade I’ve personally made — and it cost $280 in oak furring strips from Home Depot versus the $600 upholstered headboard I’d been considering. The horizontal lines pull the eye across rather than up, which visually widens the room in a way that vertical installations never do. For a queen or king bed, I’d run the slat wall to at least 48 inches above the mattress height; anything shorter reads as an afterthought.
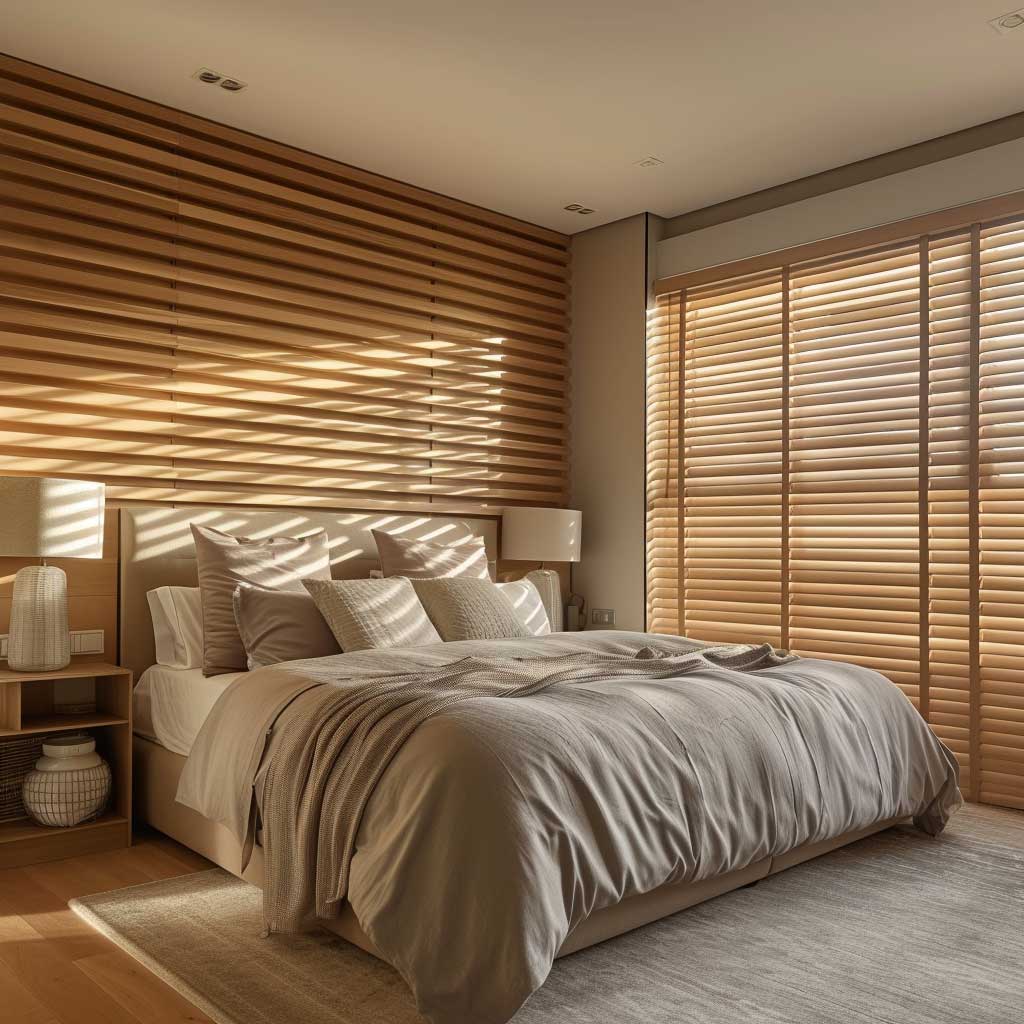
Wood selection in a bedroom should lean toward lighter species than you’d use in a living room. Ash and light oak keep the room from feeling heavy — important when you’re designing a space meant for sleep. You’ll notice that darker walnut behind a bed works only when you balance it with very pale bedding and at least one large mirror on an adjacent wall. A trick I’ve used: buy unfinished pine, sand it to 220 grit, and apply two coats of Rubio Monocoat Pure — at $60 for a half-liter, it covers roughly 130 square feet and gives you a matte, natural-looking finish that doesn’t yellow.
Gap width in a bedroom follows different logic than in a living room. Tighter gaps — 3/8″ to 1/2″ — read as more serene and ordered, which suits the psychological purpose of a sleep space. Wider gaps introduce too much visual noise for a room meant to quiet the mind. The linear pattern, when executed with tight consistent spacing, works like a visual white noise — regular enough to stop the eye from searching, interesting enough to feel intentional.

Built-in shelving within a bedroom slat wall is underused and genuinely practical. Routing a shallow 3.5″ channel into the slat framework gives you a floating shelf for a lamp, book, or phone charger without losing the clean wall surface. I’ve seen this done cleanest when the shelf is the same wood species as the slats and sits flush with the front edge — it reads as intentional architecture rather than an afterthought bracket mount. The total add-on cost using poplar shelf stock is around $40 per shelf.
If you want to see how horizontal slat walls compare to vertical installations — including which direction reads as more calming for a bedroom — this vertical slat wall breakdown lays out the differences with room-specific examples.
How to Build a Horizontal Wood Slat Wall Without Calling Anyone


Building a horizontal wood slat wall yourself on a 10×10 surface runs $200–$350 all-in — this includes lumber, backing paint, finish, adhesive, and nails. The project takes one full day if you cut and sand the slats the day before. What most tutorials skip: the prep work — painting the backing wall and letting it fully cure — accounts for about 40% of the final visual result. I rushed this step on my first build and spent an afternoon repainting around installed slats with a tiny detail brush.
Materials list for a 100 sq ft wall: 1×2 or 1×3 kiln-dried pine or poplar furring strips from Lowe’s (RELIABILT 1-in x 2-in x 8-ft boards run about $2.50 each), Titebond III construction adhesive, a Ryobi 18V brad nailer (around $99 or rentable at Home Depot for $35/day), a scrap wood spacer cut to your target gap width, and Minwax Polyshades or Rubio Monocoat for finish. Pre-cut all slats to the same length before touching the wall — ceiling height variations are real, so measure at three points along the wall and cut to the shortest.
Start from the bottom and work up. The floor gives you a flat reference line; the ceiling rarely does. Use a single scrap piece of your slat material as a consistent spacer — this is the single most important step for getting even gaps without measuring every row. Secure each slat with two beads of adhesive and two brad nails per stud contact point. What doesn’t work: relying on adhesive alone. Adhesive shifts before it cures, and you end up with a wavy wall that looks worse than nothing.
Pre-made panels are worth considering if you’re covering more than 150 square feet or working in a space with lots of outlets and corners. USA Builders Depot’s real-wood slat panels run $14–$18 per square foot and install with standard construction adhesive — no brad nailer needed. The felt backing keeps spacing perfectly consistent, which matters enormously at scale. The trade-off is that panel edges show seams, so you need to plan your layout to hide joints behind furniture or in corners.


Finishing after installation matters more than most people budget for. Sand every exposed edge with 180-grit after all slats are up — the nailer slightly crushes wood fibers at contact points. Apply finish in two thin coats rather than one heavy coat; heavy single-coat application causes drip lines in the gaps that are nearly impossible to sand out post-install. For a hardwax oil finish, Lowe’s step-by-step slat wall project page covers stain application sequence in detail with product-specific timing.
Horizontal Wood Slat Wall in an Office Makes Video Calls Look Expensive
A horizontal wood slat wall behind a desk does two things simultaneously: it improves the acoustics of a small room and gives every video call a backdrop that signals design confidence rather than spare-bedroom chaos. I’ve tracked this informally — after installing a walnut slat wall behind my desk, I received three unprompted comments in the first week of calls about what my background was. That’s the wall functioning as a professional signal, which is genuinely useful for freelancers and remote workers.
Acoustic improvement is real and measurable. Horizontal slats with 3/4″ gaps diffuse mid-frequency sound (1kHz–4kHz range) — the exact frequencies that cause echo on hard plaster walls. You’re not getting performance-grade acoustic panels, but in a typical 10×12 home office, a full slat wall reduces noticeable echo enough that your microphone picks up less room reverb. This matters more than the aesthetics if you’re recording audio or on calls for more than two hours a day.
Wood choice for an office slat wall should factor in how the surface photographs on camera, not just how it looks in person. Medium-toned ash or cerused oak films best — the grain reads clearly without creating a busy, high-contrast pattern that distracts viewers. Avoid very dark walnut behind a monitor unless your office lighting is intentionally bright; dark wood plus under-lit rooms reads as a cave backdrop on video. A 1×3 slat width at 3/4″ gaps is my go-to spec for office installs specifically because of how it renders on camera at standard webcam focal lengths.
Integrated shelving within an office slat wall is where the functional argument gets strong. Routing a 4″ deep shelf channel into the framework at monitor height gives you a clean surface for a plant, a small speaker, or a ring light — without floor stands cluttering your visual field. The shelf material cost runs $25–$45 per shelf in poplar or maple, and the visual payoff on calls is significant. Keep the shelf contents minimal: three items maximum, or the neat architectural surface becomes a distraction.
Final Word
Horizontal wood slat walls earn their cost back in every room they touch
Gap width, backing color, and wood species are the three variables that separate a slat wall that looks designed from one that looks DIY. Get those right and the budget barely matters.
A 100 sq ft DIY install runs $200–$350 in materials. A pre-made panel system from USA Builders Depot or similar runs $14–$18 per square foot installed — still cheaper than most wallpaper installs that don’t last half as long.
The acoustic benefit in offices is real. Horizontal slats with 3/4″ gaps measurably reduce mid-frequency echo — useful for anyone recording or on calls daily. Save this post before you buy a single board.