Quick Summary
Blue subway tile splashbacks start at $3–$5/sq ft and look best with white or light grey cabinets. Navy mosaic tiles cost $9–$15/sq ft and need lighter countertops for contrast. Glass splashbacks run $40–$80/sq ft installed — no grout, easy cleaning, but show fingerprints in direct sunlight. Matte and satin finishes hide daily smudges better than high-gloss on all three types.
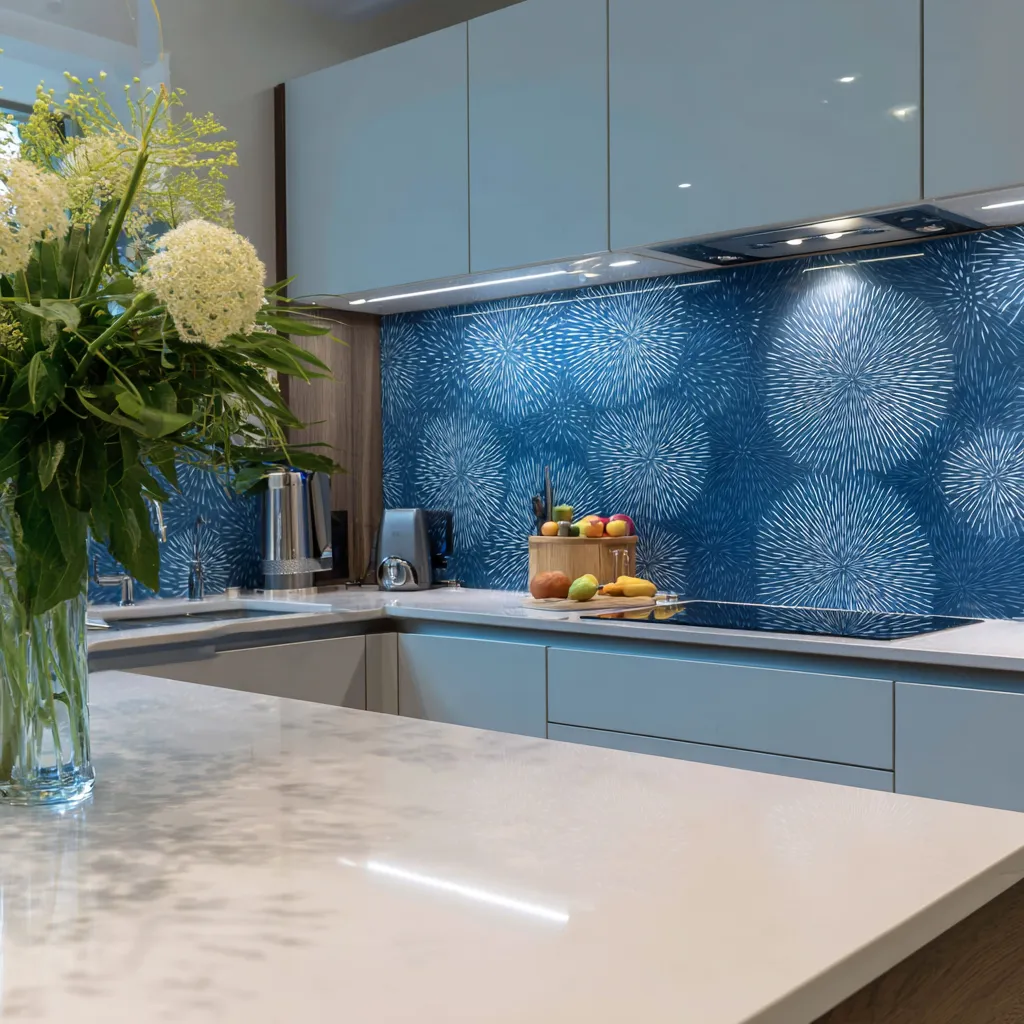
Blue kitchen splashback ideas are everywhere on Pinterest right now, and most of them look nothing like a real renovation. I’ve seen enough $12/sq ft subway tile transform a dated kitchen to know the difference between a render and a result. The good part? Blue splashbacks for kitchens work with white cabinets, dark wood, even that beige countertop you inherited from the previous owner.
Skip the safe greige backsplash. A bold blue splashback — navy mosaic, bright subway, royal glass — does what neutral tile can’t: it makes a $15K kitchen look like a $40K one. I’ll walk you through the specific tile types, finishes, and layouts that hold up after a year of grease splatter and red sauce. Some of these blue kitchen splashback ideas cost under $8 per square foot. Others are worth every cent of $25+.
Quick Scan
⏱ Reading time: 6 minutes
💰 Budget pick: Bright blue subway tile — $3–$5/sq ft
🏆 Best for drama: Navy mosaic — $9–$15/sq ft
✨ Easiest to clean: Royal blue glass — $40–$80/sq ft
❌ Biggest mistake: Dark tile + dark countertop + dark cabinets


Blue Subway Tile Splashback Ideas for a Modern Kitchen
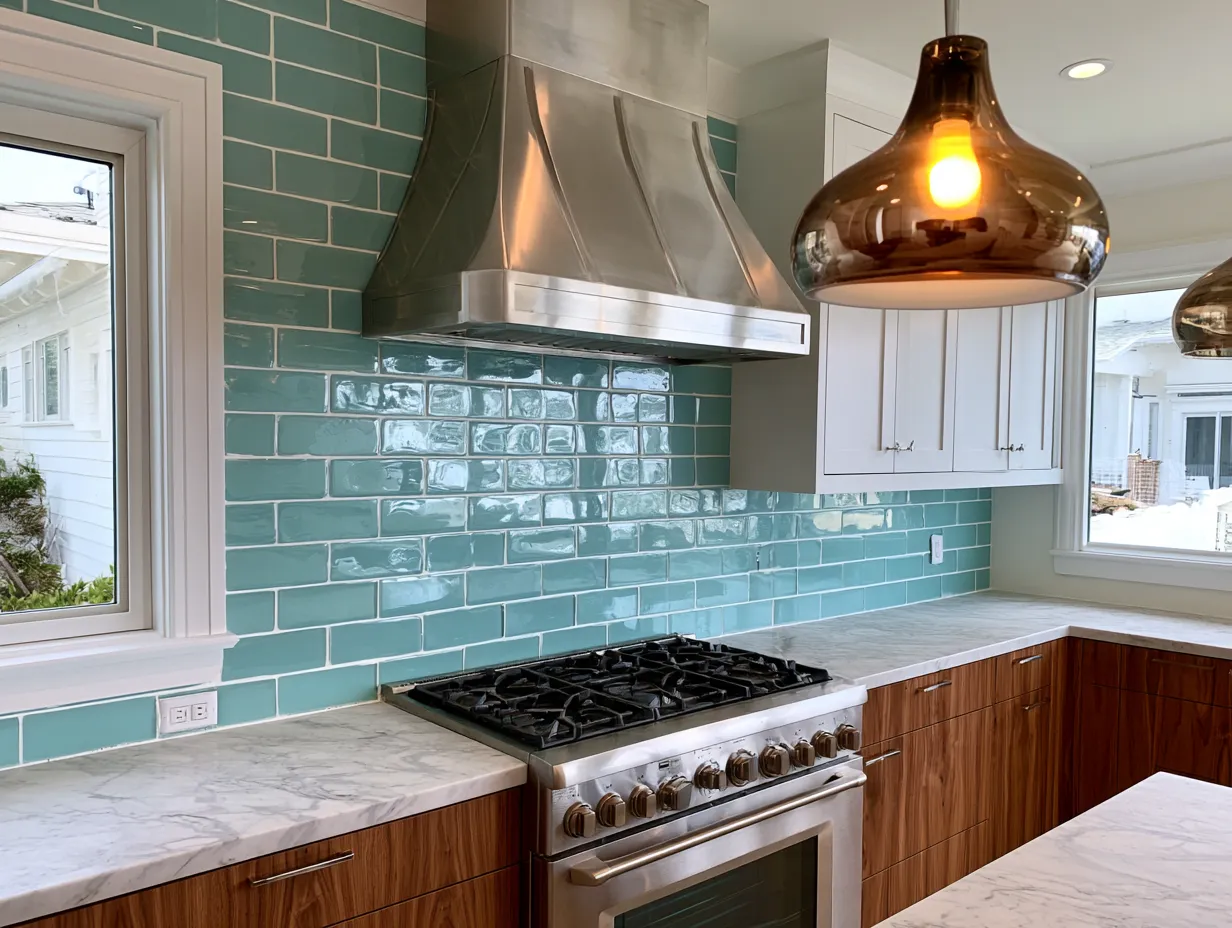
Subway tiles have long been a popular choice for kitchen splashbacks due to their simplicity and versatility. When rendered in bright blue, these classic tiles take on a new life, instantly modernizing the space with their bold color and sleek finish. The sharp contrast between the glossy blue tiles and white cabinetry creates a clean and crisp aesthetic, perfect for those who prefer a fresh, minimalist look without sacrificing style. In a modern kitchen, the reflective surface of blue subway tiles helps bounce light around the room, making the space feel larger and more open.


One of the key benefits of subway tiles in kitchen splashback ideas is their durability and ease of maintenance. The smooth surface of these tiles makes them resistant to stains and splashes, allowing for easy cleanup after cooking. Additionally, the horizontal layout of the tiles draws the eye across the kitchen, creating a sense of flow and continuity that enhances the room’s overall design. Paired with stainless steel appliances, the combination of blue and metallic tones delivers a polished, contemporary vibe that feels both inviting and practical.
In terms of design flexibility, blue subway tiles offer endless possibilities. For a modern kitchen, pairing them with neutral tones like white, grey, or black creates a sleek and balanced look, while natural wood accents can soften the space and add warmth. If you’re drawn to bold color contrasts, see how a blue backsplash paired with white cabinets creates a completely different feel. Whether you choose matte or glossy finishes, bright blue subway tiles bring a vibrant energy that breathes new life into any kitchen setting.
I bought a box of bright blue 3×6 subway tiles from Daltile for $3.49/sq ft last spring to test in a rental flip. Looked killer next to Ikea Ringhult white doors. The grout is what trips people up. Go too white and it yellows in six months behind the stove. My go-to is Mapei Keracolor U in Silver — hides cooking residue without looking dingy. You’ll spend $14–$18 per bag. Worth it.
Glossy finish or matte? Glossy bounces light better in small kitchens under 120 sq ft. Matte hides fingerprints and water spots near the sink. I’ve installed both. The glossy ones looked magazine-perfect for about three weeks, then every splash showed. If you cook daily, matte is the smarter call. Nobody tells you that.
Herringbone layout costs 15–20% more in labor than straight stack because every cut takes longer. Straight stack (vertical) is trending and actually makes low ceilings feel taller. I stole this trick from a $280K kitchen reno in Brooklyn — they used vertical stack Clé Tile in Pacific Blue, and the ceiling looked a foot higher. Your tiler might push back. Stand firm.
💡 You’re probably overpaying for grout. Mapei Keracolor U in Silver — $14/bag — outlasts anything double the price.
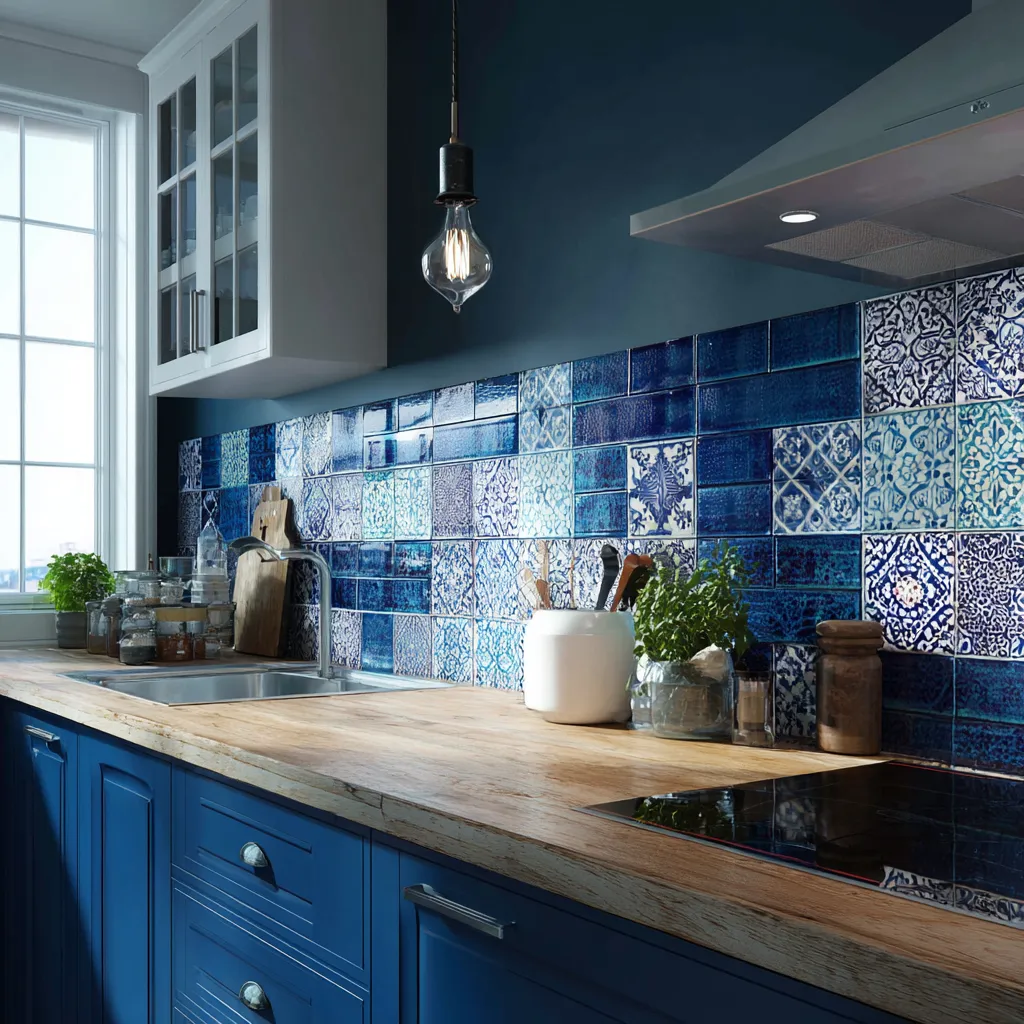
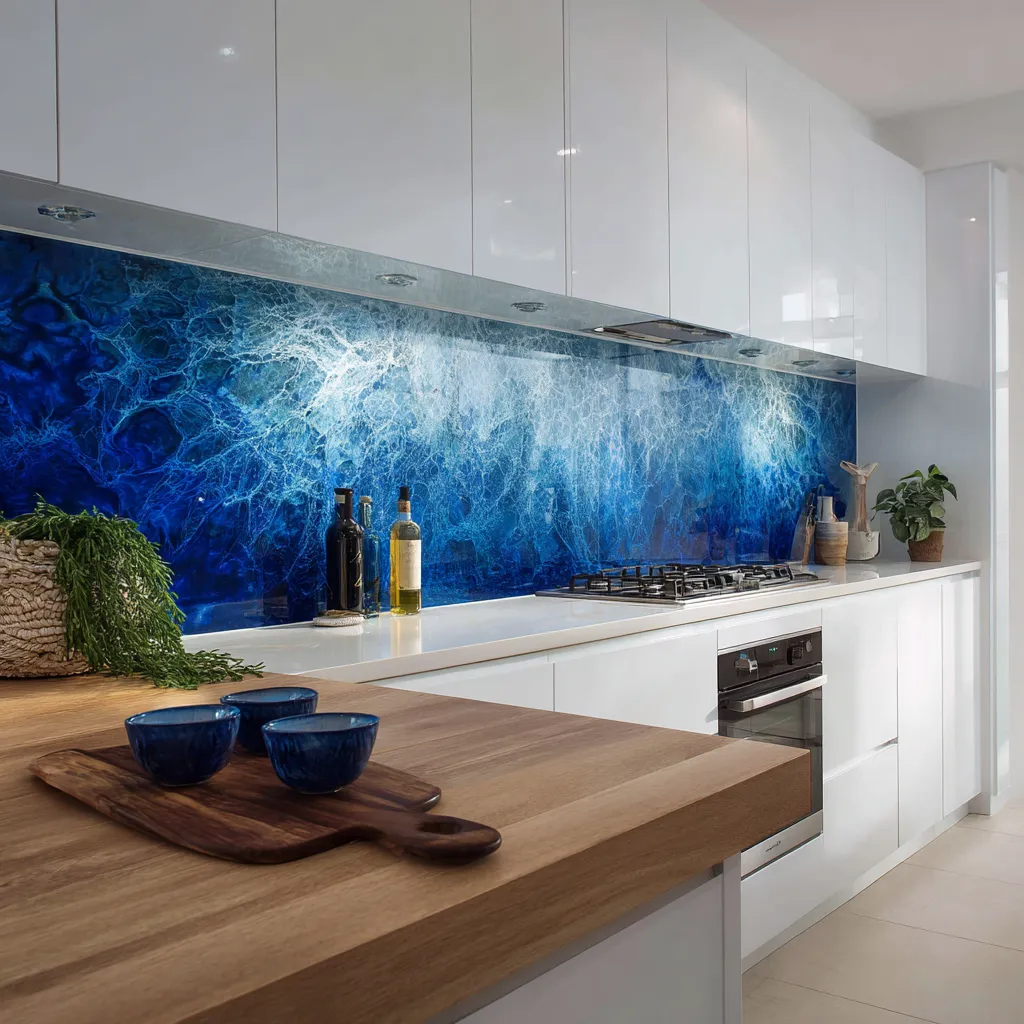
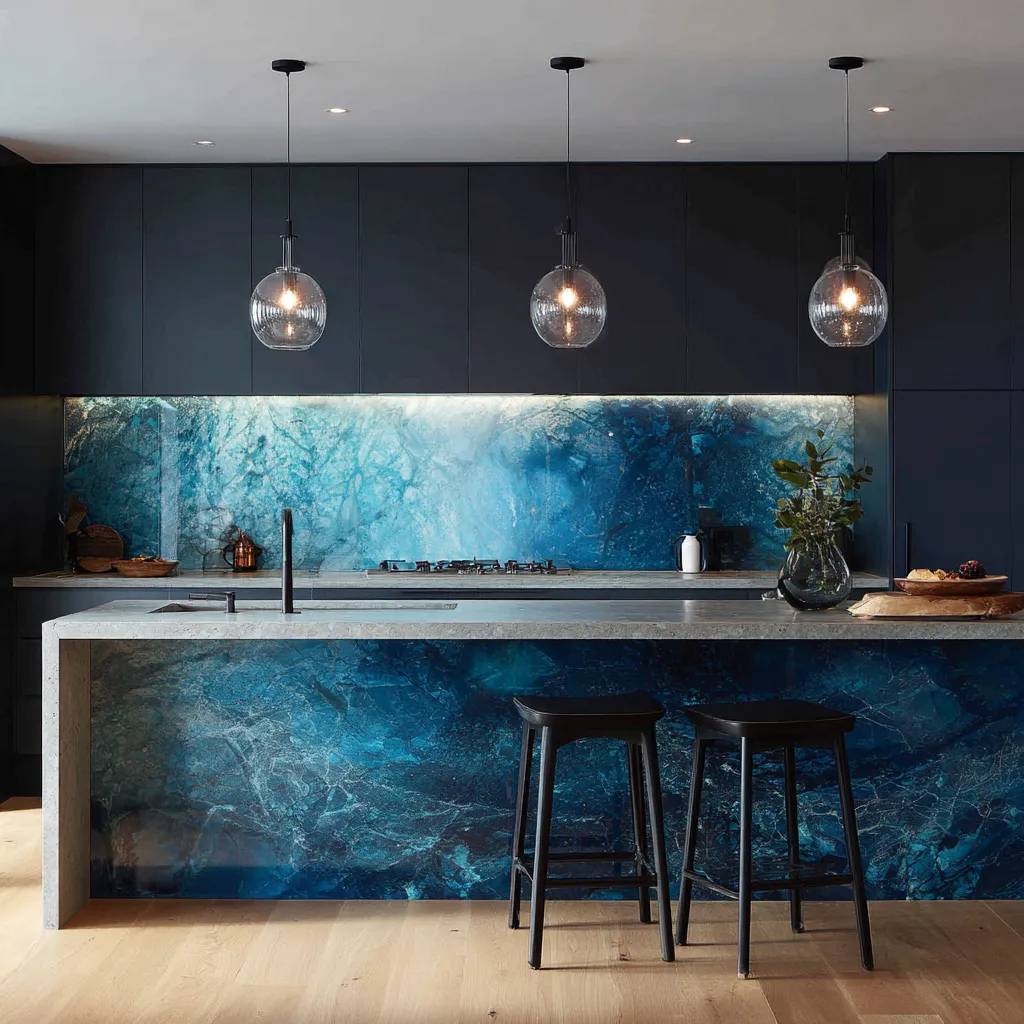
Navy Splashback Ideas: Mosaic Tiles That Add Real Depth
Mosaic tiles are a timeless option when it comes to kitchen splashback ideas, especially in bold, dramatic colors like deep navy. The intricate patterns created by small mosaic tiles add texture and visual interest to the kitchen, while the rich hue of navy brings a level of sophistication that makes the entire space feel considered. For a deep dive into ceramic, glass, and handpainted blue tile options, Fireclay Tile’s blue kitchen tile guide covers material differences worth knowing before you buy. This combination works beautifully in kitchens designed with a more luxurious or elegant theme, where attention to detail is paramount.


One of the standout features of navy mosaic tiles is the sense of depth they bring to the kitchen. The dark blue shade is both calming and dramatic, providing a striking backdrop that complements a variety of cabinetry styles. When paired with dark wood and brass fixtures, as in this design, the result is a warm and inviting kitchen that feels both cozy and upscale. The intricate patterns of the mosaic tiles also contribute to the overall richness of the design, making the splashback not only functional but also a decorative focal point.
In terms of practicality, mosaic tiles are ideal for areas that need frequent cleaning, such as behind the stove or sink. Their small size allows for flexibility in fitting into tight spaces or around awkward corners, ensuring that every inch of your kitchen is covered. With proper care, these tiles will maintain their beauty and function for years, making them a long-term investment in your kitchen’s aesthetic. For anyone looking to create a sophisticated yet practical space, navy mosaic splashbacks are a brilliant choice.
Navy mosaic from Jeffrey Court runs around $11–$15/sq ft depending on the pattern. Sounds reasonable until you realize a 30 sq ft backsplash needs about $450 in tile alone plus $200+ in labor. I priced a similar Merola Tile navy hex mosaic at $9.50/sq ft — looked 90% as good. The grout lines on mosaic eat more sealant than subway tile. Budget an extra $30–$40 for grout sealer and apply it every 18 months.
Worst navy mosaic mistake I’ve seen? Pairing it with dark granite countertops. The whole kitchen turned into a cave. Navy needs contrast. White quartz (Caesarstone Frosty Carrina is my pick around $65/sq ft installed) or butcher block — anything lighter than the tile. Even a light grey like Silestone Suede works. Dark on dark on dark makes a $25K kitchen feel like a basement.
🚫 Don’t Do This
Don’t pair navy mosaic tile with dark granite and dark cabinets. The kitchen turns into a cave. Navy needs at least one light surface — white quartz, butcher block, or light-painted uppers — to breathe.
Don’t use white grout behind the stove with any blue tile. It yellows in under a year. Silver or medium grey grout hides cooking residue and still looks clean at month 12.
📌 Save this: Navy tile + white quartz + brass hardware = the combo that gets the most saves on Pinterest boards right now.
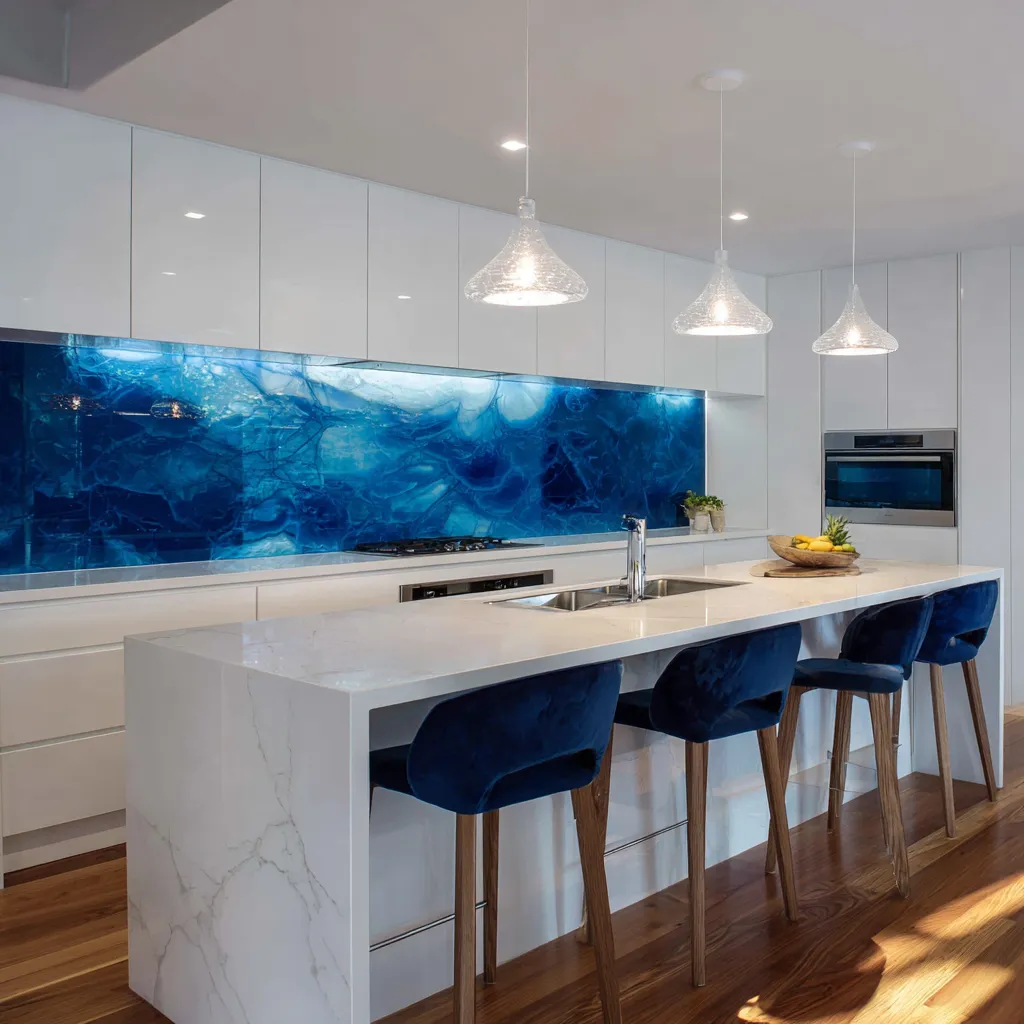
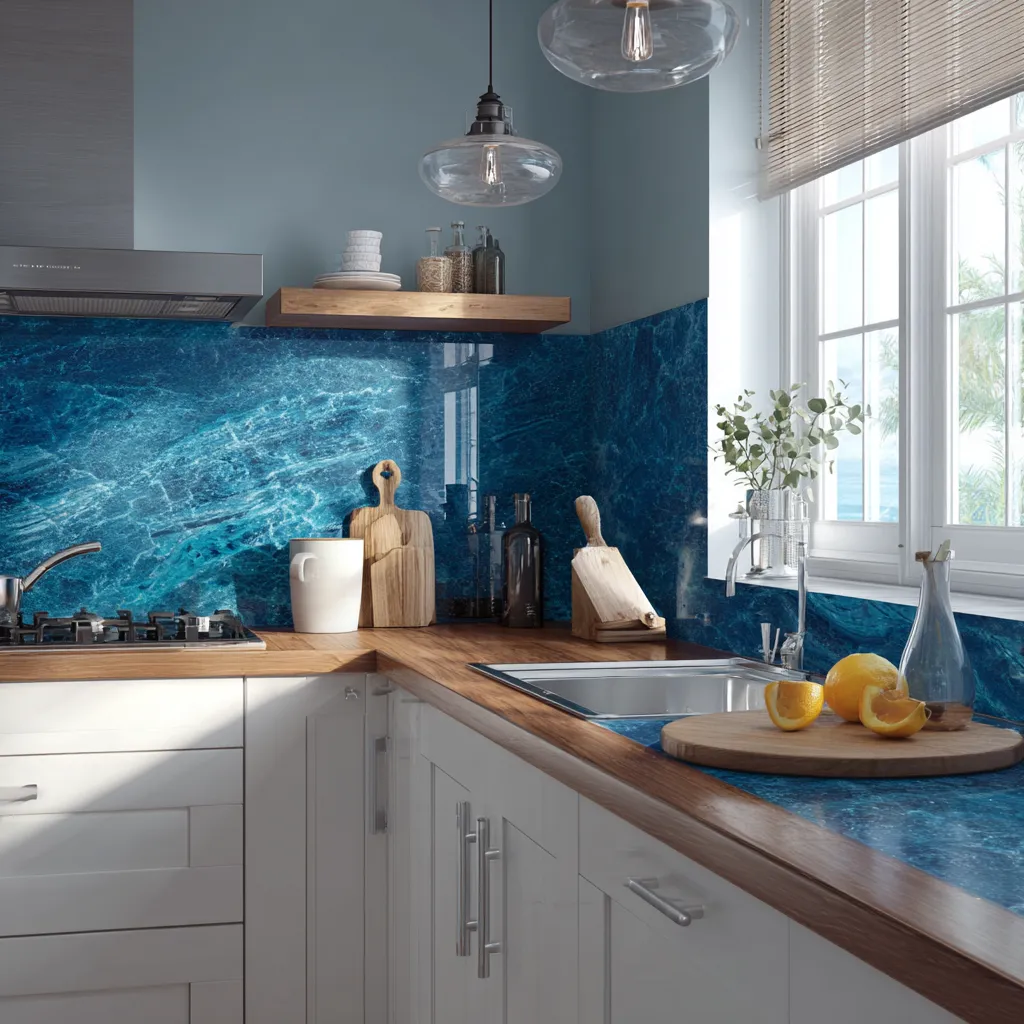
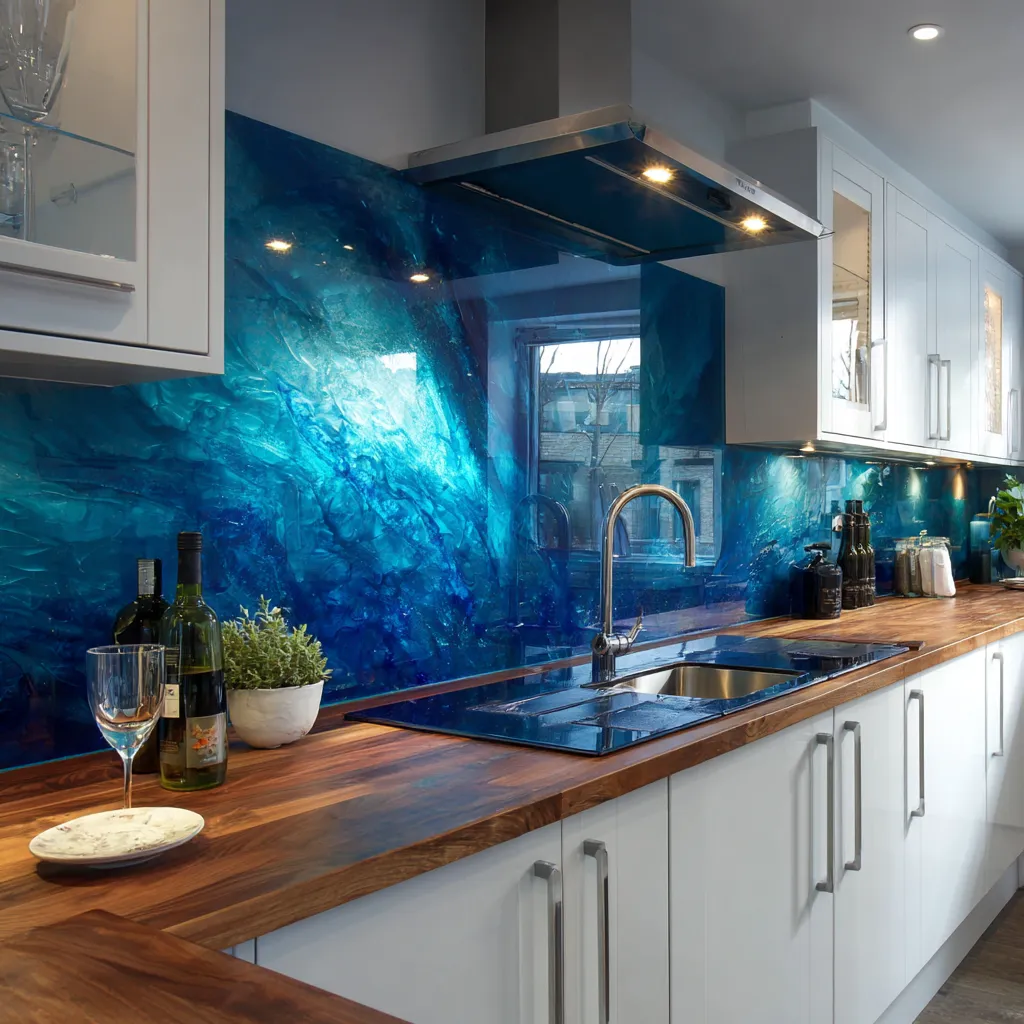
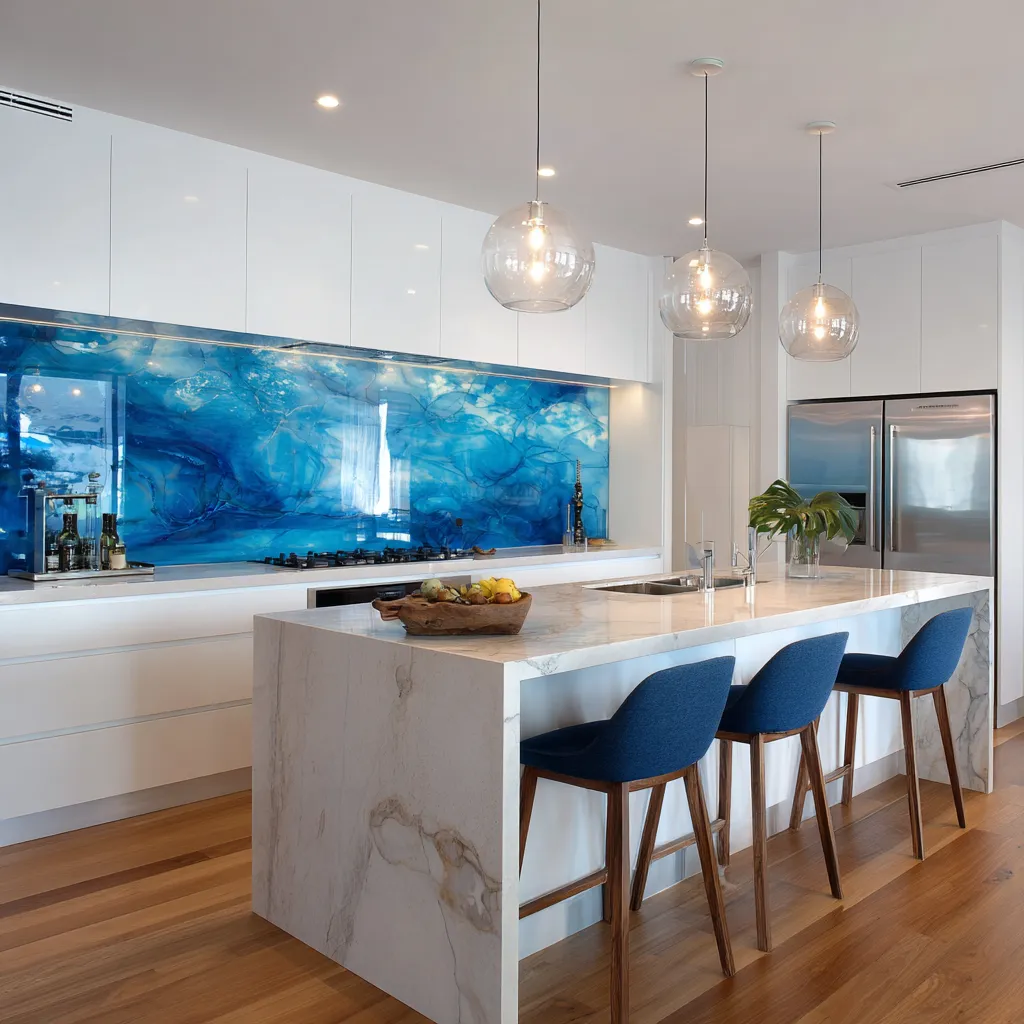
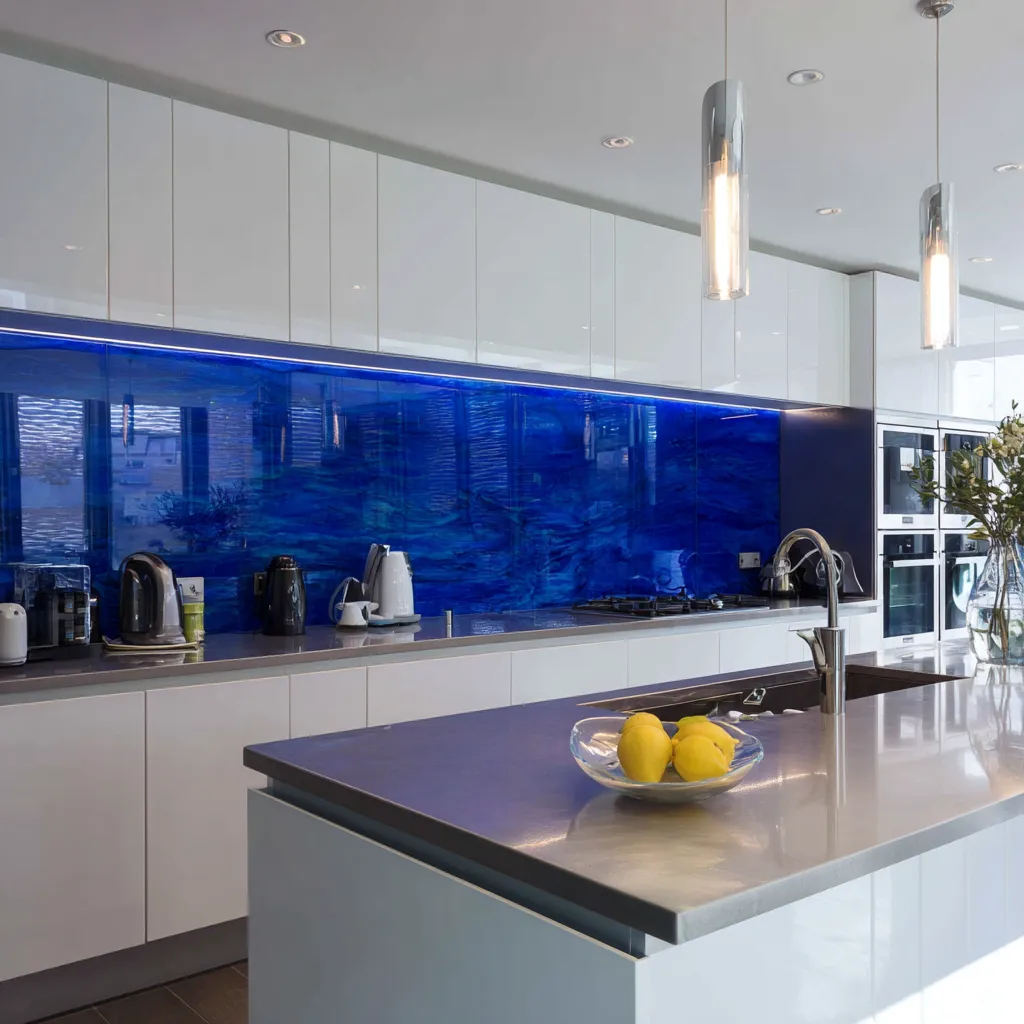
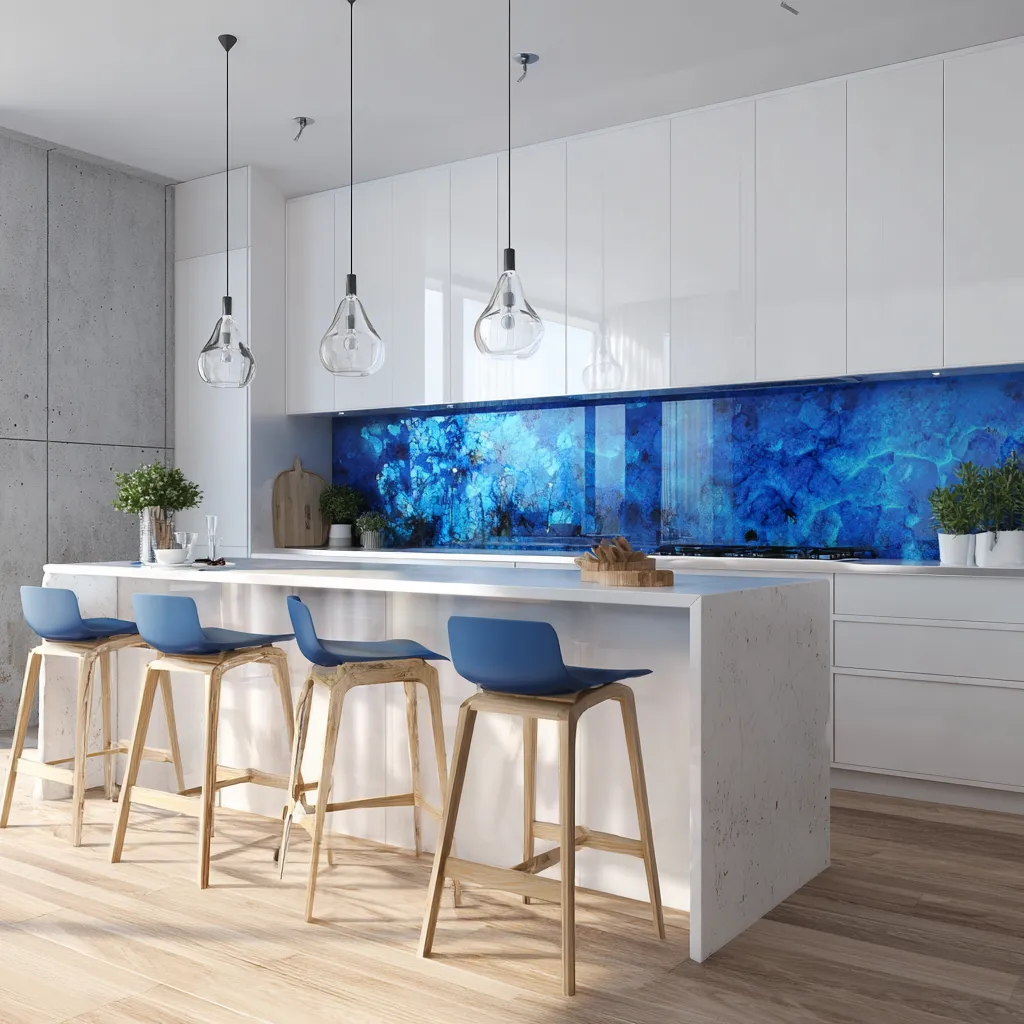
Blue Glass Splashback Ideas for a Sleek Contemporary Kitchen
Glass splashbacks are increasingly popular in contemporary kitchens for their sleek, seamless appearance and ease of maintenance. In royal blue, they create a bold statement that immediately grabs attention. The reflective quality of glass enhances the color’s vibrancy, especially in a modern kitchen where clean lines and minimalistic design elements reign supreme. This style is ideal for those who want a high-impact, low-maintenance solution that still packs a punch in terms of visual appeal.


A royal blue glass splashback offers a striking contrast to neutral kitchen tones, such as white or grey cabinetry. The sleek, glossy finish of the glass adds a touch of luxury and modernity, making the kitchen feel futuristic and cutting-edge. For a different take on bold kitchen surfaces, metallic finish splashbacks deliver a similar high-impact look with an industrial edge. Unlike tiles, a glass splashback provides a smooth, uninterrupted surface, which not only looks sophisticated but also simplifies cleaning. This makes it a practical choice for busy kitchens where spills and splashes are inevitable.
In addition to its aesthetic appeal, glass is an excellent material for kitchen splashbacks due to its durability and heat resistance. Whether placed behind a stove or near countertops, it stands up to daily wear and tear without losing its luster. The royal blue color, paired with chrome or stainless steel fixtures, completes the modern look, offering a kitchen design that is both stylish and functional. For anyone seeking a contemporary edge with a bold color choice, royal blue glass splashbacks are a perfect solution.
Glass splashbacks run $40–$80 per square foot installed, which makes them two to four times pricier than ceramic tile. You’re paying for the seamless look — no grout lines, no lippage, nothing for grease to hide in. I recommended a Dulux blue glass splashback to a client last year. Six months later, not a single stain. She wipes it with Windex and a microfiber cloth. Done.
Here’s what nobody mentions: glass shows every fingerprint and water spot in direct sunlight. If your kitchen faces east or south and gets morning light, you’ll notice streaks you’d never see on tile. The fix is a satin finish instead of high-gloss. Costs about the same but diffuses light enough to hide daily smudges. I learned that the hard way after installing a high-gloss panel in a sun-drenched galley kitchen and getting a call three days later.
🧽 One wipe. That’s all a glass splashback needs. No grout lines, no scrubbing. Just Windex and a microfiber cloth.
Blue Kitchen Splashback Comparison: Subway vs Mosaic vs Glass
| Feature | Blue Subway Tile | Navy Mosaic Tile | Blue Glass Panel |
|---|---|---|---|
| Cost per sq ft | $3–$5 | $9–$15 | $40–$80 |
| Grout maintenance | Moderate | High (more grout lines) | None |
| Best kitchen style | Modern, farmhouse | Luxurious, traditional | Contemporary, minimal |
| Cleaning difficulty | Easy | Medium | Easiest |
| Fingerprint visibility | Low | Low | High (glossy) |
| DIY-friendly? | Yes | Moderate | No (pro install) |
| Best pairing | White cabinets, silver grout | Dark wood, brass fixtures | Chrome fixtures, white quartz |
Before You Close This Tab
Three blue kitchen splashback types. Three completely different price points. Subway tile gives you the look for under $5/sq ft. Navy mosaic adds depth for $9–$15. Glass costs more but cleaning takes ten seconds flat. Pick the one that matches your daily life, not just your Pinterest board.
I’ve installed all three in real kitchens. The one people regret least? Whichever one they paired with the right countertop and the right grout. That’s the real trick. Not the tile itself.
Related Topics
FAQ
How much does a blue kitchen splashback cost?
What blue splashback works best with white cabinets?
Is a blue glass splashback hard to maintain?
Can I install a blue subway tile splashback myself?
What grout color works best with blue splashback tiles?
Does a navy splashback make a small kitchen look dark?
How to Choose and Install a Blue Kitchen Splashback
Pick the right blue tile type, prep your wall, and install a backsplash that lasts. This process works for subway tile, mosaic, and glass panels.
Tools & Materials:
- Tile cutter or wet saw
- Thin-set mortar and notched trowel
- Tile spacers
- Grout and grout float
- Level and tape measure
- Grout sealer
Pick your tile type based on budget and lifestyle
Subway tile ($3–$5/sq ft) for budget-friendly DIY. Mosaic ($9–$15/sq ft) for visual texture. Glass ($40–$80/sq ft installed) for zero-grout maintenance. Match the finish to your kitchen’s light — glossy for dark rooms, matte or satin for sun-drenched spaces.
Prep the wall surface
Clean the wall and sand any bumps or old adhesive. For tile, apply a skim coat of thin-set if the wall is uneven. For glass panels, the wall must be perfectly flat — any bump shows through. Mark your center line and dry-lay the first row before committing.
Install tiles bottom-up with spacers
Start from the bottom center and work outward. Use 1/16″ spacers for a tight look or 1/8″ for a more traditional grout line. Press each tile firmly into the mortar and check level every 3–4 tiles. Cut edge pieces with a wet saw for clean results.
Grout, seal, and cure
Wait 24 hours after tiling. Apply grout at a 45-degree angle with a float, wipe excess with a damp sponge. Use silver or grey grout — not white — behind the stove. Seal grout after 72 hours and reapply sealer every 18 months for mosaic tile.