A budget-friendly kitchen remodel doesn’t start at the hardware store — it starts with knowing which two or three surfaces carry all the visual weight. I’ve watched homeowners drop $8,000 on new cabinets when a $180 can of Benjamin Moore Chantilly Lace would have done 90% of the work. You’ll notice the difference the moment you walk in: a repainted cabinet face and a new peel-and-stick backsplash read as a complete kitchen renovation to every single guest. The moves that actually shift how a kitchen feels are the ones most people skip because they seem too small.
Affordable kitchen remodel ideas live in the gap between what looks expensive and what actually costs money. Subway tile backsplash panels from HomeDepot run $1.29 per square foot. New cabinet hardware from Rejuvenation starts at $6 a pull. Under-cabinet LED strips from Govee cost $28 for 10 feet and change the entire mood of a kitchen after 6pm. None of this requires a contractor, a permit, or a weekend longer than Saturday afternoon.
What’s in this article
- Cabinet refresh: paint, hardware, crown molding — under $400 total
- Countertop facelifts that don’t involve demolition
- Backsplash updates from $30 to $300
- Lighting swaps that change everything for under $100
- Sink and faucet upgrades with the highest visual return
- Open shelving vs. upper cabinet removal — which actually works
- Appliance tricks: refurbish, scratch-and-dent, or floor models
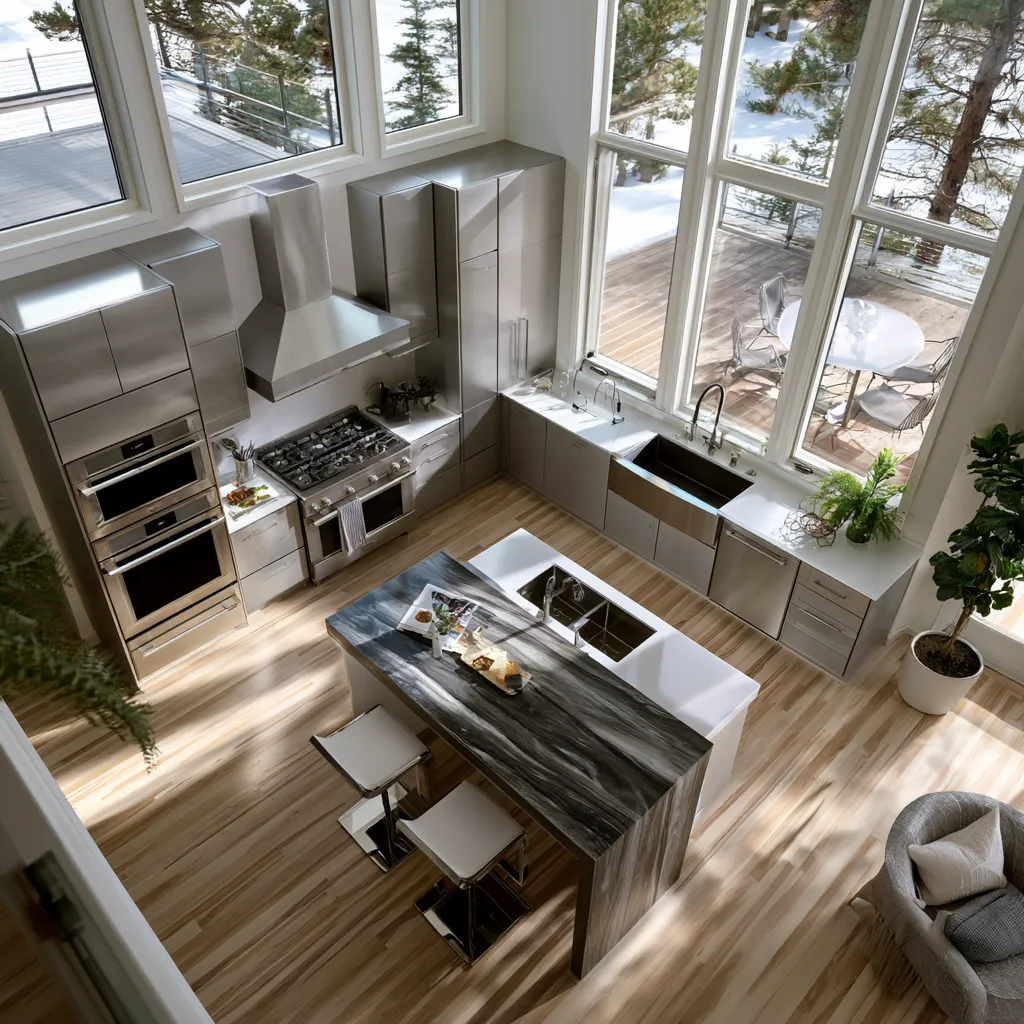
Cabinets Cost Nothing to Paint and Look Like They Cost Everything


My go-to move for a budget-friendly kitchen remodel is always cabinets first. Stripping and replacing them can run $5,000–$15,000 installed. Repainting runs $150–$300 in materials if you do it yourself, or $800–$1,200 hired out — and the result is indistinguishable to anyone who didn’t live with the before. Benjamin Moore Advance ($75/gallon) is the industry standard for cabinet paint because it self-levels and cures rock hard. You don’t sand to bare wood; you degrease with TSP substitute, sand lightly with 220-grit, prime with Zinsser BIN, and roll with a foam roller for a factory finish.
Hardware is the earring, not the outfit — but it changes everything. I own two kitchens I’ve updated and in both cases, swapping $3 builder-grade knobs for $8–$12 matte black or unlacquered brass pulls from Schoolhouse or Rejuvenation added more perceived value than anything else I did. Skip the Amazon bulk hardware packs. They strip immediately and the finish goes brassy in six months. Spend the $12 per pull and buy once.
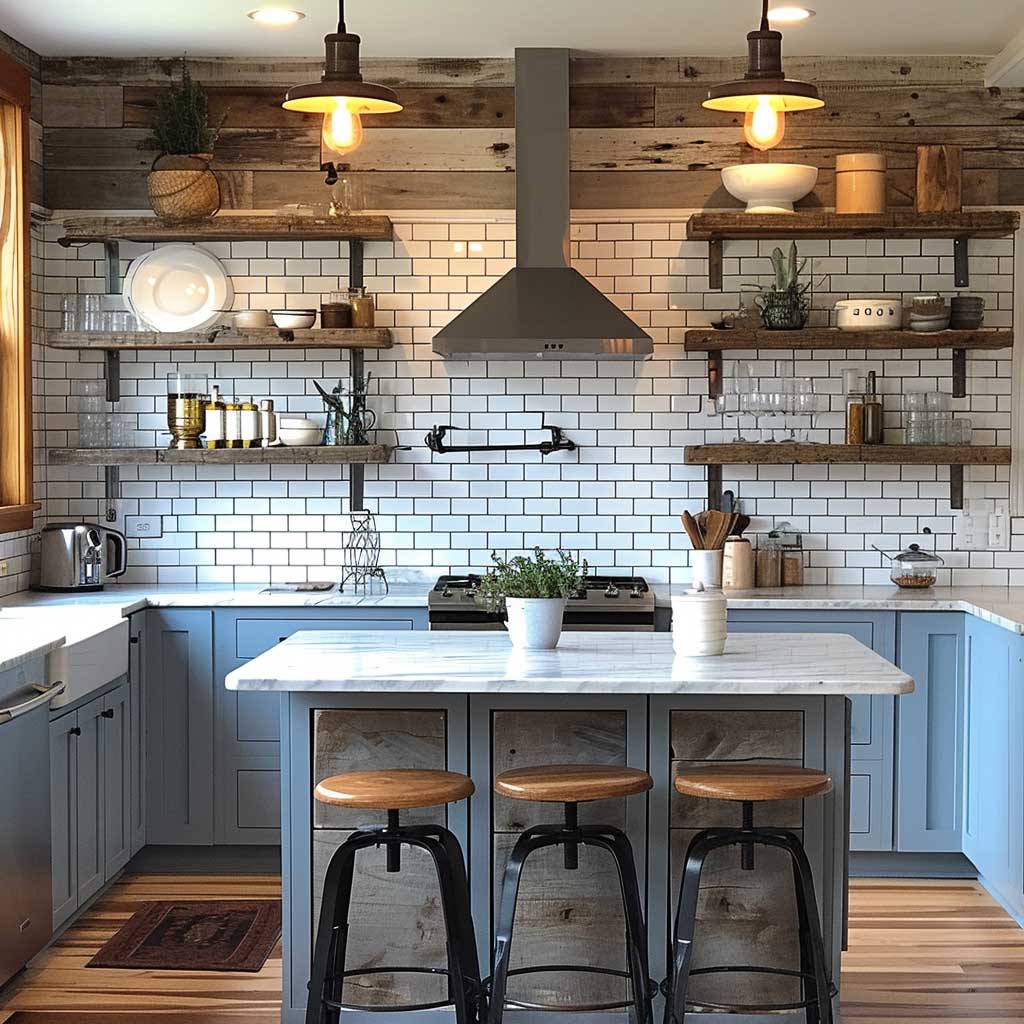
Crown molding above upper cabinets is the one detail that signals custom cabinetry to anyone walking in. You can buy primed MDF crown from Home Depot for $1.39 per linear foot. A standard kitchen needs 20–30 feet, so the total material cost runs under $60. The installation is fussy but not hard — a miter saw, construction adhesive, and painter’s caulk at the joint. Don’t skip the caulk. Without it, the gap between crown and ceiling makes the whole thing look DIY in the worst way.
What doesn’t work: painting over grease without degreasing first. I learned this the hard way on my first cabinet repaint — the paint peeled in sheets within four months because I skipped the TSP step. What also doesn’t work: gloss or semi-gloss on cabinet interiors. It makes the inside look like a hospital supply closet. Stick to satin on the boxes, eggshell on walls.


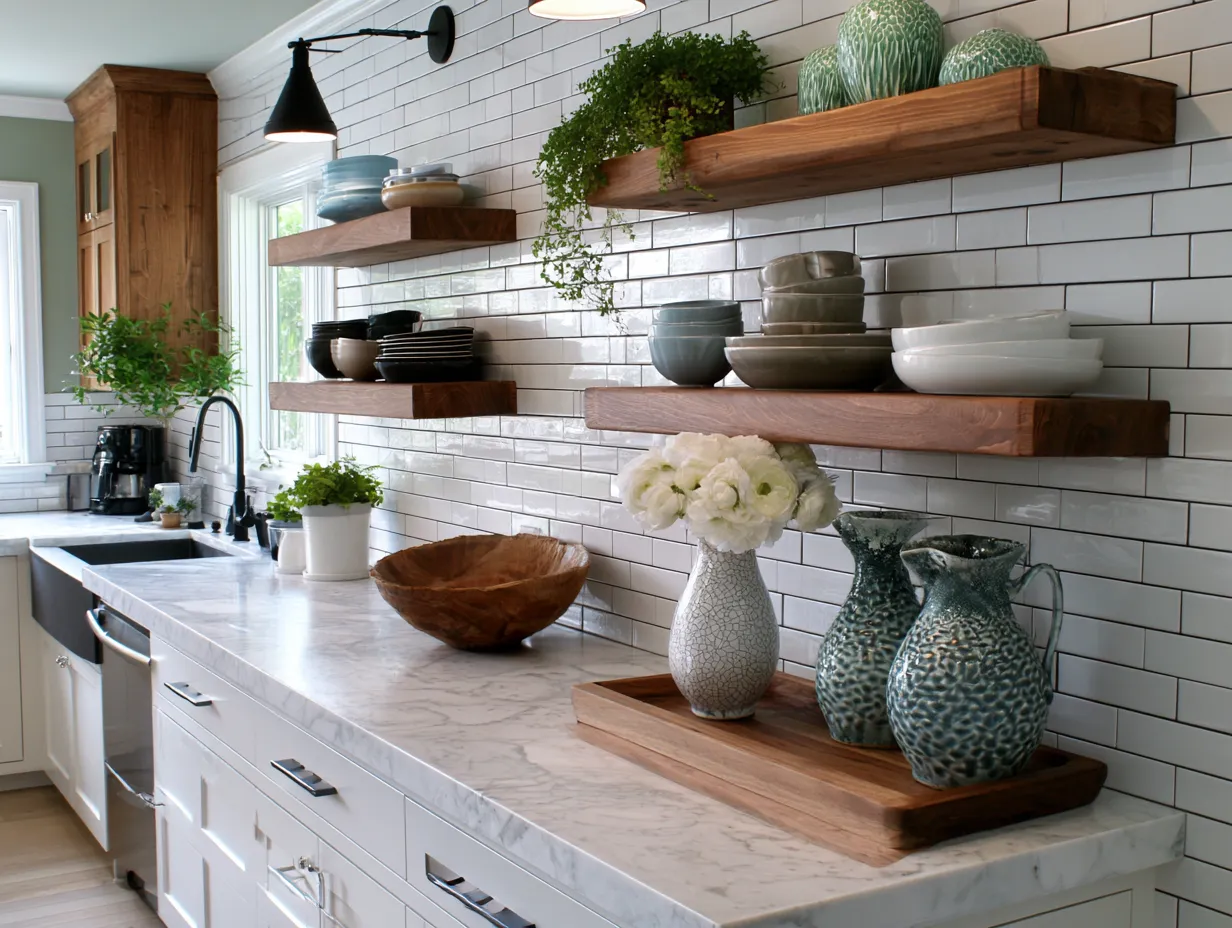
Open shelving as a replacement for upper cabinets is a different kind of update — and it only works if you have dishware worth displaying. I stole this trick from a designer I follow: pull one upper cabinet section, install a floating shelf from IKEA’s BERGSHULT line ($25–$40), and use the open section as a display break in an otherwise closed run. It reads as intentional rather than unfinished. Removing all upper cabinets and going fully open is a commitment that works in editorial kitchens and creates chaos in real ones.
Countertops and Backsplash Swaps That Don’t Require a Contractor


Countertops are the single most expensive line item in most kitchen remodels — but replacing them entirely isn’t your only option. Butcher block from IKEA (BADELUNDA, 74″ x 25″) runs $279 installed yourself and transforms a kitchen more dramatically than any other surface swap I’ve attempted. It does require annual oiling with food-safe mineral oil, and you’ll never put a hot pan directly on it without a trivet. That’s a tradeoff I can live with for a surface that costs $279 instead of $2,800.
Stone remnants are the countertop hack no one talks about. Fabricators always have leftover slabs from larger jobs — quartz, granite, quartzite — and sell them at 30–60% below retail. You need to measure your runs precisely, but for a galley kitchen or a small perimeter run, you can often get genuine stone for $400–$800 total installed. Call three local stone fabricators, ask specifically for remnants, and you’ll get real quotes within a day. Don’t confuse this with prefab stone from big-box stores, which looks noticeably different up close.
Backsplash is where I’d spend the first $150 of any affordable kitchen renovation budget. Smart Tiles’ Ledger Stone peel-and-stick panels ($12–$16 per tile) cover a standard 4-foot backsplash run for $80–$120, take two hours to install, and remove clean when you’re ready to sell or change direction. The pattern that photographs best on Instagram is the white and grey subway stack — ArtStation Muretto Bellagio, $14 per tile at Home Depot. If you want actual tile, 3×6 white ceramic subway tile runs $0.89 per square foot at Floor & Decor, and a standard backsplash of 12 square feet costs $11 in tile, plus thinset, grout, and a Saturday afternoon.
What you should never do: countertop paint. I’ve tried Rust-Oleum Countertop Transformations on a rental property and watched it chip within eight months under normal use. It photographs beautifully on day one and looks like a craft project by month six. If you can’t afford new counters right now, skip the paint and put that $80 into hardware and backsplash instead — you’ll get more out of it. For a related read on farmhouse kitchen budgets that get material choices right, this small modern farmhouse kitchen breakdown covers countertop and tile pairing in more depth.


Lighting Fixtures Nobody Notices Until They’re Wrong


Lighting is the refrigerator of kitchen design — you don’t notice it until it’s terrible. Most builder kitchens ship with a single flush-mount ceiling dome that throws flat, shadowless light across every surface. You’ll notice immediately how different a kitchen feels under layered lighting: a ceiling fixture for ambient, pendants over the island for task, and under-cabinet strips for prep. Swapping the ceiling fixture alone costs $60–$120 at Lowe’s and takes 30 minutes if there’s already a junction box. If there isn’t, hire an electrician for a $150–$200 outlet add — still cheaper than new cabinets.
Under-cabinet LED strips are the highest ROI lighting move in a budget kitchen remodel. Govee’s Warm White LED Strip ($28 for 10 feet) installs with 3M adhesive backing and plugs into any outlet. The trick nobody mentions: use 2700K bulbs everywhere in the kitchen, not the 3000K or 4000K “daylight” options that ship in most fixtures. 2700K reads as warm and residential; everything above that makes your kitchen look like a dental office. I’ve replaced the bulbs in every fixture I own because the pre-installed ones are always wrong.
Pendant lights over an island or sink don’t require a hardwired junction box if you use a swag kit. Plug-in pendant swag kits from Amazon run $35–$60 and let you hang a pendant anywhere there’s a ceiling hook and a nearby outlet. West Elm’s Sculptural Glass Globe pendant in brass ($79 on sale regularly) is my go-to recommendation — it photographs well, ages gracefully, and doesn’t look like it came from a budget fixture aisle. Don’t hang pendants lower than 30 inches above a counter surface or you’ll constantly hit them when you stand up.
What I’d skip entirely: recessed can lights as a DIY project. Adding new cans requires cutting drywall, running wire, and patching — it’s a weekend of work that costs $200–$400 in materials plus real risk of a bad finish. Existing cans are worth updating with LED retrofit kits ($8–$12 each at Home Depot), but adding new ones on a budget is rarely worth the disruption. For more specific lighting ideas by fixture type and price point, this kitchen island lighting breakdown goes deep on pendants, track systems, and chandelier options under $200.
Don’t Do This
- Don’t buy a statement pendant from a fast-furniture brand at full price. The same fixtures appear on Wayfair, Amazon, and Overstock with different brand names and a $40–$80 price spread. Search the fixture style on Google Shopping before buying anywhere.
- Don’t install peel-and-stick backsplash over existing tile without surface prep. The adhesive fails within months if the existing tile has any grease film. Clean with TSP substitute first, let dry 24 hours, then apply.
- Don’t go open shelving with everyday dishes on display. The look works in magazines because stylists spend three hours arranging six pieces. If your shelves will hold coffee mugs and protein powder, keep the cabinet doors.
- Don’t paint oak grain cabinets without grain-filling first. Paint over raw oak reads as painted wood, not painted cabinetry. Use Aqua Coat grain filler ($22/qt) before priming and the finish looks millwork-quality.
Sink and Faucet — the Two Inches That Read Across the Room


A faucet replacement is a two-hour project that transforms the entire sink area — and the sink area is what you look at every single time you cook. The Delta Trinsic pull-down in matte black ($180–$220 at Home Depot) is the kitchen equivalent of a well-cut blazer: it makes everything adjacent to it look more considered. You’ll notice the difference the moment it’s installed. Moen’s Arbor pull-down in brushed gold is $195 on sale and reads significantly more expensive than it is against any white or grey cabinet color.
Sink replacement is harder than faucet replacement — it requires disconnecting the drain, the supply lines, and sometimes cutting a new hole in the countertop. But if your sink is the original builder-grade drop-in with visible rim clips, a swap to an undermount stainless is worth the $150–$200 labor cost. Ruvati makes a 16-gauge undermount in three bowl configurations for $149–$199, and 16-gauge is the minimum thickness that doesn’t flex or drone when you run water. Avoid 18-gauge and above — they ring like a drum and dent.
The one splurge that surprises people: a pot filler above the range, if you cook in volume. Kraus’s Crespo pot filler in matte black runs $119 at Wayfair and requires only a cold water supply line at the wall. You need a plumber for the rough-in ($100–$150), but the functional and visual payoff is outsized. My neighbor added one during her affordable kitchen renovation and it became the first thing every visitor asked about. That’s the kind of ROI you want from a detail that costs $250 installed.
What you shouldn’t buy: a bridge faucet for a non-farmhouse kitchen. I’ve seen people I know install bridge faucets on laminate counters with RTA cabinets and the period-specific fixture fights everything around it. Bridge faucets belong with apron-front sinks, soapstone or butcher block counters, and shaker cabinets. Pull them out of that context and they read as a style mistake even at $300. Match the fixture family to the kitchen aesthetic before you buy anything. According to Houzz’s kitchen remodel cost calculator, faucet and sink upgrades consistently offer among the highest visual return per dollar spent across all budget remodel tiers.
FINAL TAKE
A budget-friendly kitchen remodel works because of sequencing, not sacrifice.
Start with paint and hardware — that’s your $300 move. Add backsplash — that’s another $80–$150. Swap the faucet — $180. Install under-cabinet LED strips — $28. You’ve just spent under $700 and the kitchen looks like a $4,000 renovation to anyone walking in cold.
The rooms that feel expensive aren’t the ones where the most money was spent. They’re the ones where money was spent on the right surfaces. Cabinets, counters, and lighting carry 80% of the perception. Everything else is supporting cast.
Save this post before you order a single thing — the sequence matters as much as the products.