Door moulding design is the detail most homeowners skip — and the one that makes every other finish look cheaper by comparison. I’ve renovated four apartments, and every single time, swapping out flat contractor casing for a proper profile was the change that made rooms look finished rather than just painted. You’ll notice it the moment you stand in the doorway. The trim around your doors is doing the same visual work as a frame around a painting: get it wrong and the art looks amateur, get it right and everything reads intentional.
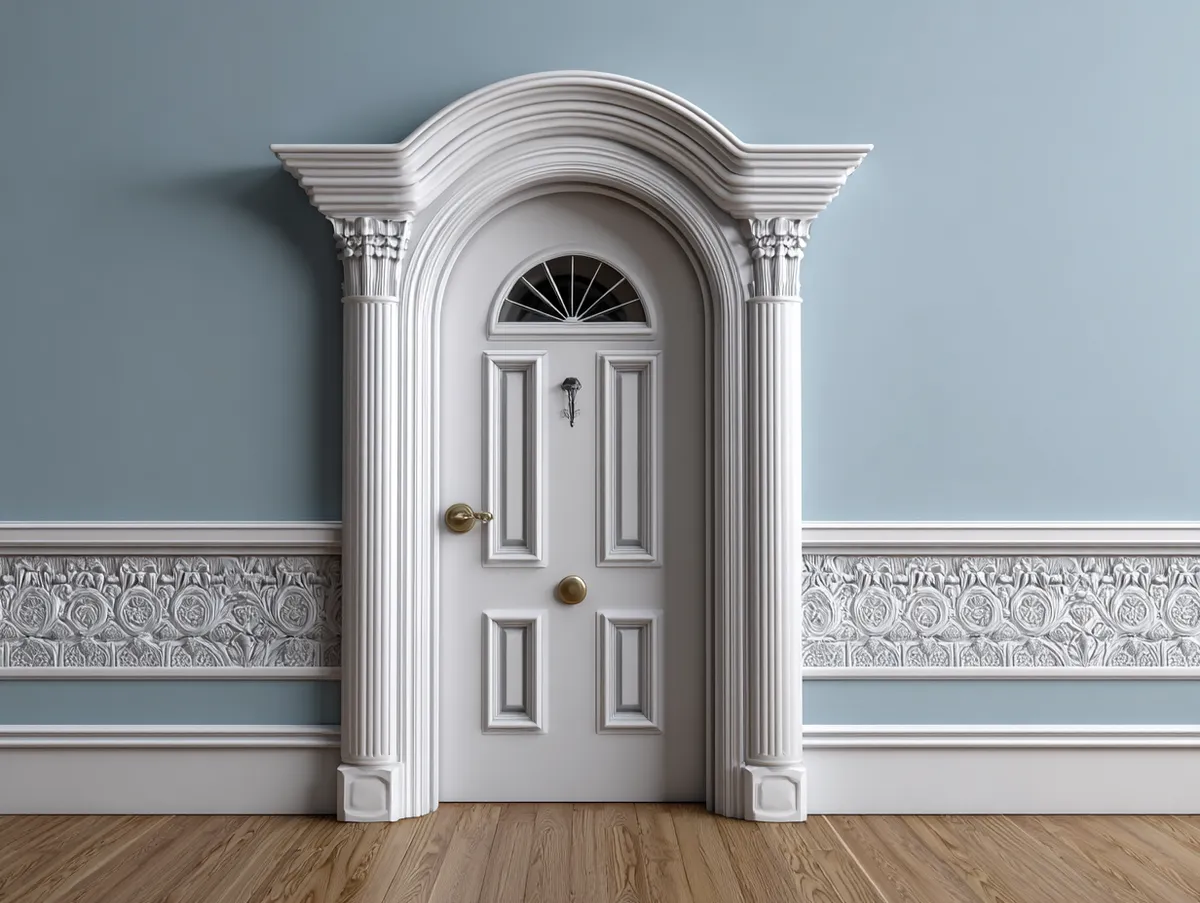
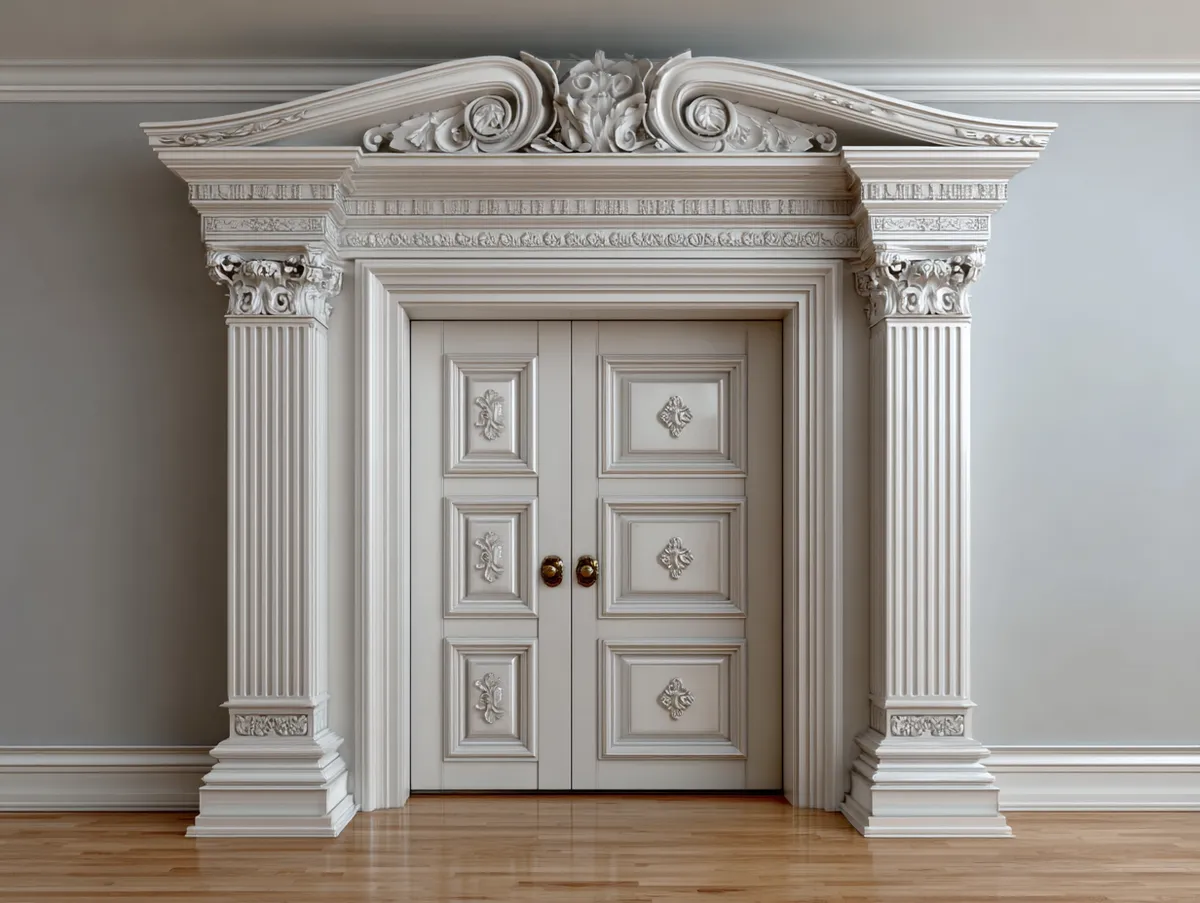
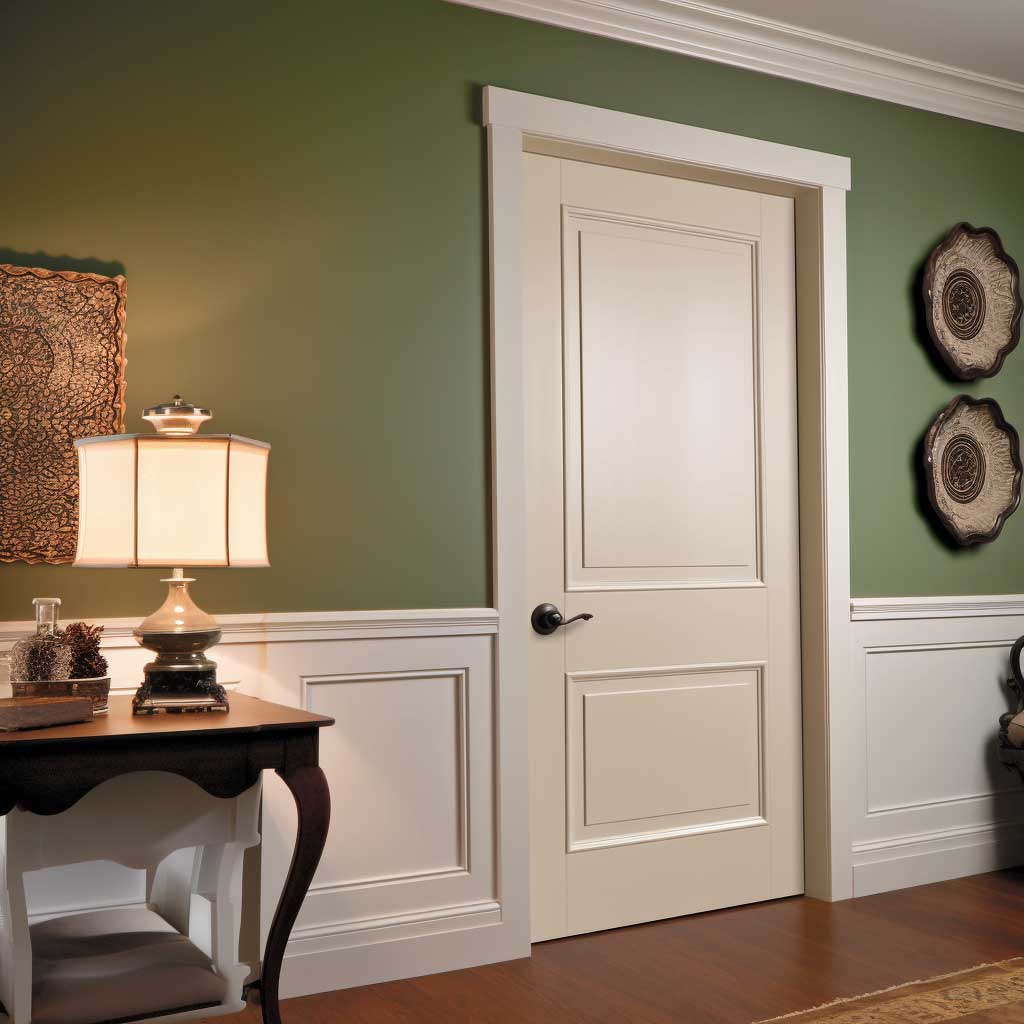
Door casing ideas range from $2-per-linear-foot colonial stock at Home Depot to custom carved hardwood that runs $40 a foot or more. The profile you choose signals your entire interior vocabulary. My go-to for most rooms is a 3.5-inch colonial casing in primed MDF — it costs about $1.20 per linear foot, takes paint beautifully, and pairs with everything from mid-century furniture to farmhouse shiplap. Skip the 2.25-inch colonial. It reads as builder-grade no matter what you do with it.
Quick Scan
- Colonial casing — cove-and-bead profile, mitered corners, works in traditional and transitional rooms
- Craftsman casing — flat 4-inch boards with square corner blocks, no miters needed
- Flat modern casing — zero profile, flush or reveal installation, minimal rooms only
- Fluted pilaster casing — vertical grooves, needs ceiling height of at least 9 feet
- Rustic reclaimed casing — live-edge or barn wood, skip staining, let grain show raw
- Geometric layered casing — built-up from stock profiles, architectural detail without custom cost
- Best width for standard 8-foot ceilings — 3 to 3.5 inches; wider reads top-heavy
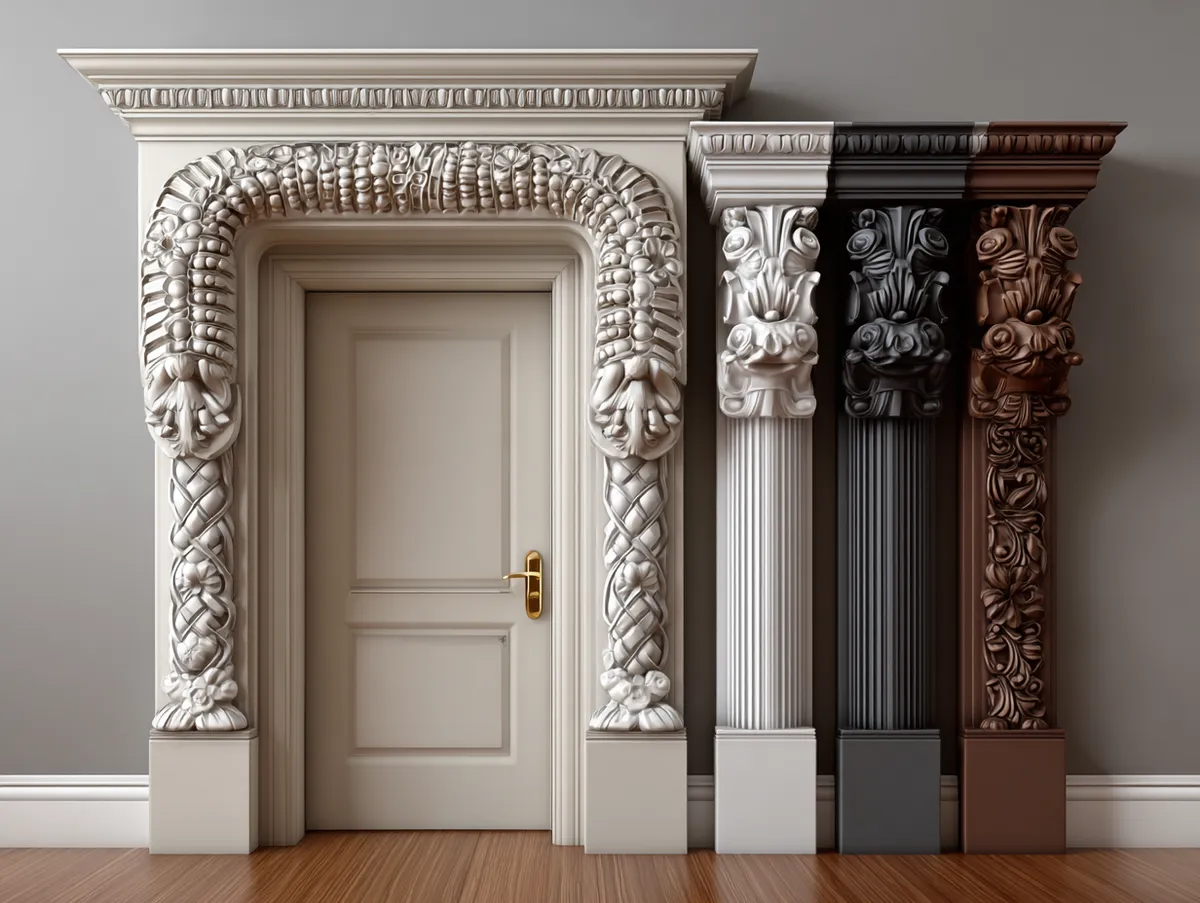
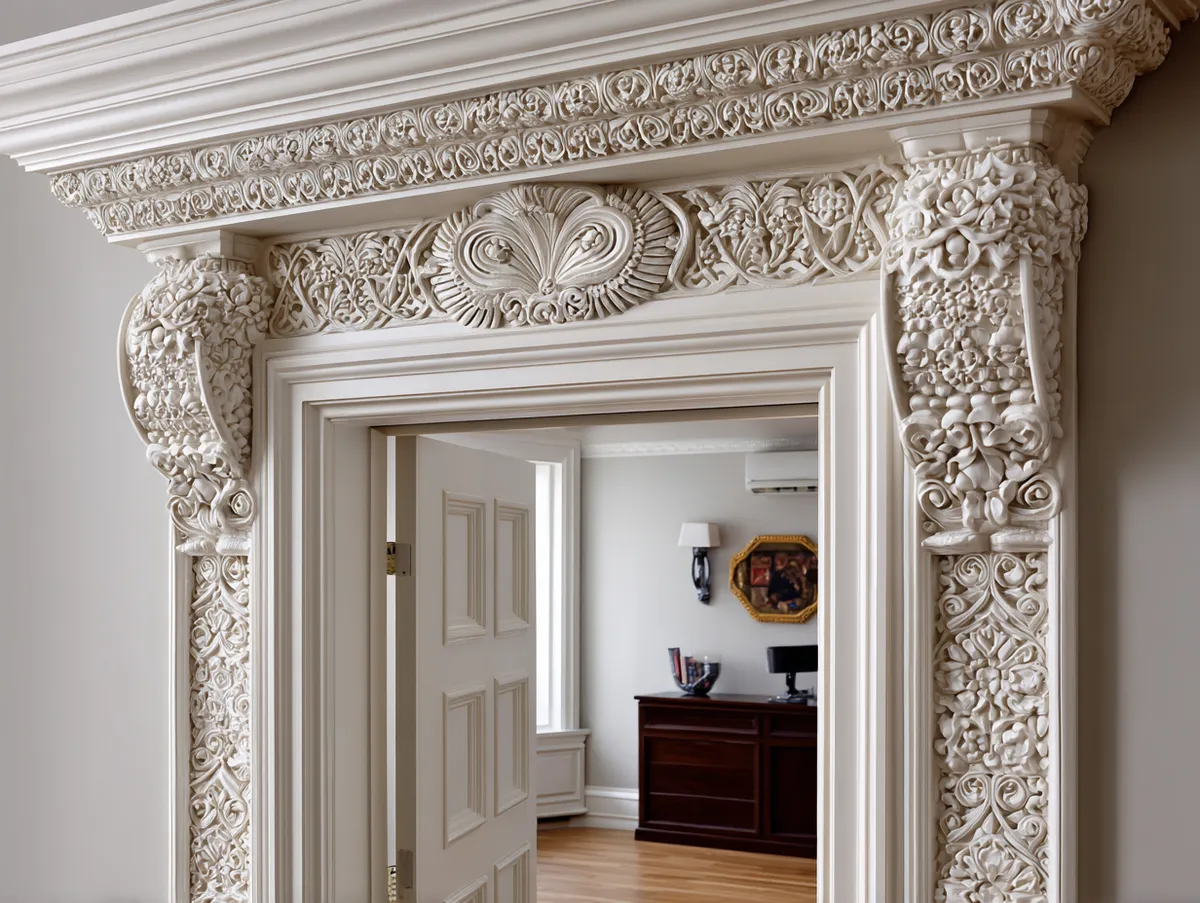
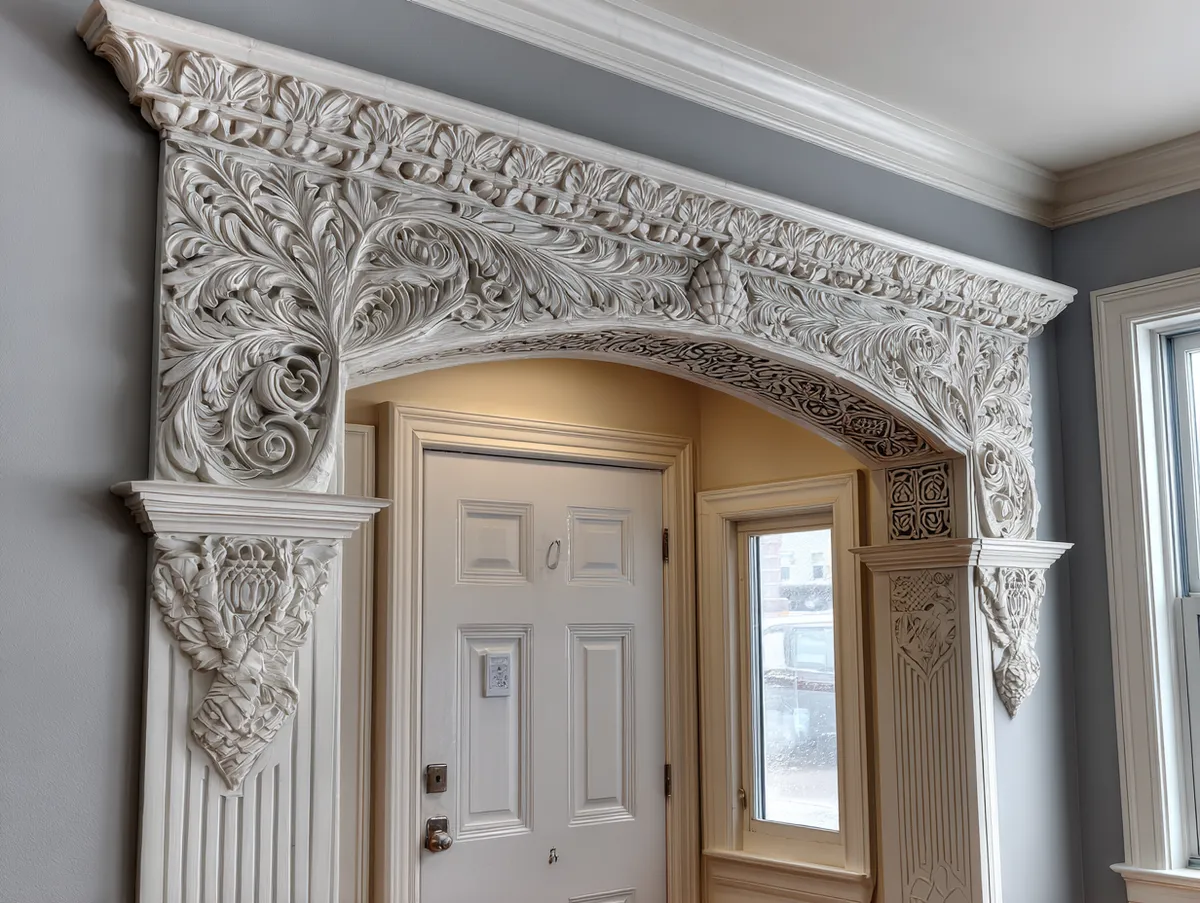
Custom and Reclaimed Door Casing Designs Worth the Extra Cost
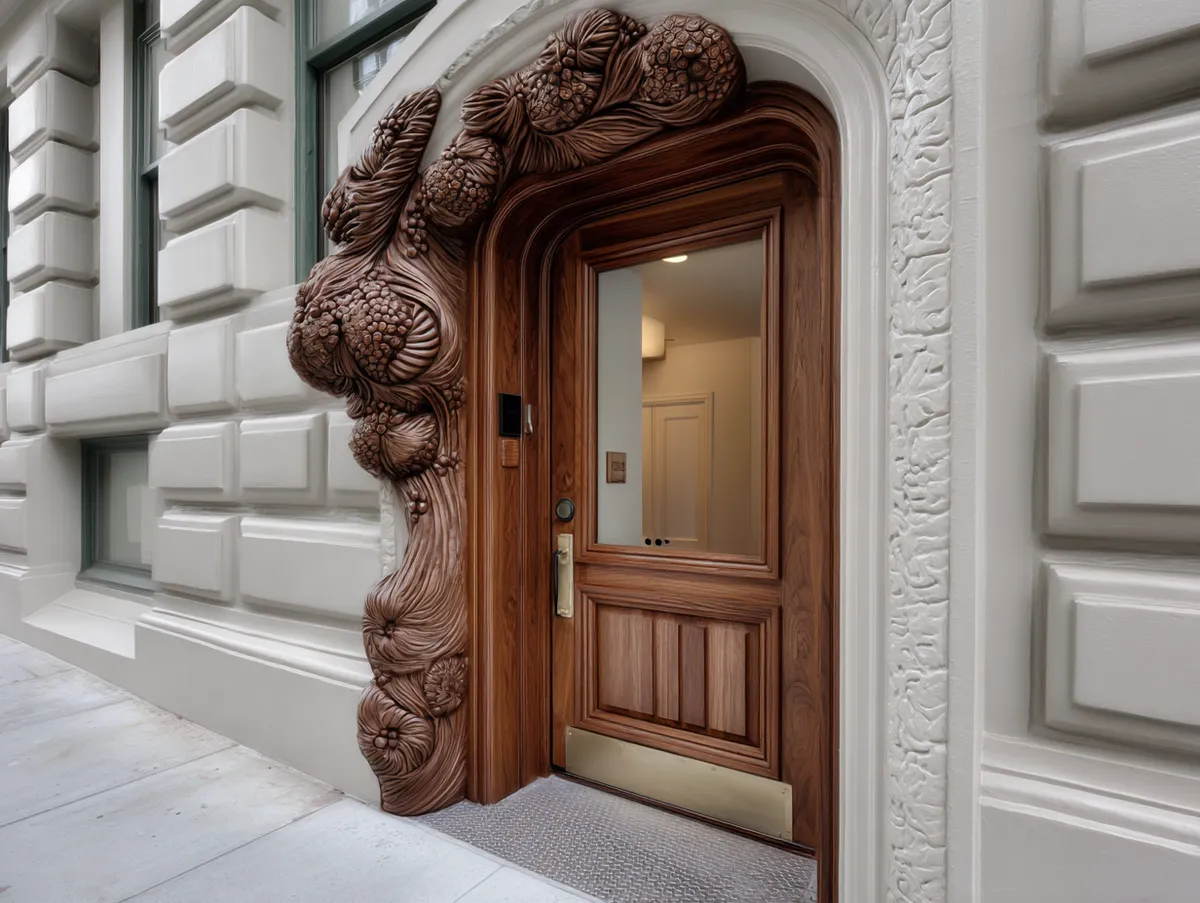
Reclaimed barn wood casing from places like Elmwood Reclaimed Timber runs $8–$15 per linear foot. That sounds steep until you realize a single doorway only needs about 17 linear feet of casing — meaning you’re spending $135–$255 to turn a gap in your wall into a focal point. I used salvaged Douglas fir on my kitchen doorway and the texture reads better in photos than any wallpaper I’ve tried. The natural variations in grain do the design work for you.
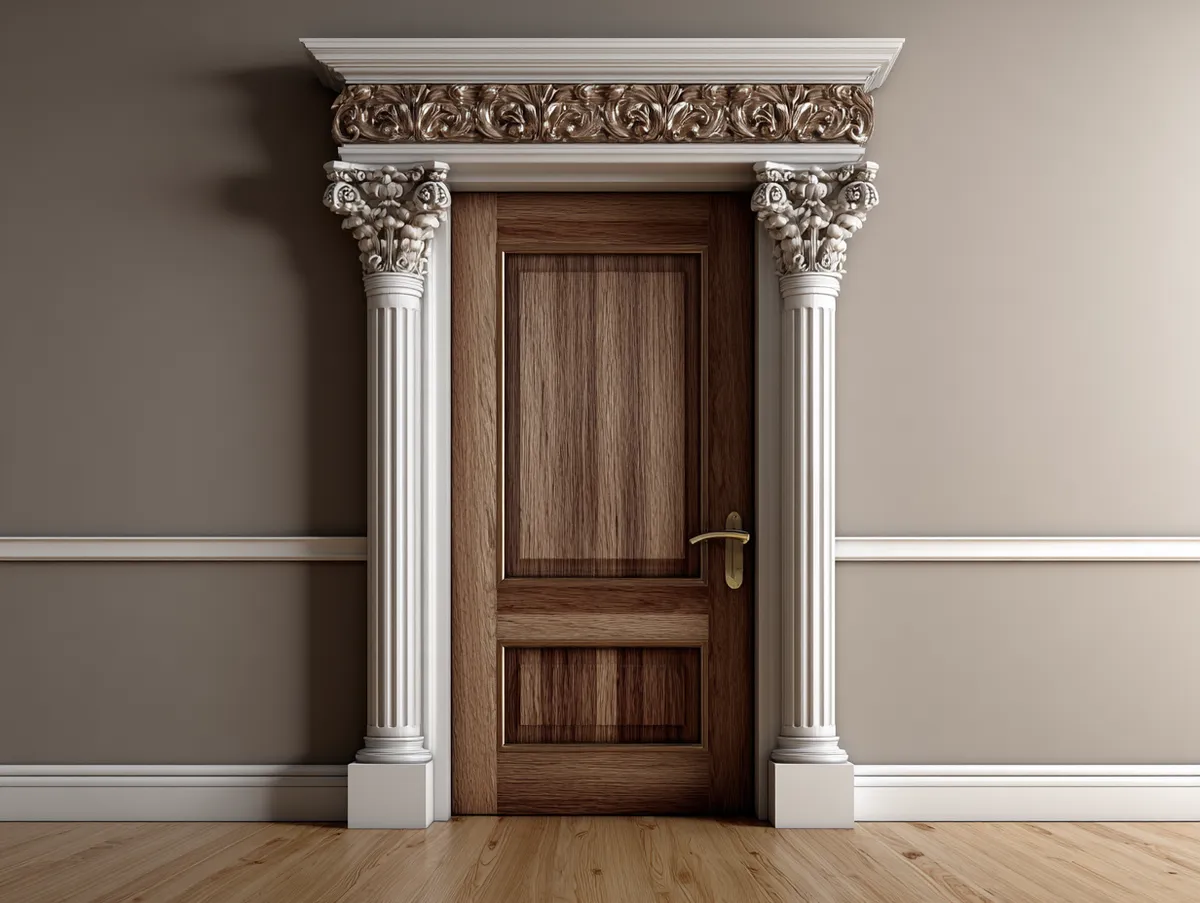
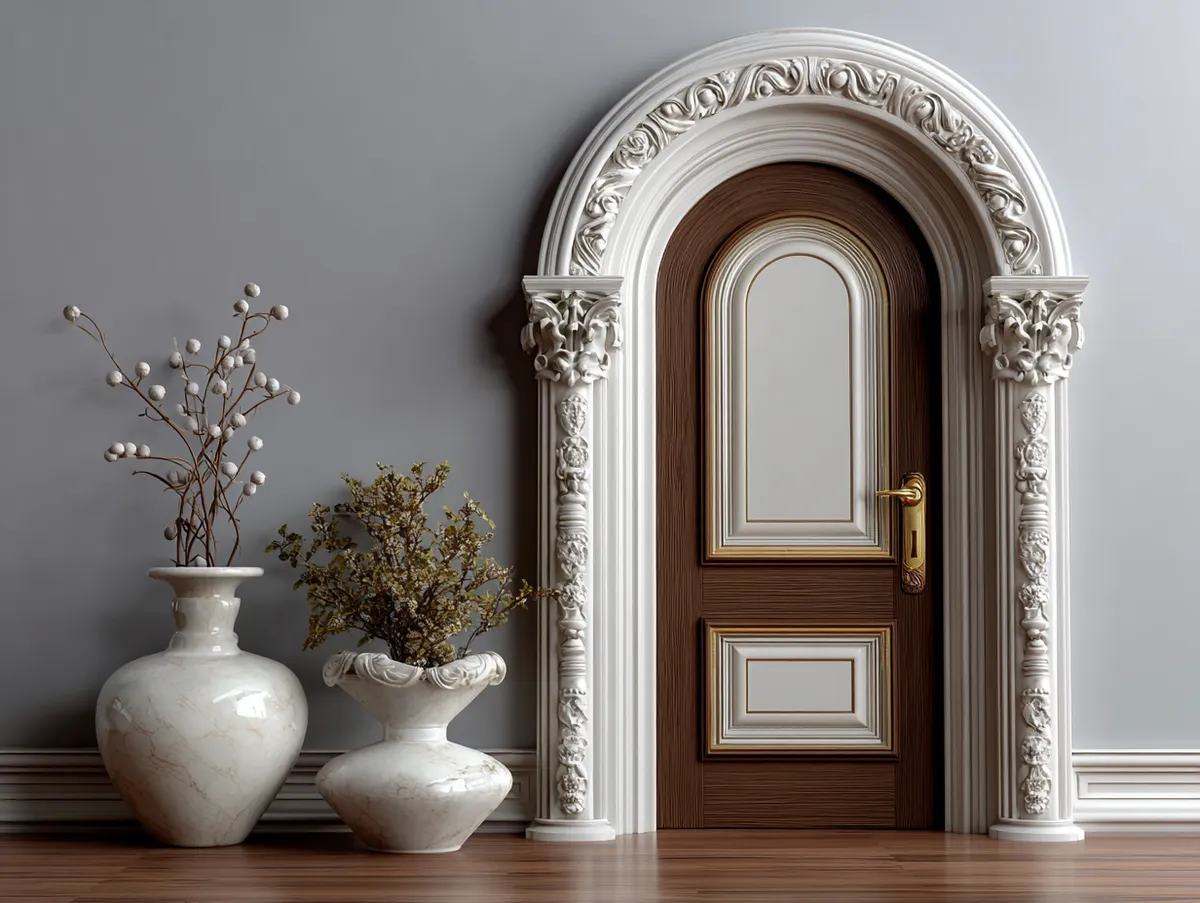
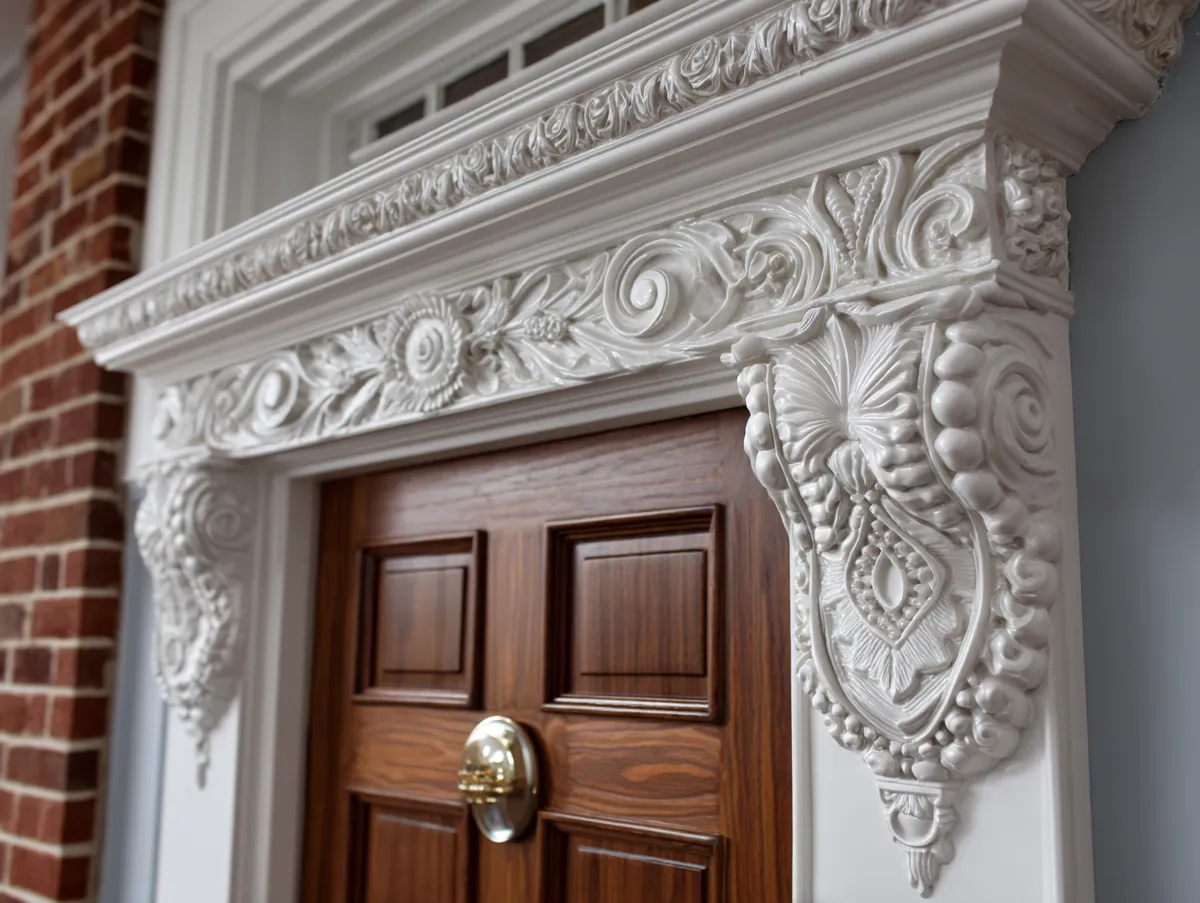
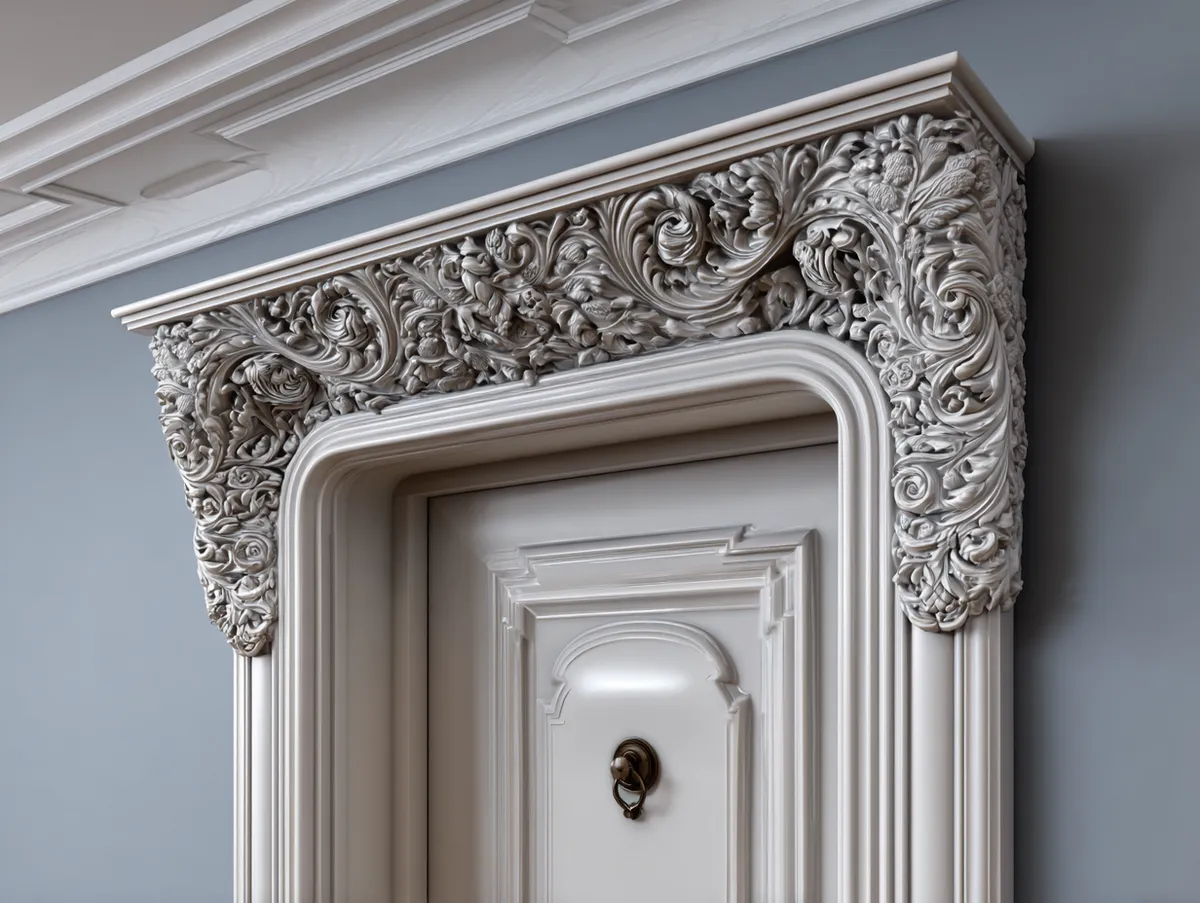
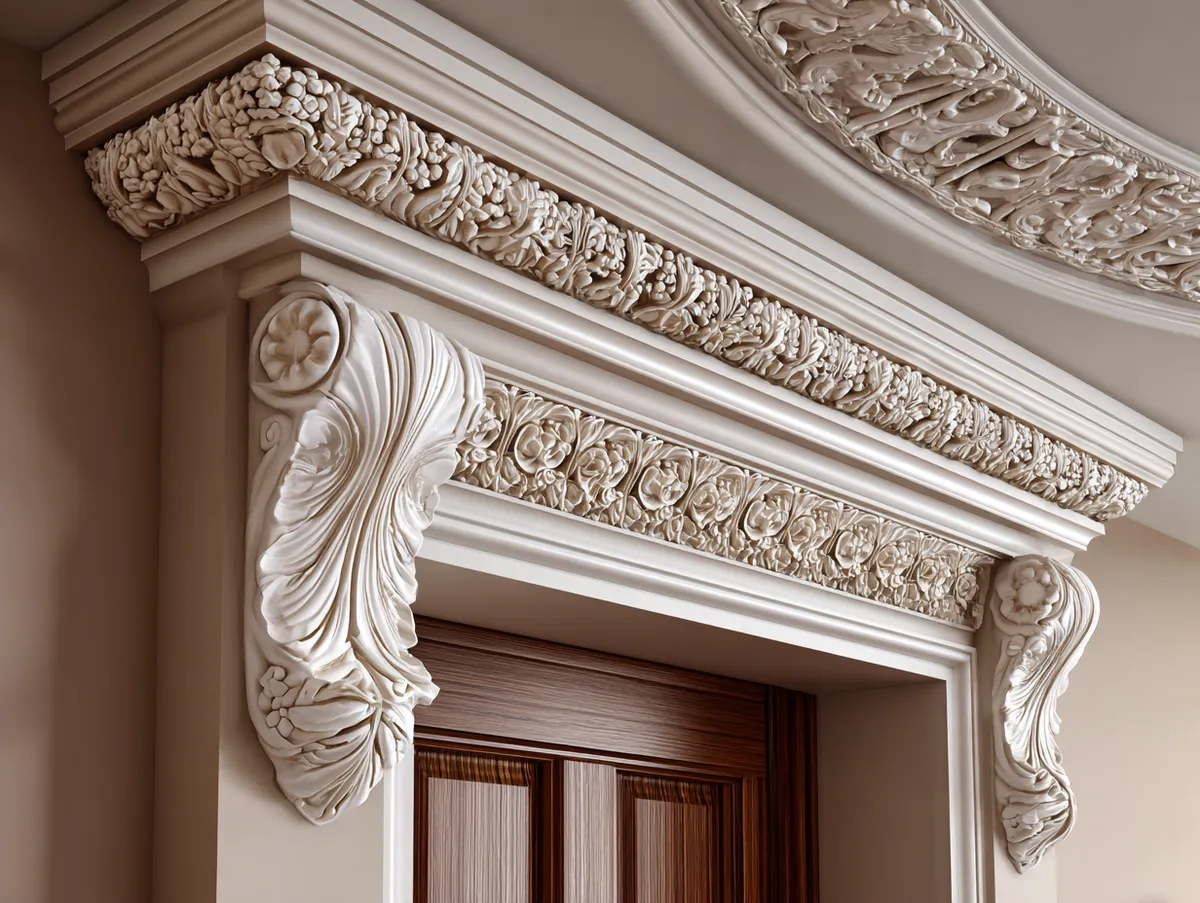
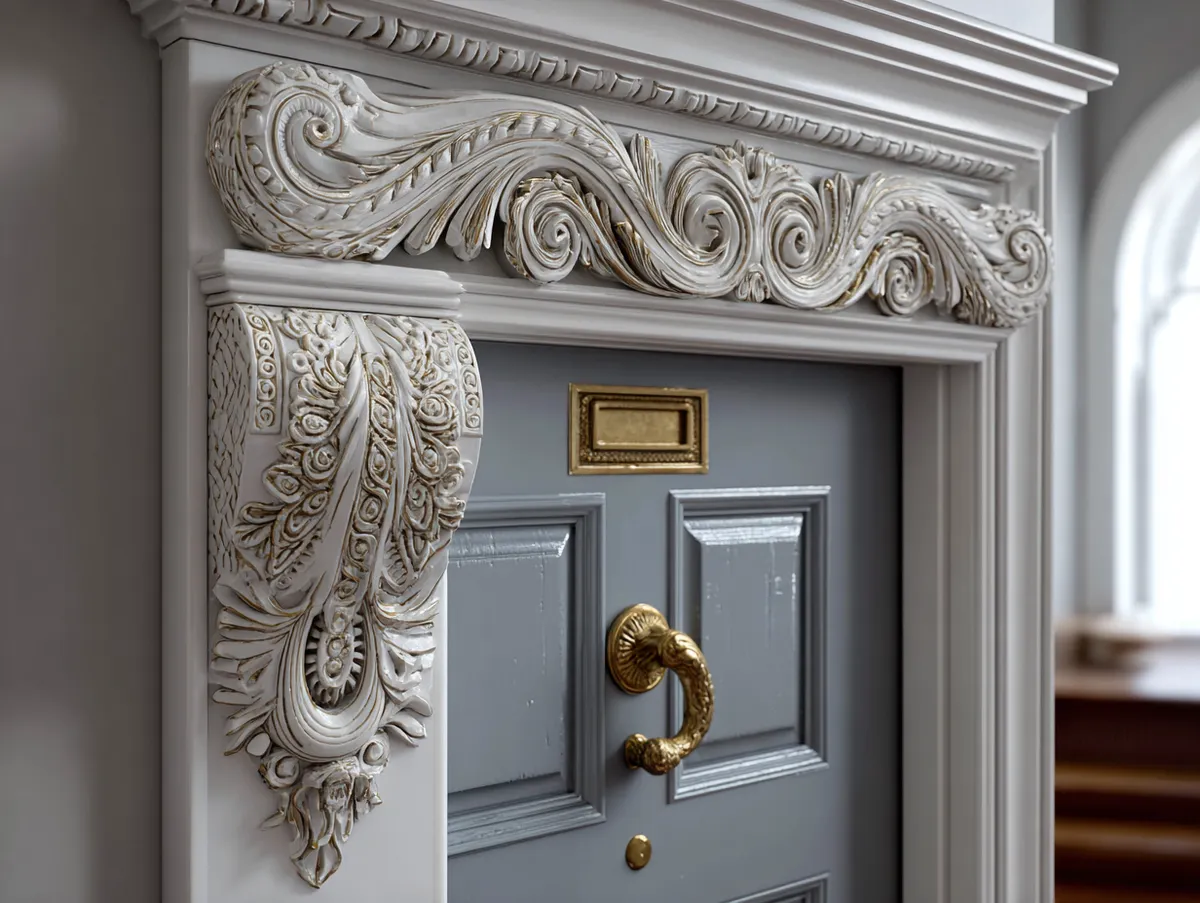
Custom carved casing is the other direction. Hand-carved oak with rope-twist detailing from millwork studios like Bear Creek Lumber or Kingsmill starts around $22 per linear foot. For a 32-inch-wide doorway, you’re at roughly $375 total. Worth it for an entry hall or formal dining room. Not worth it for a powder room nobody sees. The mistake I made early on was applying high-end casing profiles in rooms with low ceilings — the ornate detail made a 7-foot ceiling feel like a box lid.
Mixing metals into reclaimed wood casing is having a moment right now. A steel strap across a rough-sawn pine casing costs almost nothing extra but photographs dramatically. What doesn’t work: combining raw metal with painted MDF. The contrast reads unresolved rather than intentional. Commit to one material language per doorway.
Vintage Door Casing Styles and Where to Actually Find the Good Stuff
Architectural salvage is the cheat code nobody in the renovation community talks about loudly enough. Salvage yards like Ohmega Salvage in Berkeley or Build It Green NYC regularly stock 19th-century moldings with profiles you simply cannot buy new — multi-piece builds with cove, ogee, and backband layered together. Prices range from $0.50 to $4 per linear foot for salvaged wood, compared to $8–$12 for a reproduction. The catch: you have to sand, clean, and possibly remill the back face so it sits flat. Budget an extra hour of prep per doorway.
Faux distressing on new MDF is a legitimate technique when done right. Sand the face with 80-grit in random passes, then apply a watered-down dark glaze (Raw Umber artist acrylic diluted 1:4 with water works), wipe back immediately, and topcoat with dead-flat varnish. The result reads as aged painted wood rather than new trim. What looks fake: applying brown paint over white without a base stain layer first. The undertone is wrong and every visitor with a design eye will clock it immediately.
Hardware is where vintage door casing ideas come alive. Cast-iron rosette escutcheons from House of Antique Hardware run $18–$45 each. Wrought iron strap hinges from Cliffside Industries cost $22–$60 a pair. You’ll notice the difference the first time you see a beautiful salvaged molding profile paired with a stamped-steel hinge from the big box store — it looks like a costume, not a renovation. Spend the $80 on hardware. It’s the last 5% of the cost but 30% of the visual result.


Flat and Flush Door Moulding Design for Rooms That Read Too Busy
Flat casing — zero profile, just a rectangular board — costs $0.80–$1.10 per linear foot at Home Depot in primed MDF. The Metrie “Simplicity” line is my go-to; it comes pre-primed and cuts cleanly without chipout. Flat casing works in rooms where the walls already have texture, pattern, or strong color. In a white-on-white room with no art, flat casing reads as unfinished, not minimal. Minimal requires contrast or intention, not just the absence of profile.
Reveal casing is the more sophisticated version. Instead of bringing the casing flush with the wall, you recess it 1/8 inch to 3/16 inch from the drywall face. The shadow line that results does more visual work than most profiles. Architects use this trick compulsively. It requires a slightly different installation technique — you need to account for the reveal during rough framing or use a reveal gauge — but the result is a doorway that looks like it came from a $500-per-hour designer’s office at a cost of about $35 in materials per door.
Flat-mitered installation adds another layer. Cutting the casing at 45 degrees on all four corners instead of the standard 3-piece butt-and-head creates a picture-frame effect. It’s cleaner than standard colonial and more modern than Craftsman. The downside: any wood movement or settling will open the mitered corners over time. In humid climates like the Southeast, I’d skip mitered flat casing on exterior-adjacent walls and stick to the butted-head style instead.
Don’t Do This
Don’t install 2.25-inch colonial casing thinking you can dress it up with paint. That profile width reads as 1990s builder-spec regardless of color — it’s the door trim version of popcorn ceilings. The minimum width to look intentional in most rooms is 3 inches. Also avoid applying different casing profiles in adjacent rooms that share a visible doorway; the mismatch reads as oversight, not personality. And never caulk over a gap between drywall and casing with a contrasting-color caulk — either match the paint or replace the casing.


High-End Door Frame Materials That Hold Their Value Past the First Repaint
Solid white oak casing from a millwork supplier like Pacific Coast Lumber or Windsor Mill runs $4–$9 per linear foot unfinished. You’ll spend another $1–$2 per foot on finish materials. The payoff is a casing that looks better after 10 years than it did new — the wood darkens and gains character where paint-grade MDF starts to chip at corners. I own two sets of white oak casings on my bedroom doors and I’ve never once thought about replacing them. The only care they’ve needed is a light recoat of Rubio Monocoat every three years.
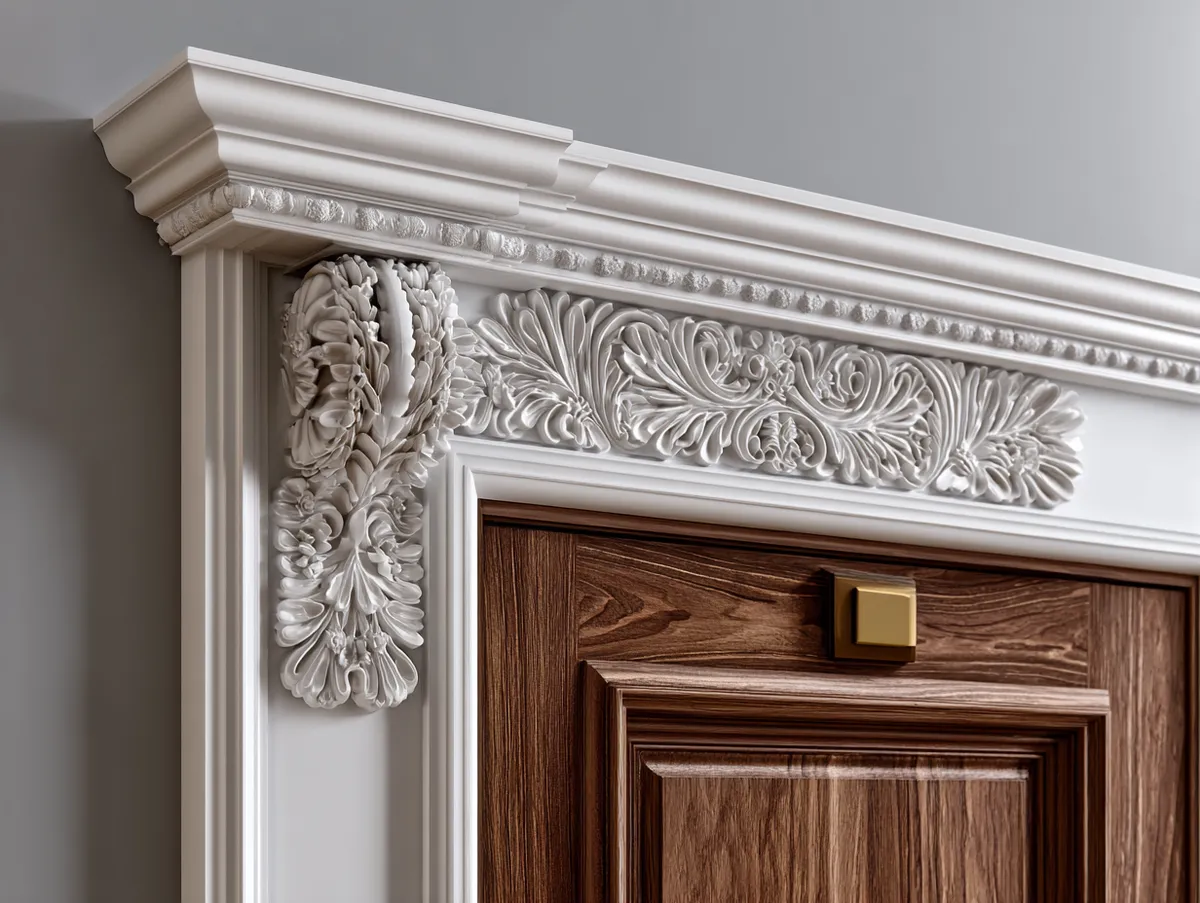
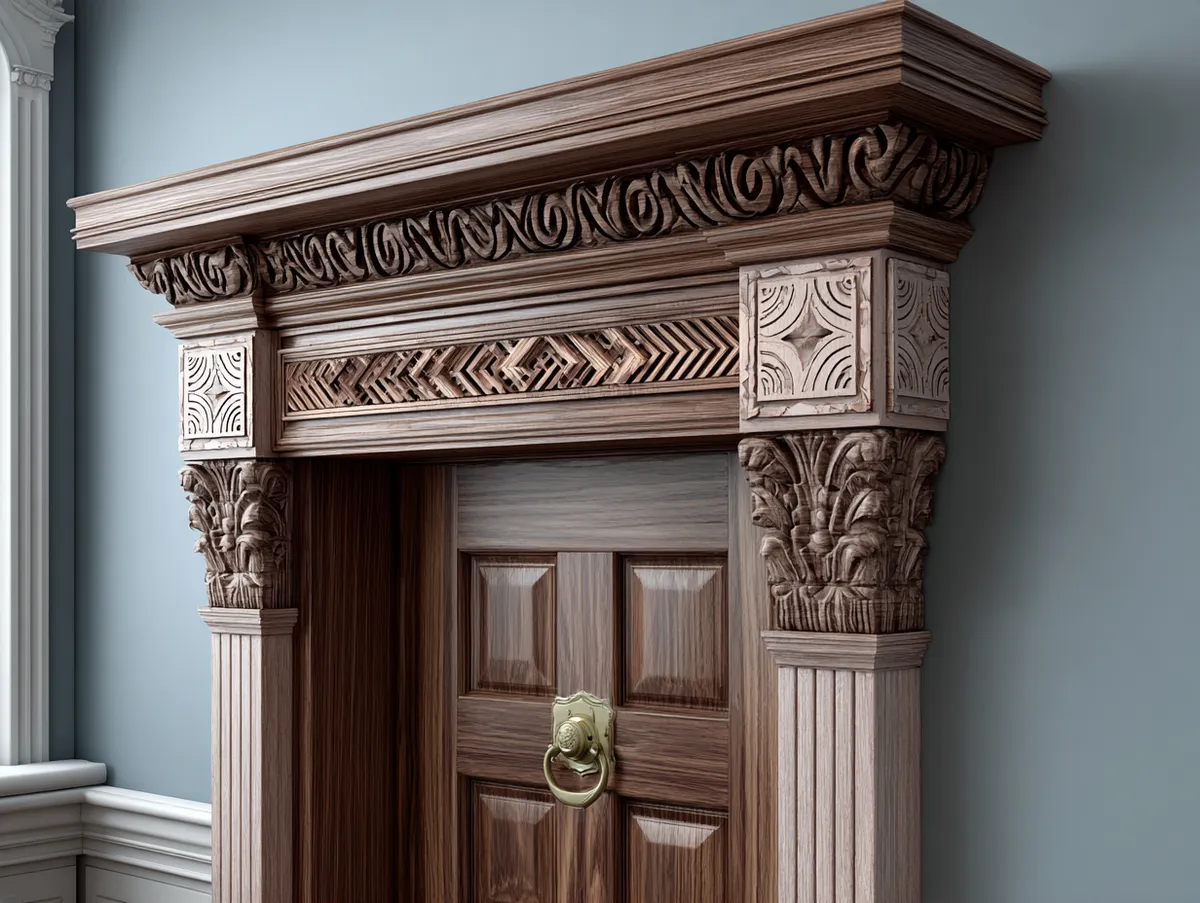
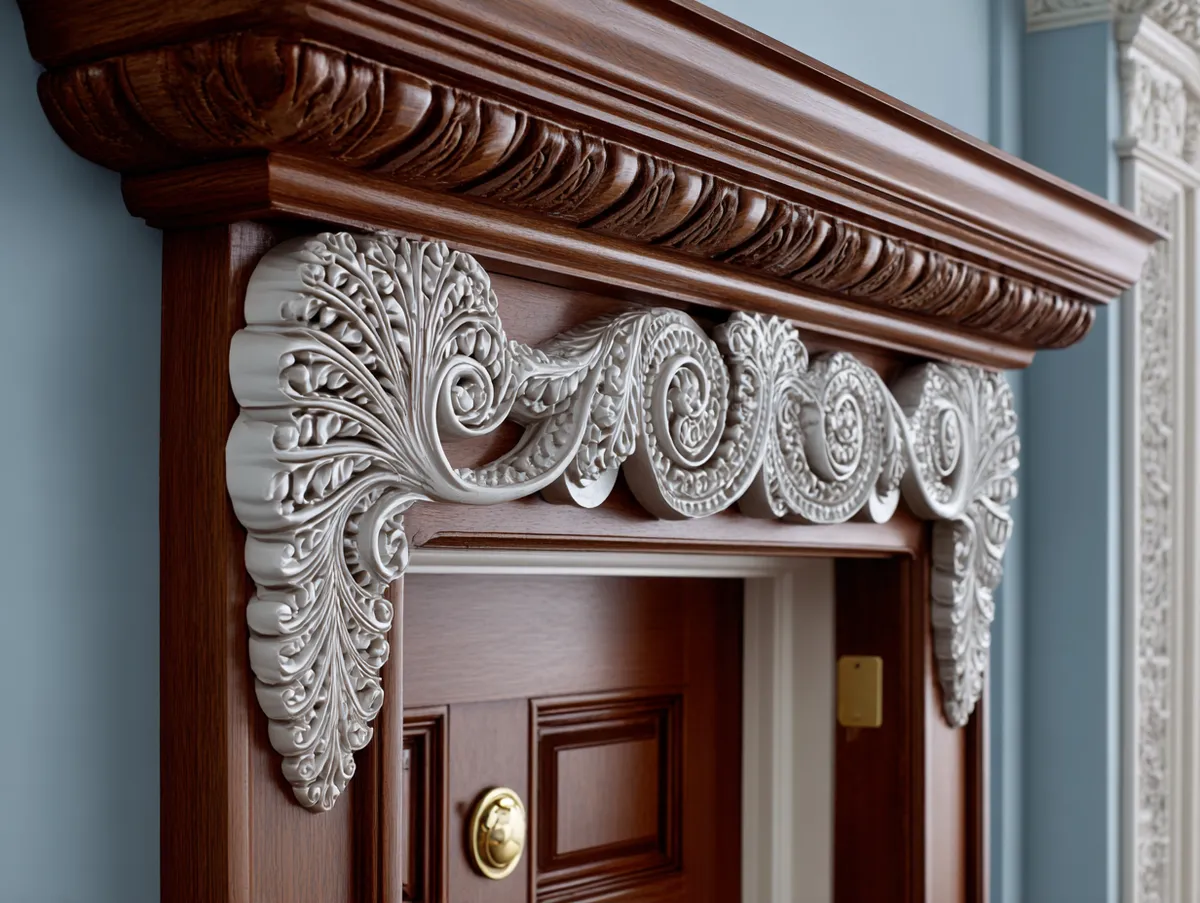
Built-up luxury casing is the other approach — layering stock molding profiles to create a custom look. This Old House’s Norm Abram famously recommends adding backband to standard colonial casing: the L-shaped piece that cups the outer edge adds $0.60–$1.20 per linear foot but transforms a flat builder profile into something that looks genuinely architectural. I stole this trick from a 1920s Craftsman bungalow I photographed in Portland — the original trim was three pieces stacked, and the whole effect cost about $90 per doorway to replicate in new stock.
Integrated LED lighting in a casing reveal is the high-end move that actually works. A 1.5-inch routed channel in the header casing, lined with a continuous LED strip (LIFX or Govee Neon Flex at $45–$80 per run), creates uplighting that makes the entire doorway glow without any visible fixture. The mistake version is surface-mounting LED tape on the face of the casing — it looks like a trade show booth, not a residence. Door header trim with integrated lighting is a separate design system worth understanding before you commit to a casing profile.
Rustic Door Casing Without the Barn-Theme Trap
Unfinished pine with a wire-brush texture is the rustic door casing move I keep coming back to. Buy standard 1×4 pine boards, run a wire brush wheel on an angle grinder along the grain, and you’ve raised the grain texture from 0 to 60 in about eight minutes per board. Total material cost for a doorway: $12–$18. The finish decision matters: Danish Oil (Watco is $18 per quart) gives warm amber depth, while clear wax keeps it pale and Scandinavian. Skip wood conditioner — it kills the grain contrast that makes the technique work.
Live-edge slabs as door casing are genuinely striking but require structural framing support if the slab is thicker than 1.5 inches. Most people skip that step and end up with a casing that pulls away from the wall within 18 months as the slab moves with humidity. Kiln-dried slabs from suppliers like Woodcraft or Bell Forest Products behave better than green-cut material, but you still need to acclimate them in the room for at least two weeks before installation. A $220 slab that wasn’t acclimated is a $220 problem waiting to happen.
Wrought iron hardware on natural wood casing is the combination that actually delivers on the rustic promise. Avoid antler and horseshoe decorative accessories — they read as theme park rather than home. The hardware that works is functional, not decorative: exposed screw heads, hand-hammered texture, matte black finish. Rocky Mountain Hardware and H. Theophile both make pieces in this range at $40–$120 per piece. It’s the difference between a room that looks designed and one that looks costumed.


Geometric Door Casing Patterns Built From Stock Profiles
Geometric door casing is 90% about the layout drawing and 10% about the cutting. Grid patterns, chevrons, and stepped reveals all start at the paper stage — if the proportions aren’t right on paper, the execution is irrelevant. The ratio I’ve found works in most rooms: the horizontal elements of the pattern should be 60% of the total casing width, leaving 40% for vertical elements. That ratio mirrors the golden section enough to read as balanced without feeling rigid.
Repeating diamond or hexagon patterns in door casing are built from standard colonial stock cut at 45 and 60 degrees. The challenge isn’t the cutting — any decent compound miter saw handles it — it’s the adhesion. Use Loctite PL Premium construction adhesive plus 18-gauge brad nails at every junction, and clamp overnight. Geometric assemblies that rely only on nails will open at the joints within a year as the wall moves. The adhesive is what holds the geometry together over time.
Color contrast on geometric casing makes or breaks the design. Paint the casing the same color as the wall and you lose the pattern entirely — all that work disappears. Paint it high-contrast (white casing on a dark wall, or a deep charcoal casing on a pale wall) and the geometry reads from across the room. Two-tone patterns — painting alternate geometric elements in different values — require a steady hand and a good angled brush (Purdy XL series at $14 is my go-to). No tape needed if you cut cleanly; tape actually softens the line and defeats the precision the pattern requires.


Colonial and Fluted Casing Profiles That Still Work in New Construction
Colonial casing is the most installed profile in North America for a reason: the cove-and-bead shape reads as finished rather than fancy, and it costs $1.10–$1.80 per linear foot in primed MDF from most lumberyards. The profile works because it creates a shadow line at the inner edge that separates the trim from the door jamb visually — without that shadow, the whole assembly reads as one blurry element. The version to avoid is the very thin “ranch casing” at 2.25 inches wide — it has none of the visual weight needed to anchor a doorway.
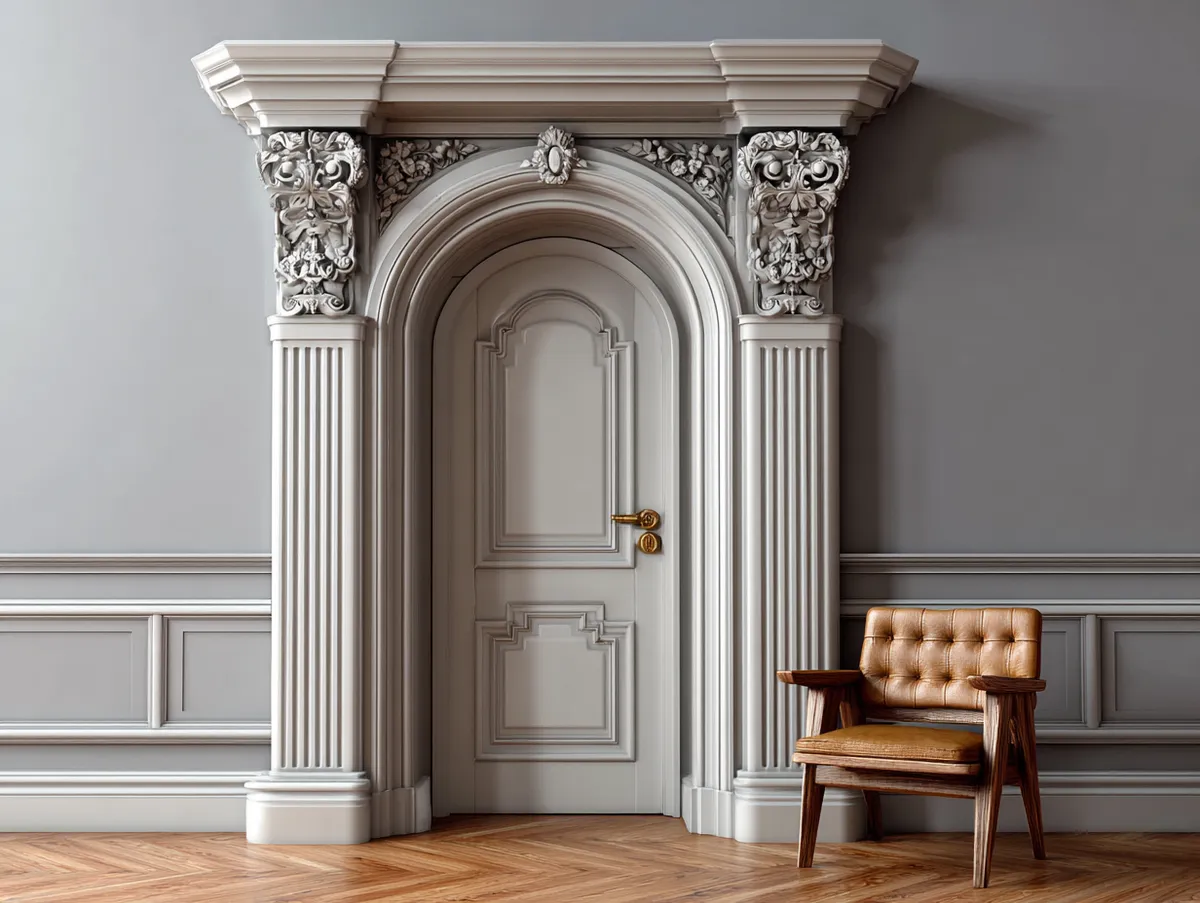
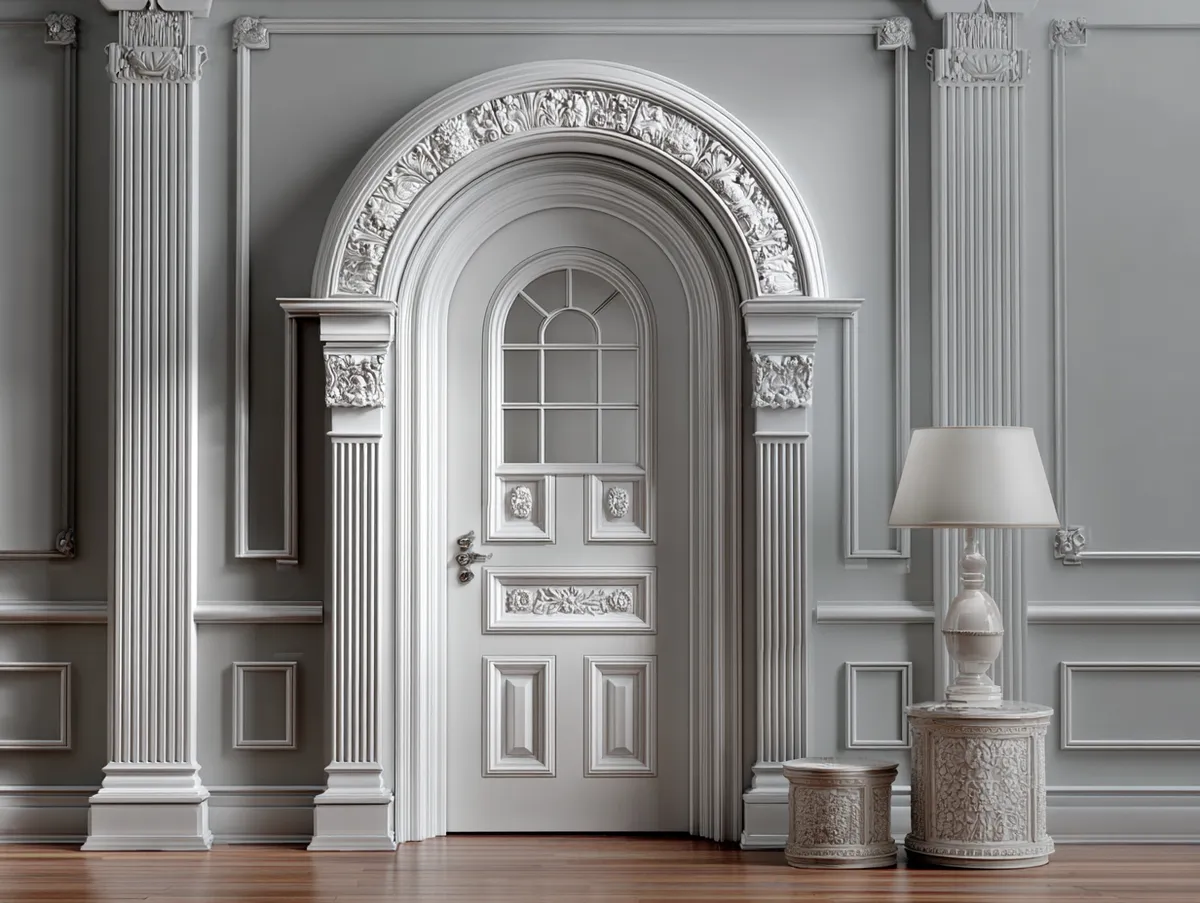
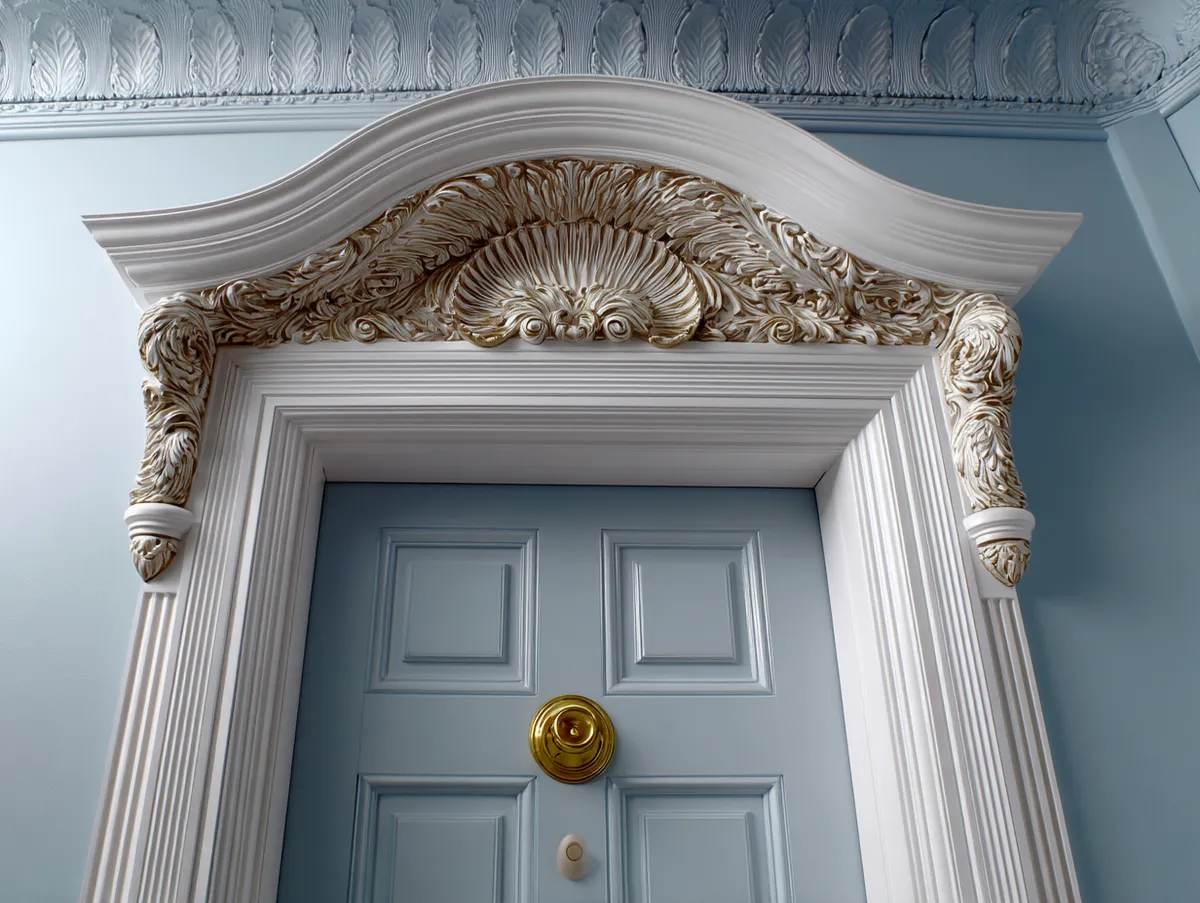
Fluted pilaster casing adds vertical grooves — typically 3 to 5 channels — to the side legs of the door casing. This profile needs ceiling height. In a room with 8-foot ceilings, fluted casings look stubby and over-decorated. At 9 feet and above, they create genuine architectural presence. Combining fluted side legs with a plain header (no fluting on the horizontal piece) and a decorative rosette block at the upper corners costs about $45–$70 per doorway in materials and looks like it came from a 1910 foyer. That’s a compliment.
Adding backband molding to standard colonial is the modification that most contractors don’t mention because it adds a labor step. The L-shaped backband (WM 930 profile from Metrie, $0.75 per linear foot) wraps the outer edge of your casing and adds 5/8 inch of depth. The difference in shadow and presence is significant. Exterior door trim molding designs use the same layered-profile logic at a larger scale — understanding both systems makes your whole entry sequence read as designed rather than assembled.


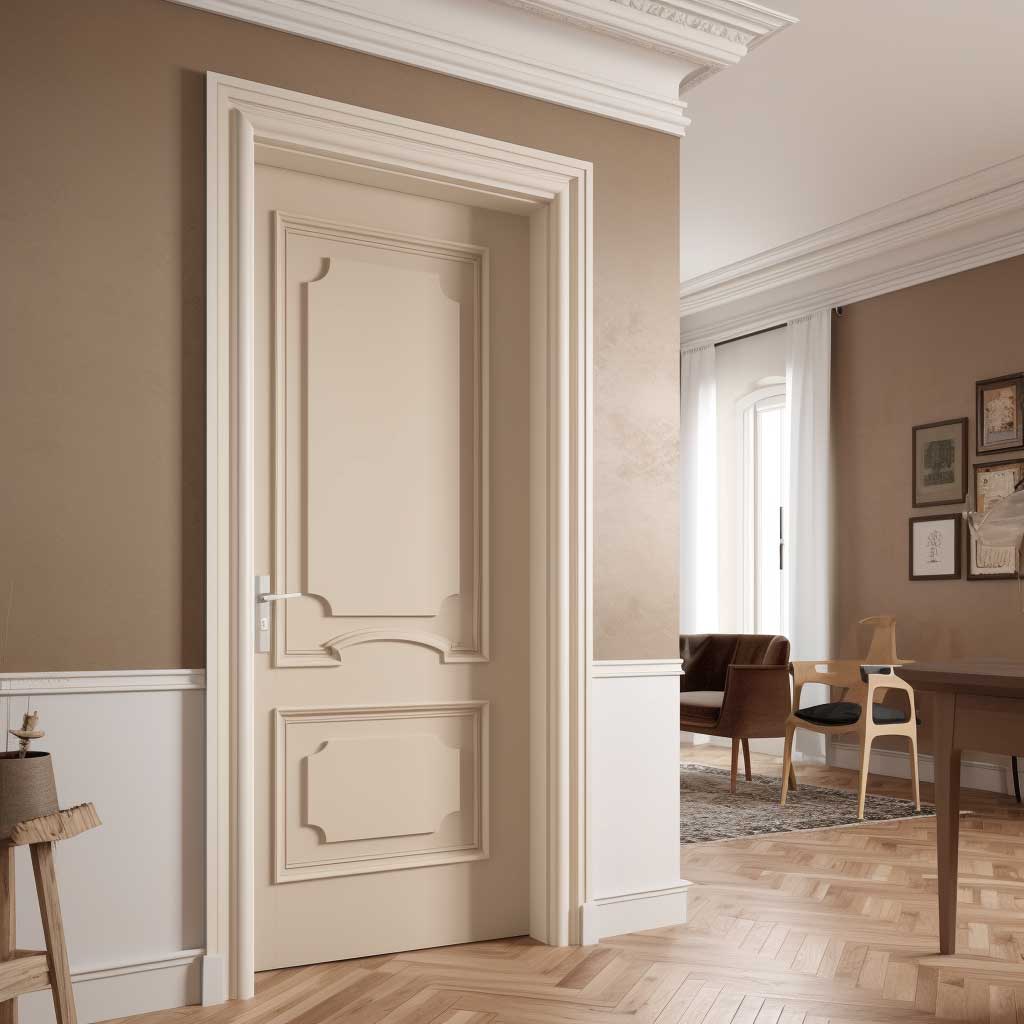
Transitional Door Casing Proportions That Don’t Read As Indecisive
Transitional casing is the hardest style to execute because it has no strong visual rules — you’re working the zone between traditional profiles and modern flat stock. The version that works: 3.5-inch square-edge casing with a subtle 1/8-inch quirk bead at the inner edge. That single bead does just enough to signal intentionality without committing to traditional. Metrie’s “Harvest” profile fits this description at $1.35 per linear foot. Skip the profiles with both a bead and a cove — they tip over into traditional regardless of how you paint them.
Mixing materials in transitional casing — painted MDF legs with a stained wood header, for example — is one of those things that sounds clever in theory and looks muddy in execution. You’ll notice the seam at the corner joint more than you notice the intentional contrast. The version that does work: same material throughout, but painted in a color that sits between the wall and the trim. Benjamin Moore’s Pale Oak OC-20 on transitional casing in a room painted White Dove OC-17 gives you a visible step without hard contrast.
Scale is the variable most people ignore in transitional design. A 4-inch casing profile on a standard 6-foot-8-inch door looks correctly proportioned. The same 4-inch profile on an 8-foot door looks narrow and meandering — you need 4.5 to 5 inches to maintain the same visual relationship. I’ve redone two doorways because I didn’t account for door height when choosing casing width. Measure the door first, then select the profile width. Not the other way around.

Door moulding design is one of the few upgrades that changes how a room reads from across the space — before anyone looks at the furniture, the art, or the floor. This Old House’s guide to door casing styles covers profile terminology in depth if you want to understand the vocabulary before talking to a millwork supplier. Get the casing right and everything else in the room gets a free upgrade by association.
Final Thought
Door moulding design is the trim detail that tells the room what it’s allowed to become.
Most rooms fail on the trim, not the furniture. The profile you choose — its width, depth, and shadow line — sets the visual register for everything else in the space.
Start with ceiling height, then door width. Profile comes third. Color is last. In that order, nothing ends up looking wrong.
Save this post before your next hardware store run — you’ll want the measurements on hand.
Related Topics