The donut hair bun works on every hair length — but most people never get a round, full result because they grab whatever foam ring came in a $3 pack and call it a day. I’ve tested four different donut sizes across shoulder-length, medium, and fine hair, and the difference in outcome is night and day. Match your tool to your length and density, and the bun shapes itself in under two minutes.
You’ll notice the styles below span electric blue, sunset orange, pastel pink, lavender, neon green, icy silver, and cherry red — not random. Each color creates a different visual weight, and understanding how that affects placement (high vs. mid vs. low) is what separates a polished donut bun from one that looks like an afterthought. Scroll through for the technique that matches your length.
My go-to for medium hair is the EZ Bun Donut ($5.99 on Amazon) in a large size — it fills out the bun without leaving gaps, and the foam grip holds color-treated hair without snagging. For short or fine strands, the mini version at $3.99 is the correct call. Trying to wrap thin hair over a large donut is like fitting a child’s shoe on an adult foot: technically possible, visibly wrong.
- The right donut size for your hair length (short, medium, long)
- How to use a hair donut with thin hair without losing volume
- Why medium hair needs smoothing product before wrapping — and which ones hold without stiffness
- The braided-wrap technique for lavender hair that works at weddings and garden parties
- What NOT to do with neon or bright-colored hair (hint: don’t match your accessories to the bun color)
- FAQ answers to the exact questions people ask about donut bun placement and technique

Electric Blue Donut Hair Bun on Shoulder-Length Hair
The donut hair bun in electric blue is one of the easiest ways to make shoulder-length hair look longer and denser than it actually is. Gather the hair into a high ponytail, thread it through a standard foam donut ring (I use the Conair Bun Maker at $4.99), and fan the blue strands evenly over the surface before pinning with U-shaped pins. The round structure of the tool does the shaping work — you just have to distribute the hair evenly and not rush the pinning step.
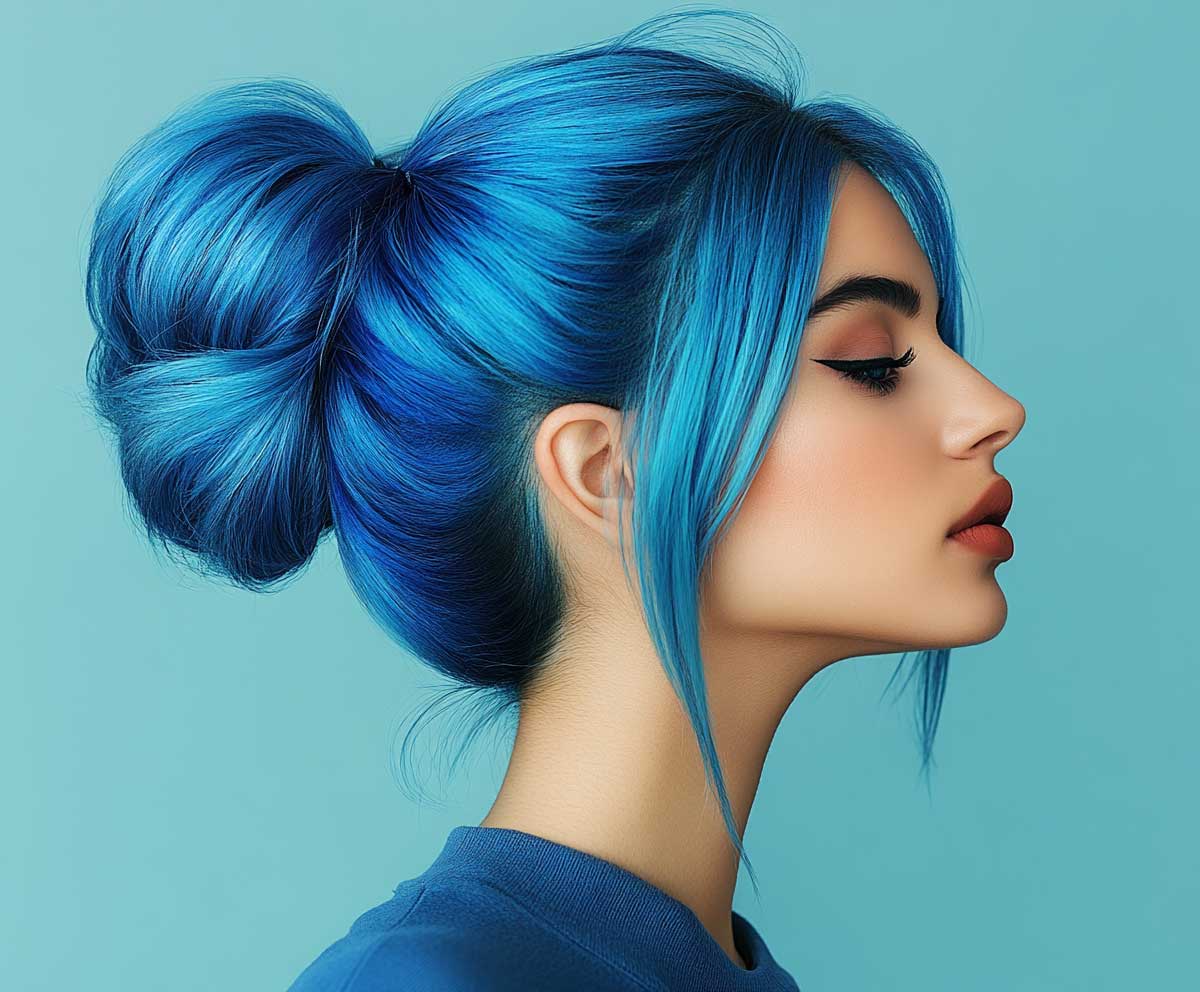


Smoothing gel or a lightweight mousse — I reach for Not Your Mother’s Curl Talk ($8) even on non-curly hair — makes the strands sleek enough to wrap cleanly and prevents the frizzy halo that ruins the round silhouette. Apply it to the ponytail before threading, not after. Does electric blue work with layered cuts? Yes, actually better than on blunt cuts — the layers create subtle texture variation across the bun surface that adds dimension you can’t replicate with a single-length cut.
Keep the surrounding look minimal: a neutral outfit lets the color carry the look instead of fighting it. Blue hair in a structured bun against a white shirt or black turtleneck is an editorial combination that costs nothing. The mistake I see constantly is pairing vivid-colored buns with patterned tops — the two compete and both lose.
Sunset Orange Donut Bun Paired with Side Bangs
Sunset orange is one of the most flattering shades to build a donut hair bun around because the color carries natural depth — the lighter and darker tones within the orange read as dimension even when the bun is completely smooth. Build the base with a mid-height ponytail (not crown-high, not nape-low — right at the back of the crown), thread through the donut, and fan the orange strands in overlapping sections to expose as much color variation as possible.


Side bangs are what make this version feel intentional rather than just “hair pulled back.” Use a small round brush and a low-heat setting to direct the bangs outward at the ends — inward curl on bangs with a high bun reads dated, like something from a 2008 prom photo. For medium-to-long hair, this bun achieves its best shape when the strands are thick enough to wrap around the tool twice, which fills out any gaps and prevents the donut from peeking through.
Finish with a light mist of shine spray — Kenra Platinum Silkening Mist ($27) is my reference point, though the $10 Garnier Fructis Sleek & Shine version does about 80% of the same job. Sunset orange thrives under natural light, so wear this on days when you’ll actually be outside. Artificial lighting flattens warm tones; sunlight brings them to life in a way no filter can replicate.
- Don’t skip the smoothing product on medium hair. Wrapping dry, product-free hair over the donut creates a frizzy halo that breaks the round silhouette immediately.
- Don’t use a large donut on fine or short hair. The tool will show through the strands and the bun looks sparse, not full. Use the mini size — EZ Bun Mini at $3.99 is the right call.
- Don’t match bright accessories to vivid hair color. A neon green scrunchie on neon green hair cancels the contrast that makes the color pop. Go for black, chrome, or a complementary neutral.
- Don’t wrap unevenly and expect it to fix itself. The donut holds whatever shape you build. Uneven strand distribution stays uneven — pin as you go, not at the end.
Pastel Pink Donut Bun for Fine Short Hair
How to use a hair donut with thin hair is the question I get more than any other on this topic — and the answer is simpler than most tutorials make it: use a smaller tool and add grip before you start. For pastel pink fine hair, I pull the top layer into a small ponytail at the crown (not all the hair — just the top section), thread it through a mini donut ring, and tuck and pin section by section rather than trying to wrap everything in one go.


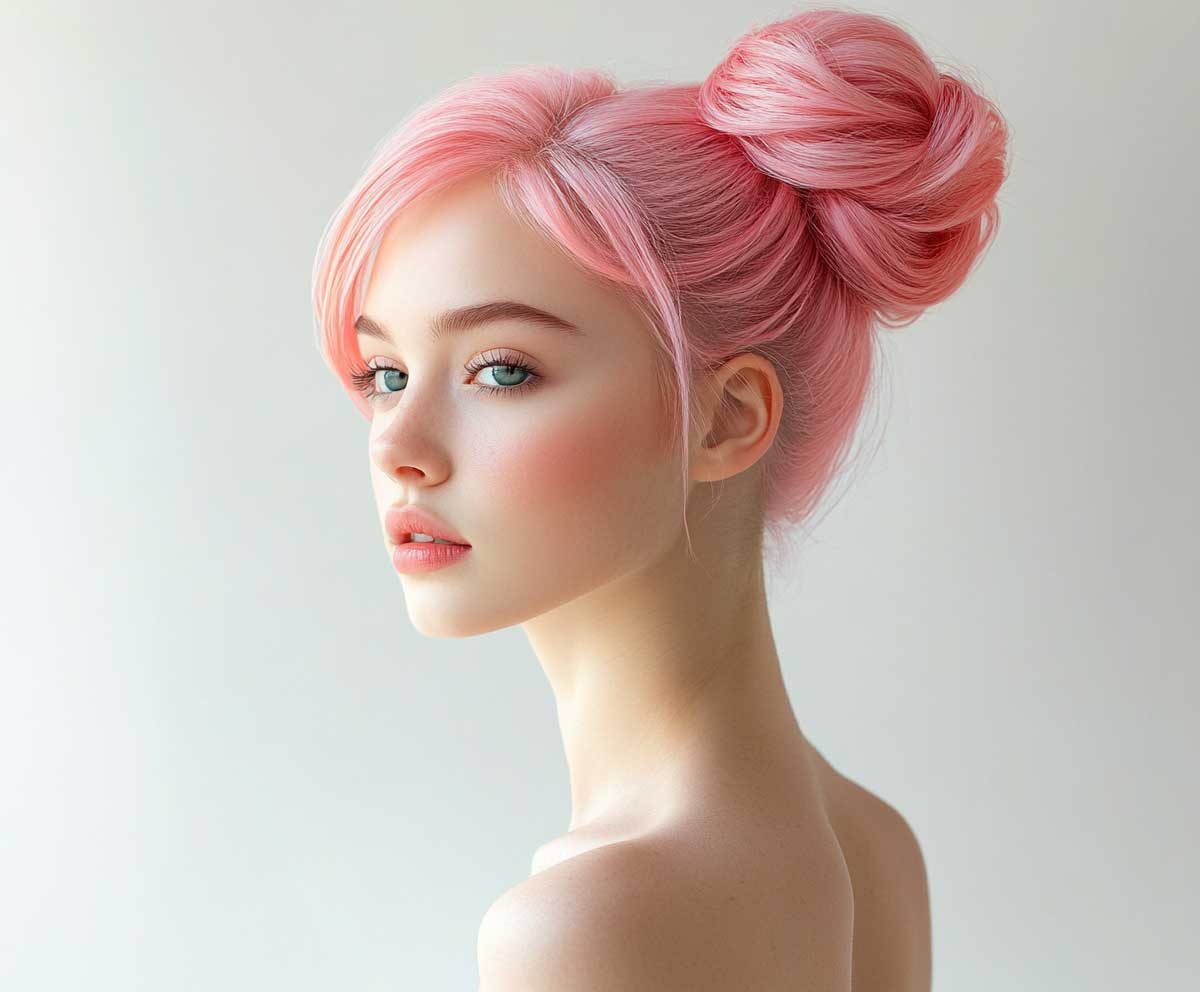

Texturizing powder is the secret weapon for fine hair — I use Kenra Platinum Silkening Powder ($24) worked into the roots before gathering the ponytail, which creates grip that keeps the donut from sliding even on slippery color-treated strands. Dry shampoo works in the same way and costs less: Batiste Original ($9) gives enough grit to make thin hair behave. A teasing comb at the crown adds the lift that fine hair naturally lacks, and the result looks fuller than it has any right to be given the starting volume.
Pastel pink amplifies the femininity of the bun and pairs beautifully with simple accessories — a thin pearl headband from Anthropologie ($16) or a sheer scrunchie reads intentional without competing with the color. You can read more about building texture and volume in everyday hairstyles for thin fine hair — the techniques there translate directly to donut bun prep.
Lavender Donut Hair Bun with a Braided Crown Wrap
The donut hair bun in lavender with a braided wrap is the version I’d recommend to anyone who needs the look to hold through a four-hour event. Build the bun first from a high ponytail, but leave a one-inch section out before threading through the donut. Once the bun is pinned and secure, take that loose section, braid it into a simple three-strand plait, and wrap it around the base of the bun like a crown before pinning the end underneath. The braid hides the elastic, adds structure, and — this is the part nobody mentions — actually reinforces the bun so it stays round all day.


Lightly pulling on the braid loops before pinning gives a fuller, looser appearance that prevents it from looking like a utility detail rather than a design choice. Set with Kenra Platinum Silkening Spray ($27) or the more affordable John Frieda Frizz Ease Dream Curls Spray ($9) for flexible hold that keeps the braid soft to the touch. Is this appropriate for weddings? Absolutely — lavender with a braided donut bun is one of the few hairstyles that photographs beautifully both indoors and in natural light because the cool hue contrasts cleanly against almost every background color.
Add delicate gold earrings or a single floral hairpin tucked into the braid rather than the bun itself — placing accessories in the braid rather than the bun keeps the round silhouette clean. I’ve worn this configuration to two garden parties and one outdoor wedding, and it held without touch-ups through six hours of heat and movement. The braid is doing structural work, not just decorative work.
Neon Green High Donut Bun for Active Days
Neon green hair rewards placement at the crown because the color is loud enough to function like a visual exclamation point — and height amplifies that effect. Pull the hair into a tight ponytail at the very top of the head, smooth flyaways with a pea-sized amount of Got2b Glued Blasting Freeze Spray ($7), thread through the donut, spread the neon strands evenly, and lock the perimeter pins before the center ones. The donut hair bun styled at crown height on neon hair looks futuristic rather than casual, which is exactly the point.


Neon hair reflects light more intensely than any other hair color, so the surrounding style needs to be simple — a black hoodie or a plain white tank top, not a graphic tee. The bun becomes the graphic. For medium-to-long hair, the neon donut bun forms a substantial, full shape that can actually withstand movement — I wore this to a cardio class once, and it held through 45 minutes without a single pin shifting. The key is starting with a tight, clean ponytail base, not a loose gather.
Bright eyeliner in a matching or contrasting shade takes the look further for festivals or nights out. Matching neon eyeliner to neon hair is one of those combinations that could go wrong but rarely does when the rest of the makeup is matte and minimal. For a more relaxed take, black liner with the neon bun creates contrast that reads editorial rather than cosplay — and that’s the difference between a look that photographs well and one that reads as overwhelming in person. You can draw more ideas from these quick bun tutorials for busy mornings if you want faster variations on the same high-volume concept.
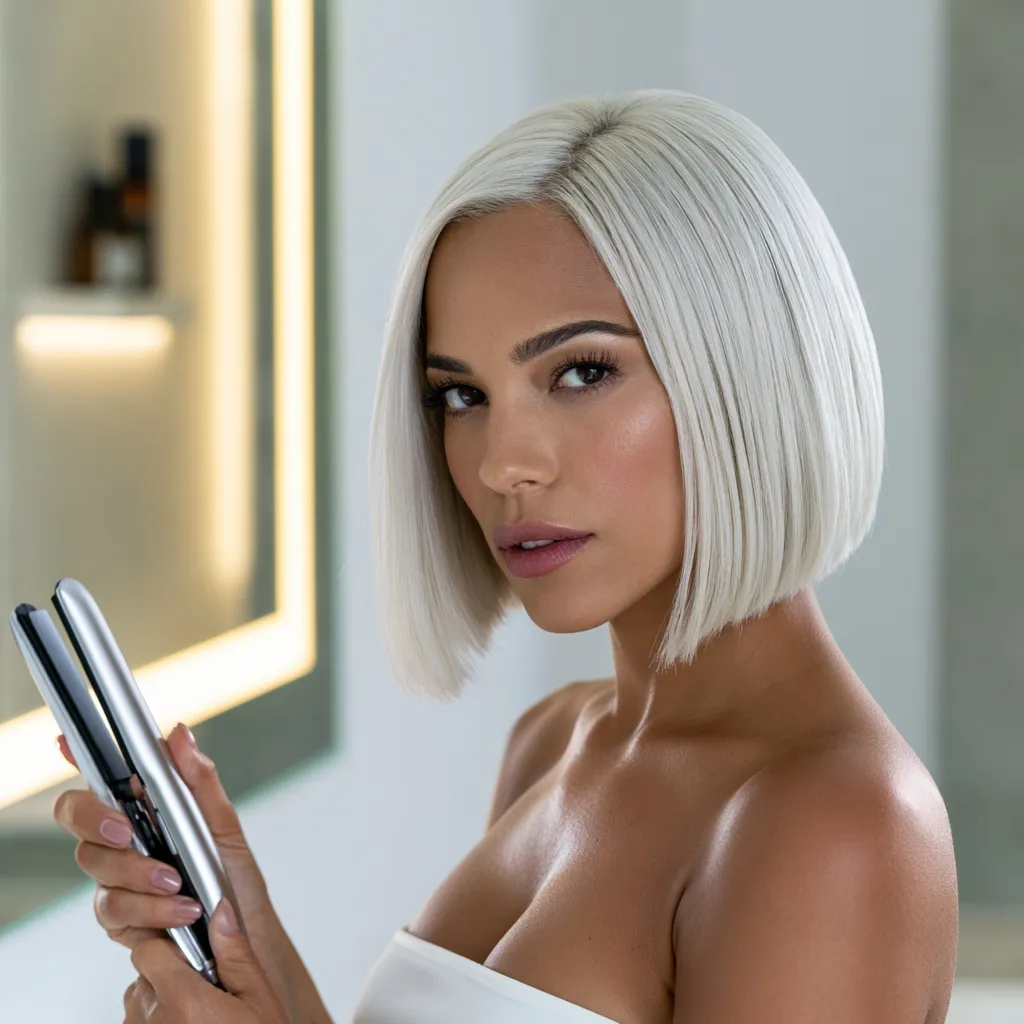
Icy Silver Donut Bun with Twisted Strand Detail
The donut hair bun in icy silver earns its complexity from the twisted-ends detail, which takes under five extra minutes and makes the bun look like something that took thirty. Gather icy silver hair into a low or mid-level ponytail, thread it through the donut, then instead of wrapping all ends in the same direction, divide them into four to six sections, twist each one individually, and wrap each twist over and around the bun’s surface before pinning. The twists catch light differently from each other, and silver hair amplifies that effect dramatically.


Use silver-toned bobby pins — the Scunci No Slip Grip pins in silver at $4.99 for 30 pins are exactly the right product here — to secure the twists invisibly against a silver base. Clear elastics do the same job at the ponytail stage. A finishing gloss serum worked through the surface before you start twisting is the non-negotiable step: Moroccanoil Treatment ($20 for 25ml) is my standard, but L’Oréal Extraordinary Oil ($10) is the budget alternative that delivers similar shine. Frizz on twisted silver strands looks like deterioration, not texture — keep the surface smooth.
This variation is built for formal settings: it conveys refinement without being fussy, and it holds its shape because the twisted sections anchor each other. I stole this pinning technique from a backstage hairstylist at a runway show — pin each twist at two points rather than one, and the bun stays geometrically round even after four hours on your feet. For a deep dive into elegant updos for long hair, the finishing techniques translate directly to this silver bun style. The external reference on donut bun technique and tool sizing from StyleCraze’s donut bun tutorial confirms that hair gel is essential for thick or very curly textures before threading — skip it on fine hair, where it collapses volume instead of building it.
Cherry Red Donut Bun on Layered Medium Hair
The donut hair bun in cherry red on layered medium hair is the only version where imperfection is a feature, not a problem. Layers mean the ends are different lengths, which creates texture variation across the bun surface automatically — trying to force every strand into a uniform wrap actually removes the visual interest that makes this version distinctive. Pull into a medium ponytail (not too tight — you want slight give at the crown), thread through the donut, and let the layered ends peek through slightly for a tousled effect that looks deliberate.


Cherry red thrives under direct natural light — daytime wear maximizes the color’s visual punch in a way that indoor lighting cannot. A matte lipstick in a similar red family (I reach for NYX Matte Lip Cream in “Budapest” at $8) pulls the entire look into a coherent moment without requiring any other coordination effort. Does a velvet scrunchie work here? Yes — a burgundy or deep wine velvet scrunchie wrapped around the base reads as a styling choice, not a functional elastic. Avoid satin scrunchies with cherry red; the shine of the fabric competes with the shine of the hair.
The cherry red donut bun on a layered cut is the version I’d recommend for anyone who wants the look to feel modern rather than formal. It works for dinners, day-to-night transitions, and workplaces that welcome self-expression. The texture from the layers keeps it from looking too precise, and cherry red is dramatic enough to carry a simple outfit — jeans, a black blazer, and this bun reads as a complete thought without any additional accessories.
Donut Hair Bun — Final Word
The Round Shape Comes from the Tool. The Staying Power Comes from Prep.
Match your donut size to your hair density — mini for fine or short hair, standard for medium, large for long thick hair. No tool fixes bad prep, and no amount of pinning saves a bun that started with the wrong ring size.
Color affects placement: high buns for neon and bold colors, mid or low placement for icy silver and lavender where the sophistication of the shade deserves a quieter silhouette. The braid-wrap technique adds structural hold that lets the bun survive events without touch-ups.
The single most common mistake is skipping smoothing product on medium hair before threading. It takes thirty seconds and prevents the frizzy halo that breaks the round shape immediately. Save this post before you reach for your donut tool next time.
Related Topics