Bouffant hair for thick hair is one of those styling challenges that sounds straightforward until you’re twenty minutes in and your crown looks like a tumbleweed. I’ve wrestled with my dense strands enough times to know that the difference between a polished bouffant and a puffy mess comes down to one thing: structure before volume. You need a controlled foundation first, height second.
My go-to move is starting with a blow-dry using a Dyson Airwrap or a Revlon One-Step ($59.99), pulling the roots smooth before I even think about teasing. Thick hair holds shape brilliantly once you give it direction — that’s the payoff you’ll notice immediately when you do it right.
The three looks below — glossy black, warm caramel, and platinum — each show a different way to work with dense texture. All of them use the same core method, adjusted for color and finish. Pick the one that matches your hair, steal the technique, and skip the trial and error I went through.
- How to prep thick hair so the bouffant holds shape all day without collapse
- Backcombing method that adds real height without damage or knots
- Glossy black finish: smoothing technique for a sleek, modern crown
- Warm caramel variation: light waves + layered teasing for a vintage effect
- Platinum look: volumizing mousse + shine spray for maximum drama
- Products that actually work on thick strands — with price points
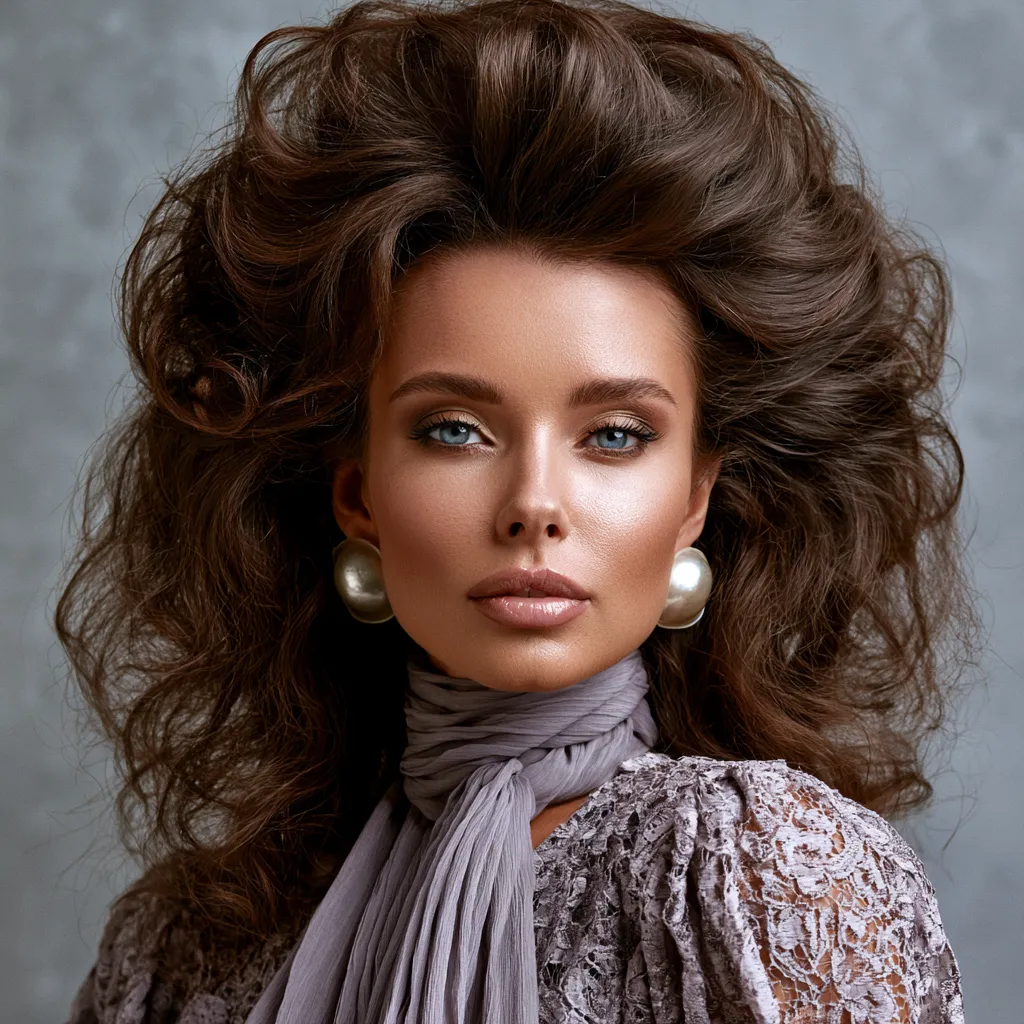
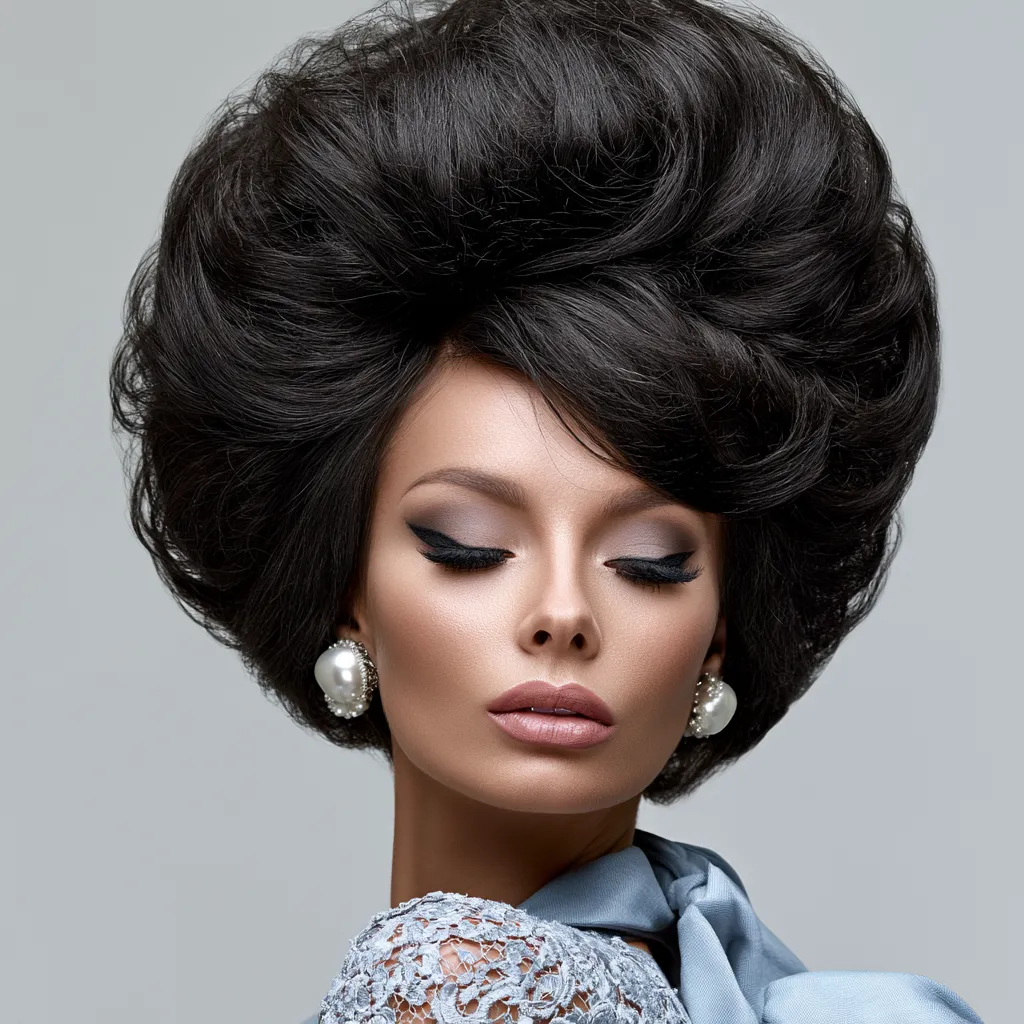
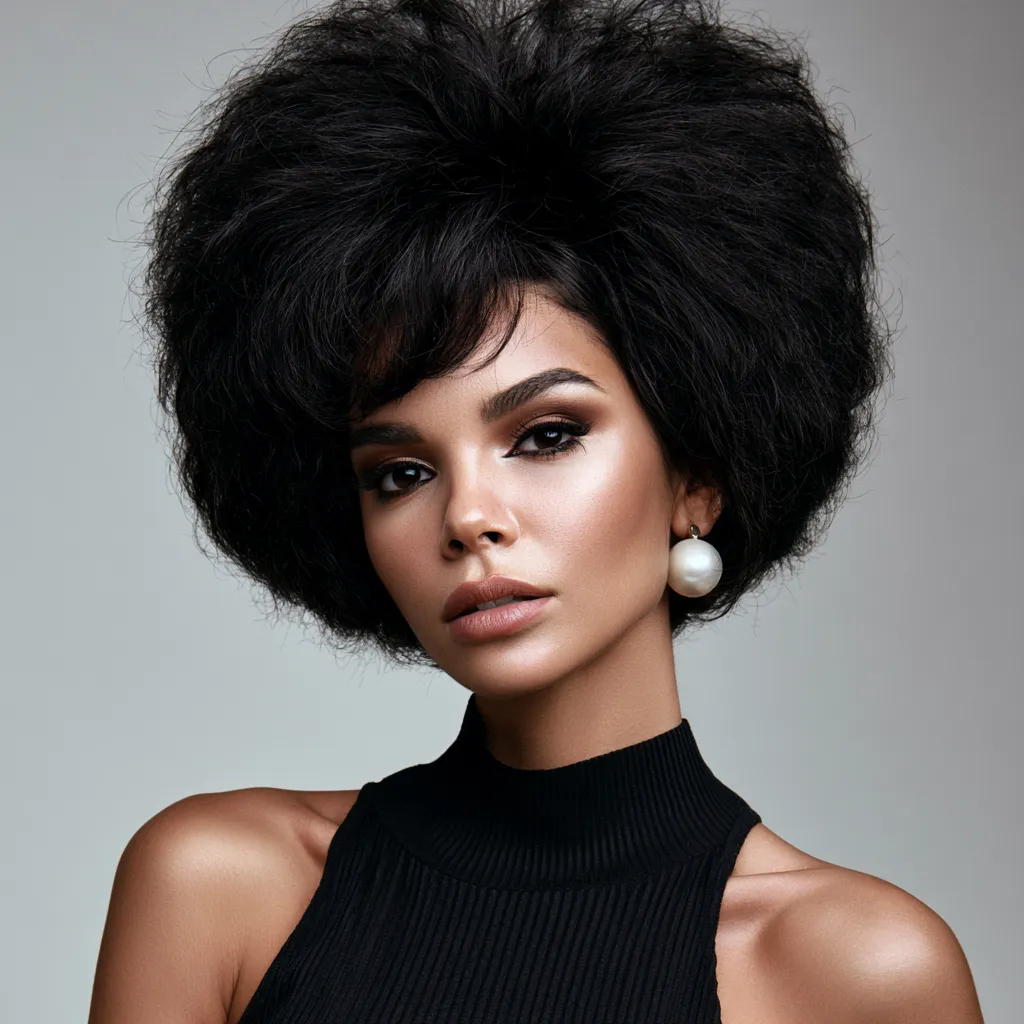
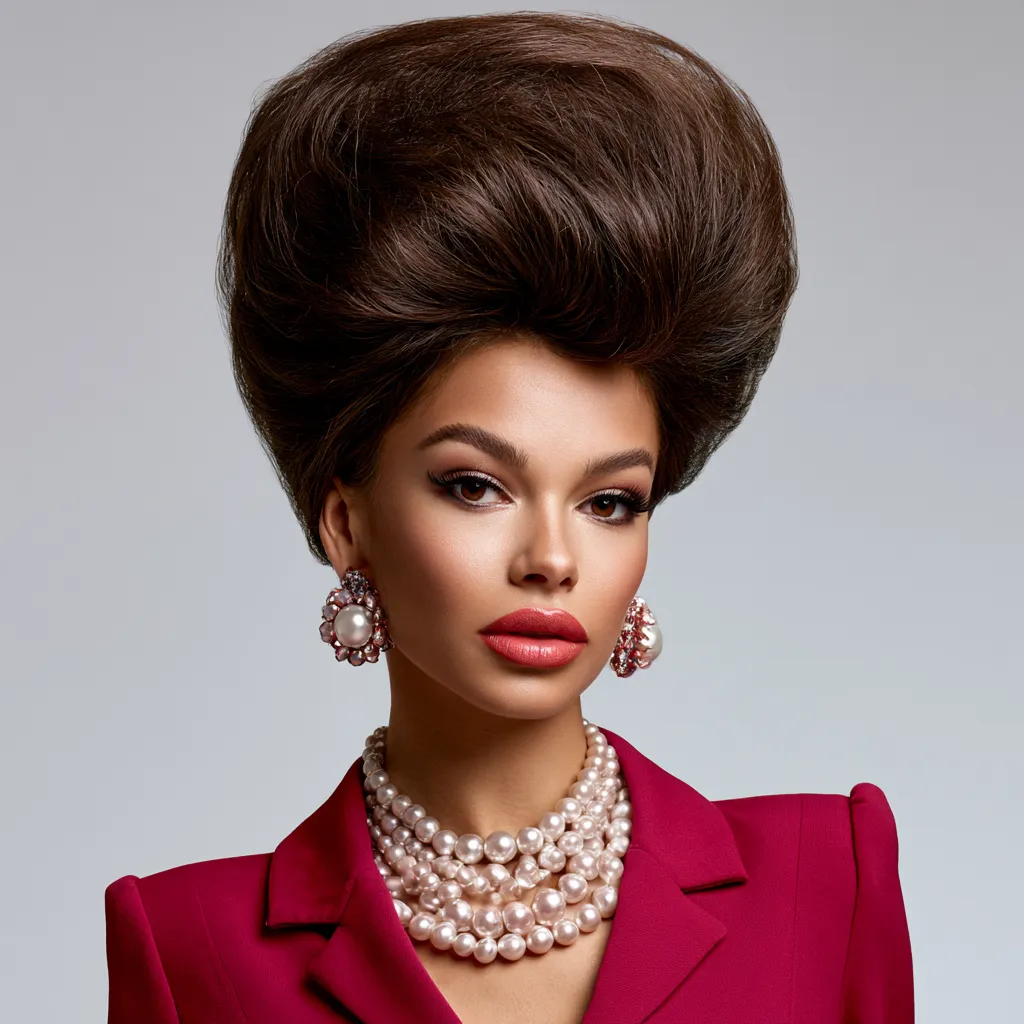
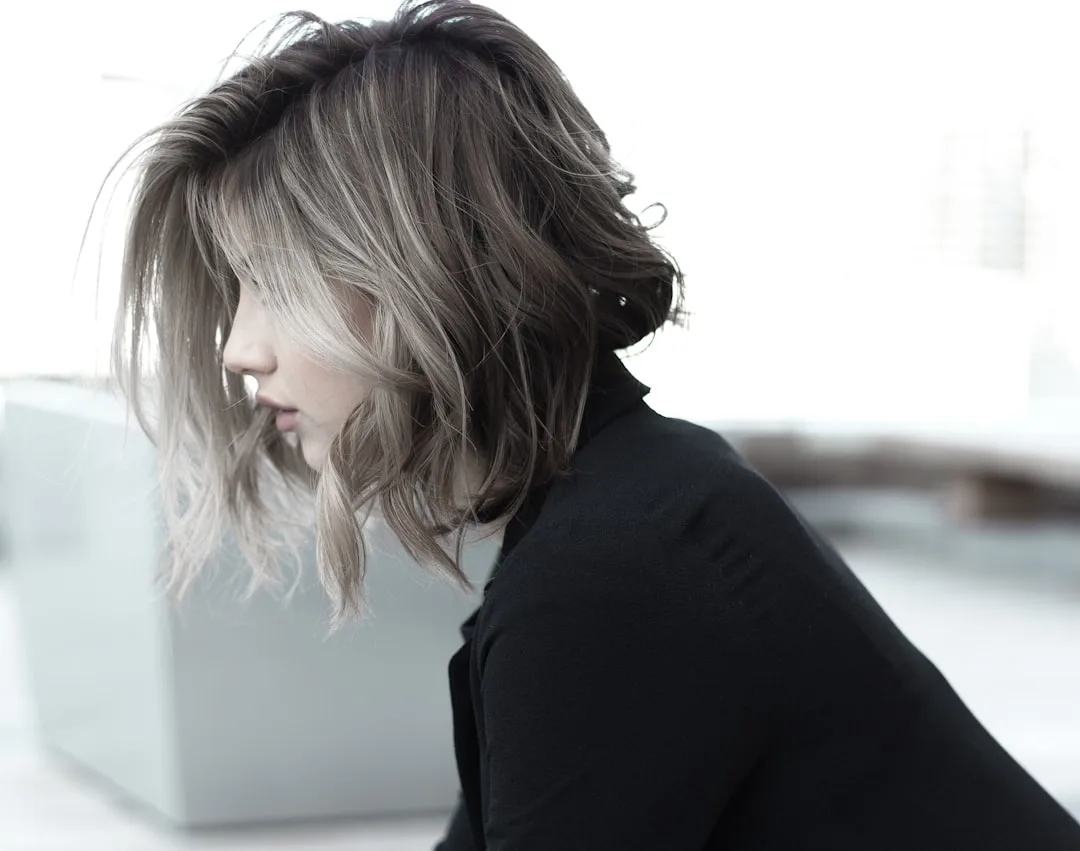
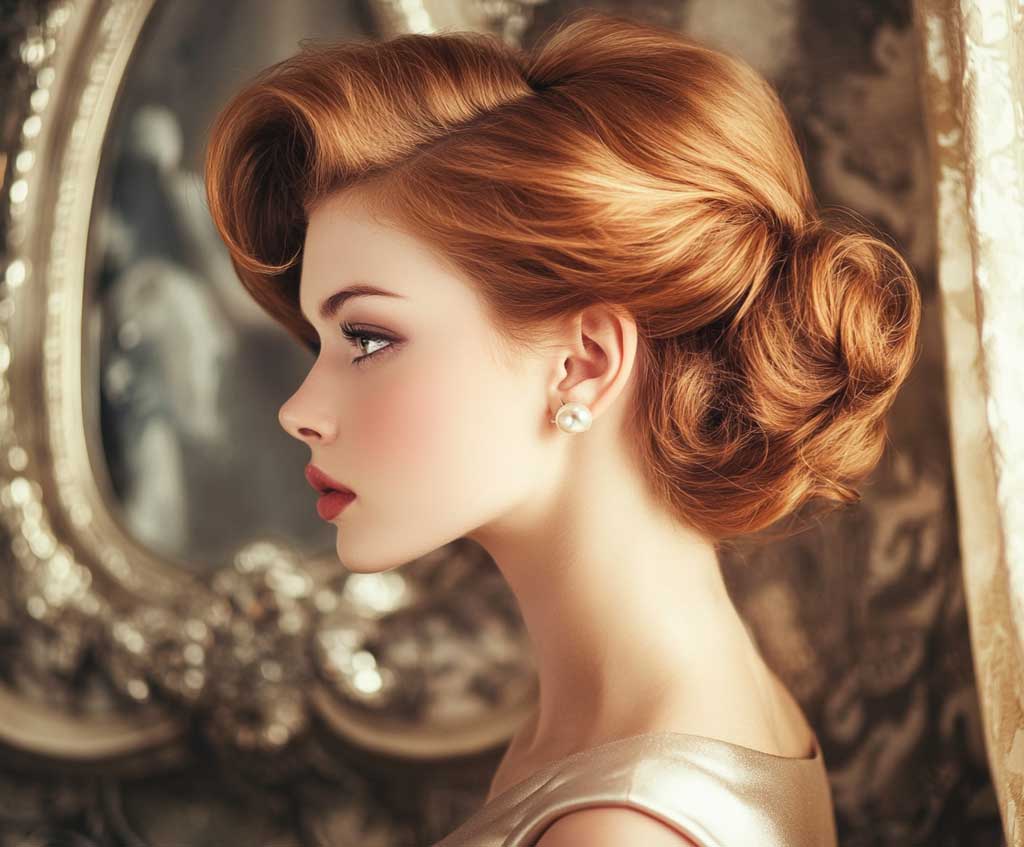
Glossy Black Bouffant Hair Built for Thick, Dense Strands
Bouffant hair on thick black strands needs two things working together: enough height at the crown to read as intentional, and enough smoothness on the surface to look editorial instead of accidental. Wash with Olaplex No. 4 Shampoo ($30) paired with their Bond Maintenance Conditioner — both are formulated to reduce that coarse, resistant feel that makes thick hair fight back during styling. Apply a dime-sized amount of Kenra Platinum Silkening Mist ($24) as a heat protectant, then blow-dry in sections with a Mason Pearson paddle brush, pulling each section downward while directing the airflow along the shaft.

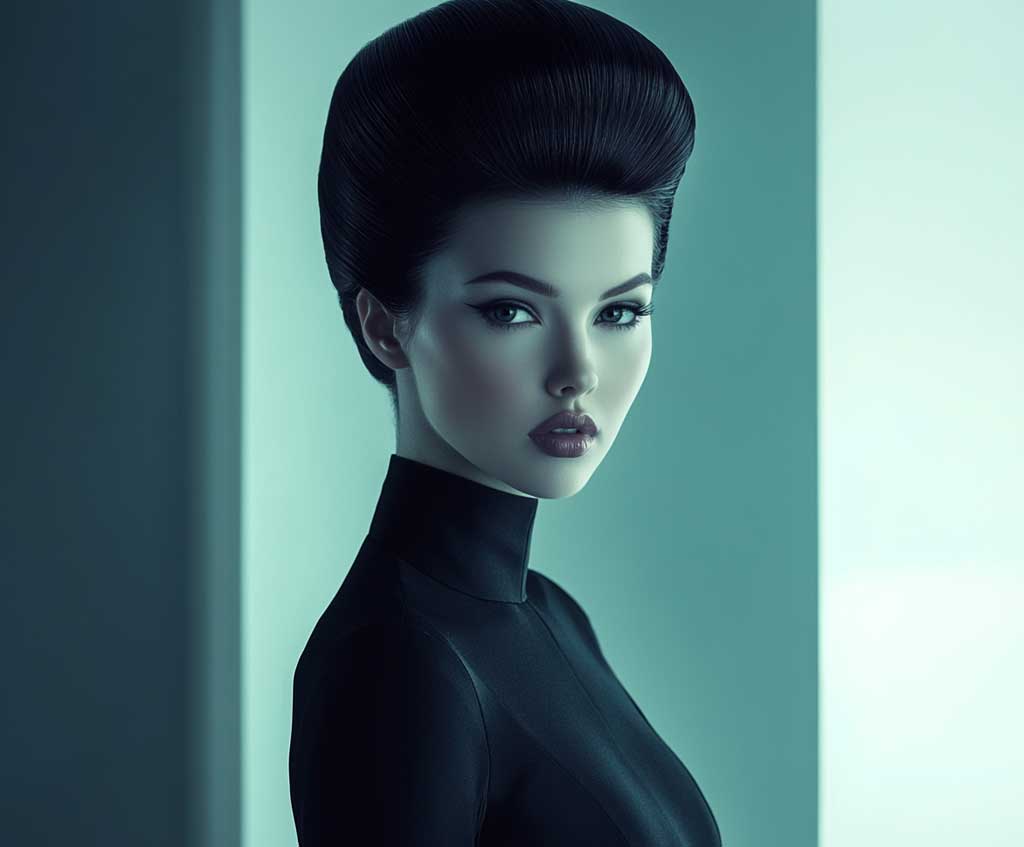
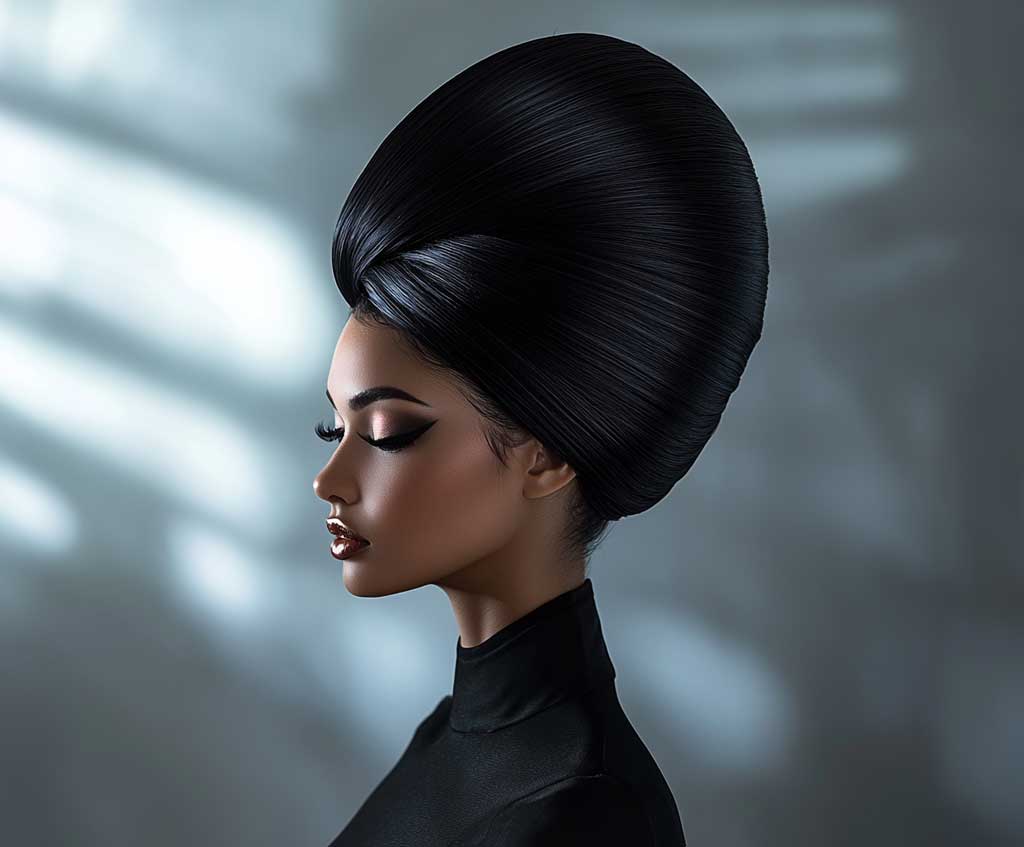
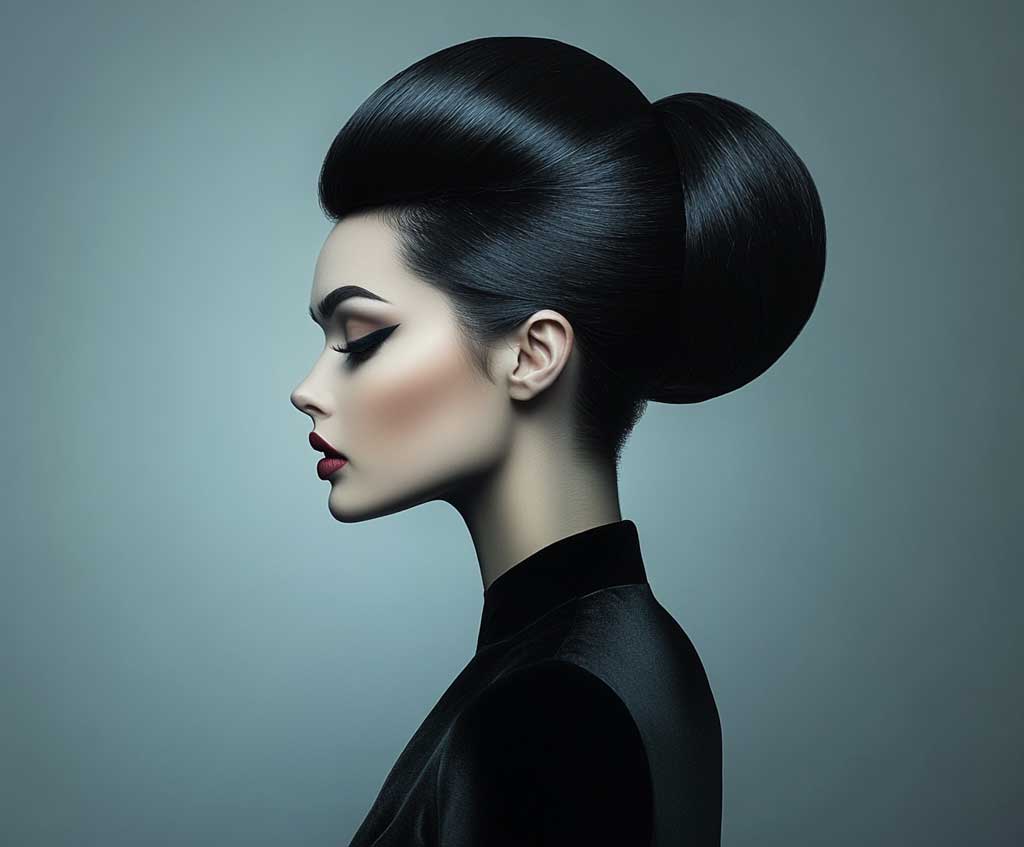
Section off the crown — roughly from ear to ear — and clip the rest away. Take half-inch pieces within that section and backcomb toward the root with a rat-tail comb, using short, firm strokes. Does this feel aggressive? It should. Thick hair requires real friction to build height. I backcomb each piece three or four times instead of once, which is the move most tutorials skip. Once the volume is built, lay one smooth section of hair over the teased base and brush it lightly with a Mason Pearson Bristle Brush ($225) or a budget alternative like the Denman D3 ($18). The black hair’s natural shine does the rest of the work — you’ll see the surface turn mirror-like in about thirty seconds of brushing.
Secure the entire structure with at least six bobby pins angled inward toward the center, not just pinned flat. Flat pins release under thick hair’s weight within a couple of hours — trust me on this one. Finish with L’Oréal Elnett Satin Extra Strong Hold Hairspray ($14.99), which gives a glossy coat without the crunch. Pair this look with a bold lip and keep accessories minimal; the architecture of the bouffant is already doing the heavy lifting. For formal dinners or gala events, this silhouette photographs exceptionally well under direct light.
One thing to avoid: skipping the blow-dry and going straight to teasing on air-dried thick hair. The result is a frizzy, undefined bump that looks nothing like a bouffant. Air-dried thick hair is too unpredictable in texture for this style — the blow-dry step is non-negotiable, not optional prep.
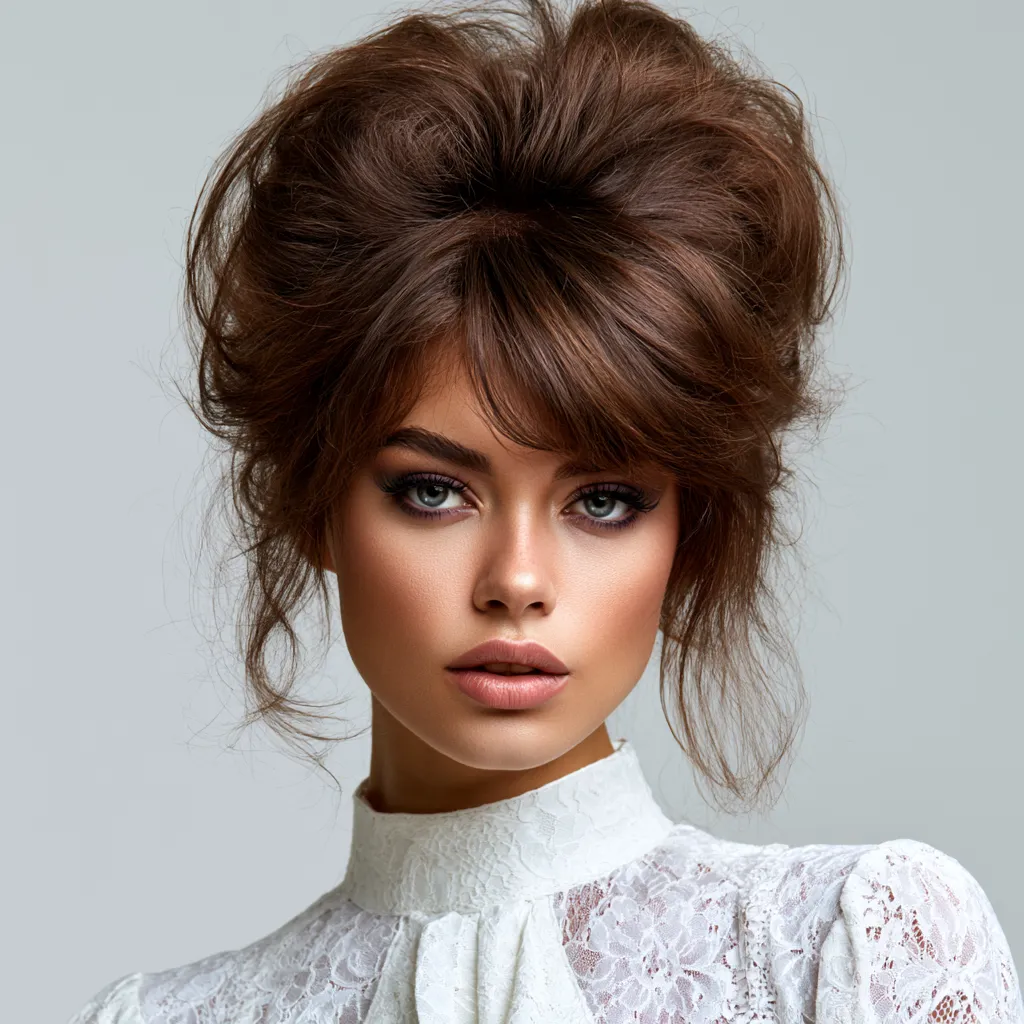
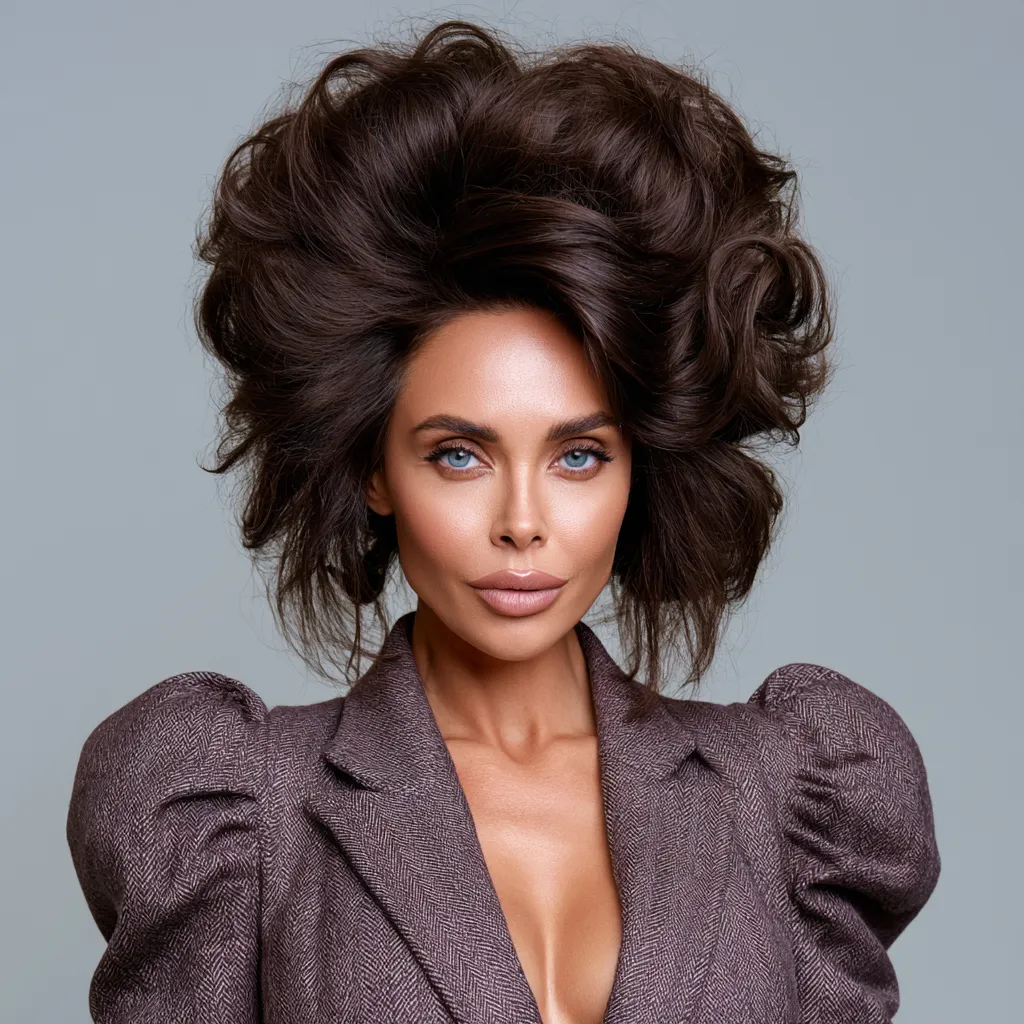
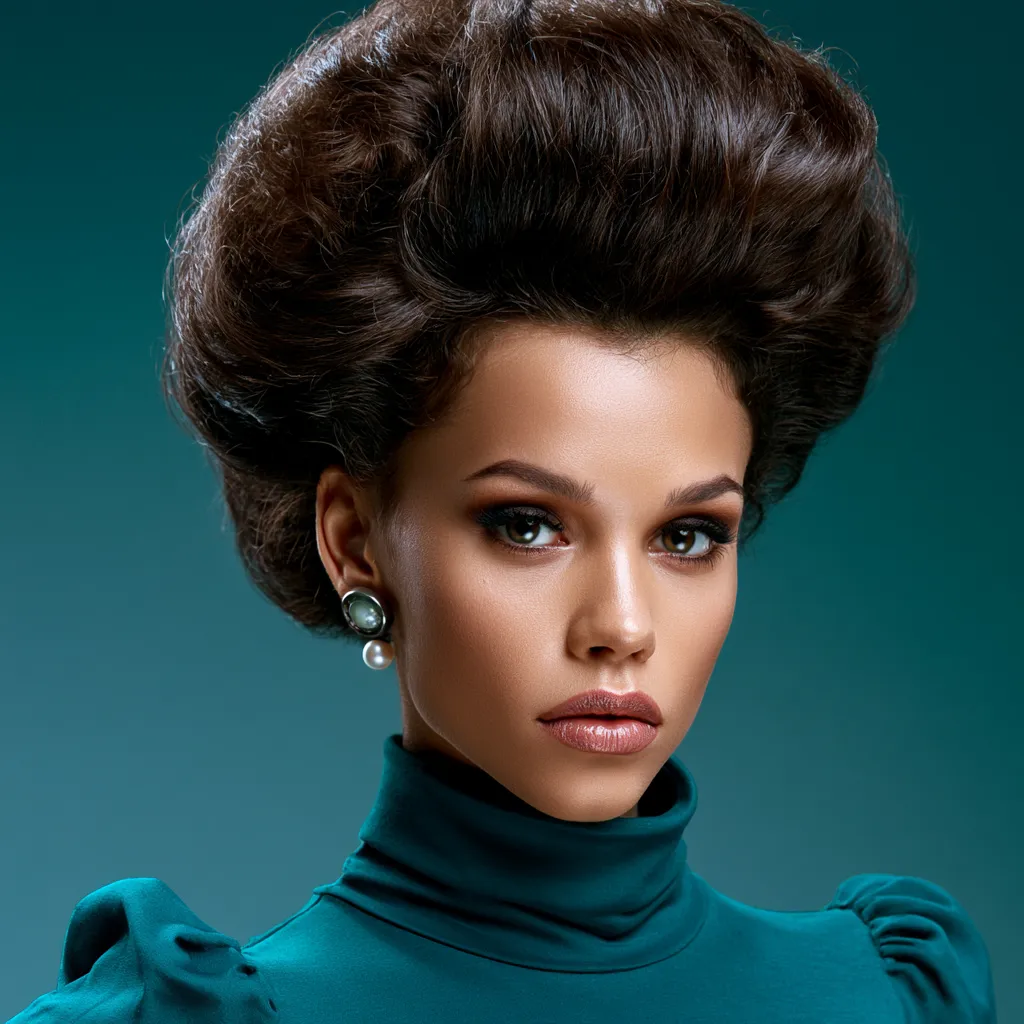
Caramel Bouffant Hair with Warm Depth and a Vintage Sweep
Caramel-toned bouffant hair on thick strands hits differently than any other color combination I’ve tried — the warm undertones create natural-looking dimension inside the teased crown, so the volume reads as intentional rather than accidental. Start with a smoothing serum: I use Moroccanoil Treatment Original ($46 for 3.4 oz) because it reduces frizz without weighing down thick hair. Blow-dry section by section with a Kent Salon Brush, focusing on the ends last. Then take a 1.5-inch curling iron and add a single loose wave to each side section — not ringlets, just one pass. This wave creates the gentle flow at the sides that makes the bouffant look like a complete shape instead of a volume island on top of straight hair.

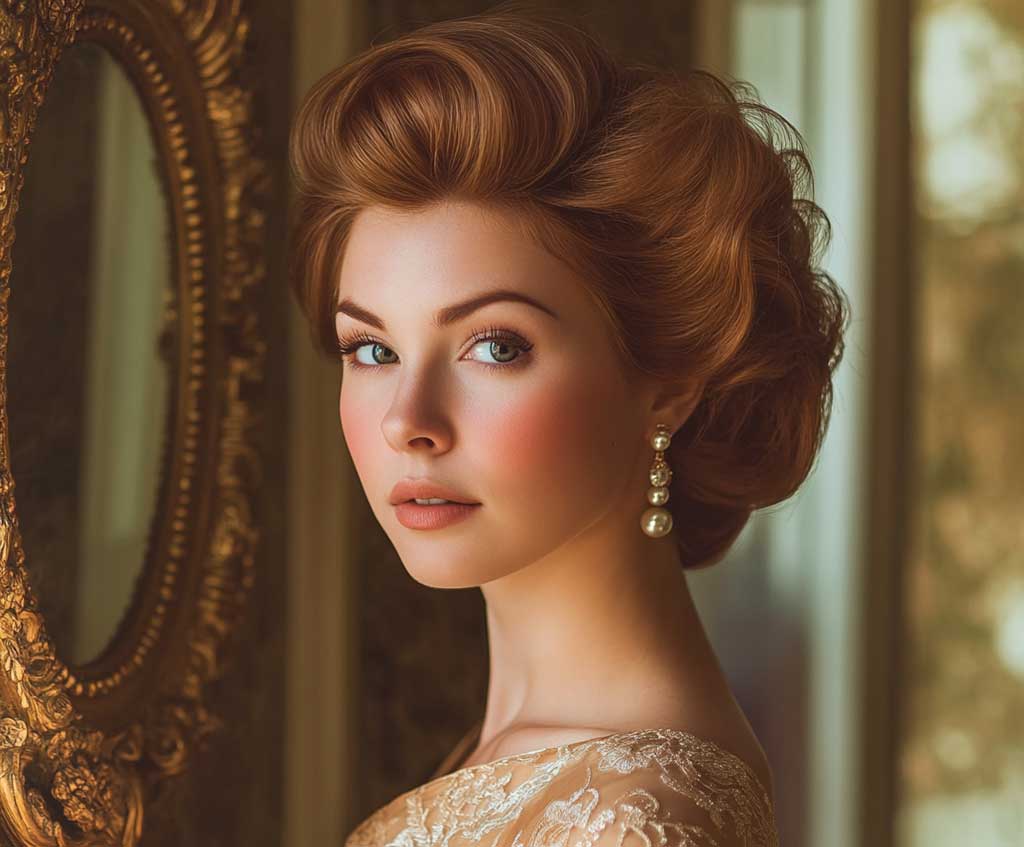
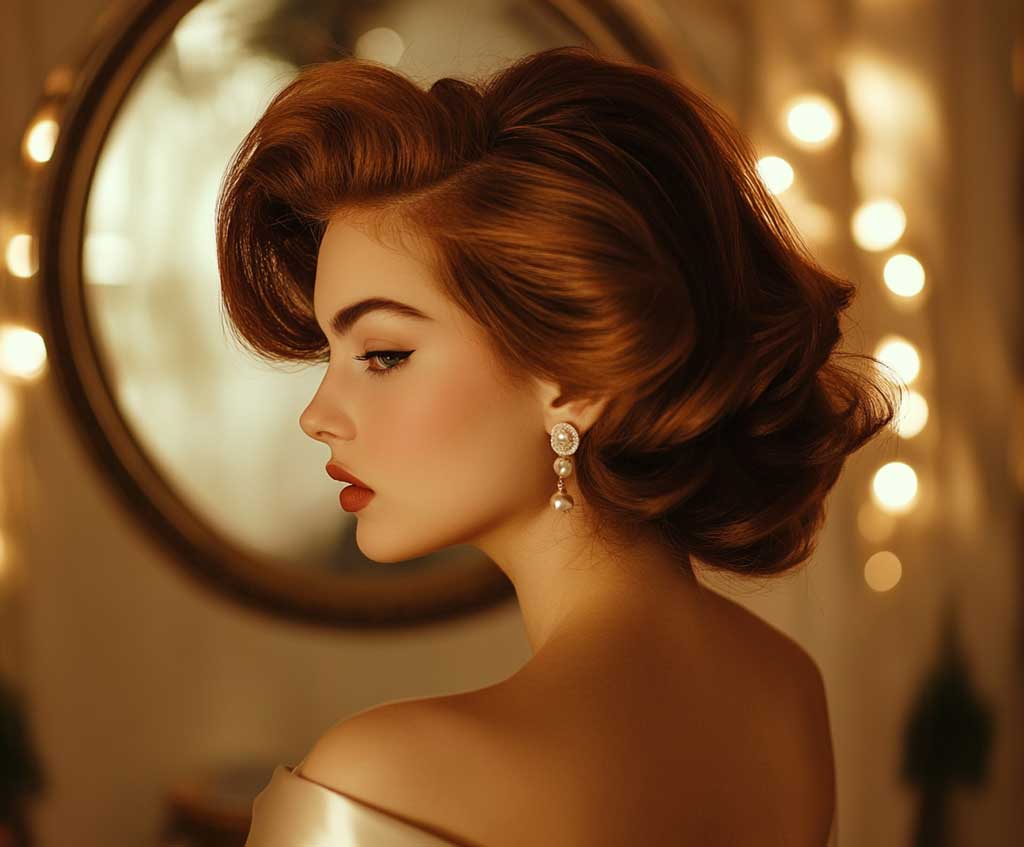
Build the bouffant by backcombing the crown in layers — start at the section closest to the nape of the crown and work forward. This layered approach gives you a rounded, domed shape rather than a flat pancake of volume. Ever notice why some bouffants look ’60s-authentic and others just look messy? It’s the dome. Smooth the outer top layer with a bristle brush, then pin the structure using U-shaped pins rather than bobby pins — they distribute the weight better and are worth the $6 you’ll spend on a pack. Spray with a light-hold mist like Bumble and bumble Dont Blow It ($30) for shine without stiffness.
The caramel color pulls out the bouffant’s internal structure in a way dark hair doesn’t — you can actually see the shape from across the room. This look works beautifully for weddings, especially outdoor settings where warm-toned hair photographs with a soft glow. Pair it with pearl accessories or a simple gold drop earring, not heavy chandelier styles that compete with the hair’s height. For those wanting to see how this shape translates to shorter lengths, bouffant hair styling for short hair follows the same dome-building principle with a few key adjustments.
- Don’t backcomb wet or damp hair. It stretches and snaps the strands — especially damaging on already-thick hair that’s heavier at the root. Always backcomb fully dry hair.
- Don’t use maximum-hold hairspray before teasing. Spraying before structure sets the hair in whatever shape it’s already in, which is flat. Spray only after the volume is built.
- Don’t use a paddle brush to smooth the bouffant top layer. Paddle brushes are too flat and too wide — they drag the teasing apart. Use a small round brush or a natural-bristle brush instead.
- Don’t make every section the same width when backcombing. Uniform sections create uniform gaps in the structure. Vary the widths between a quarter inch and three-quarters of an inch for a denser, more stable base.
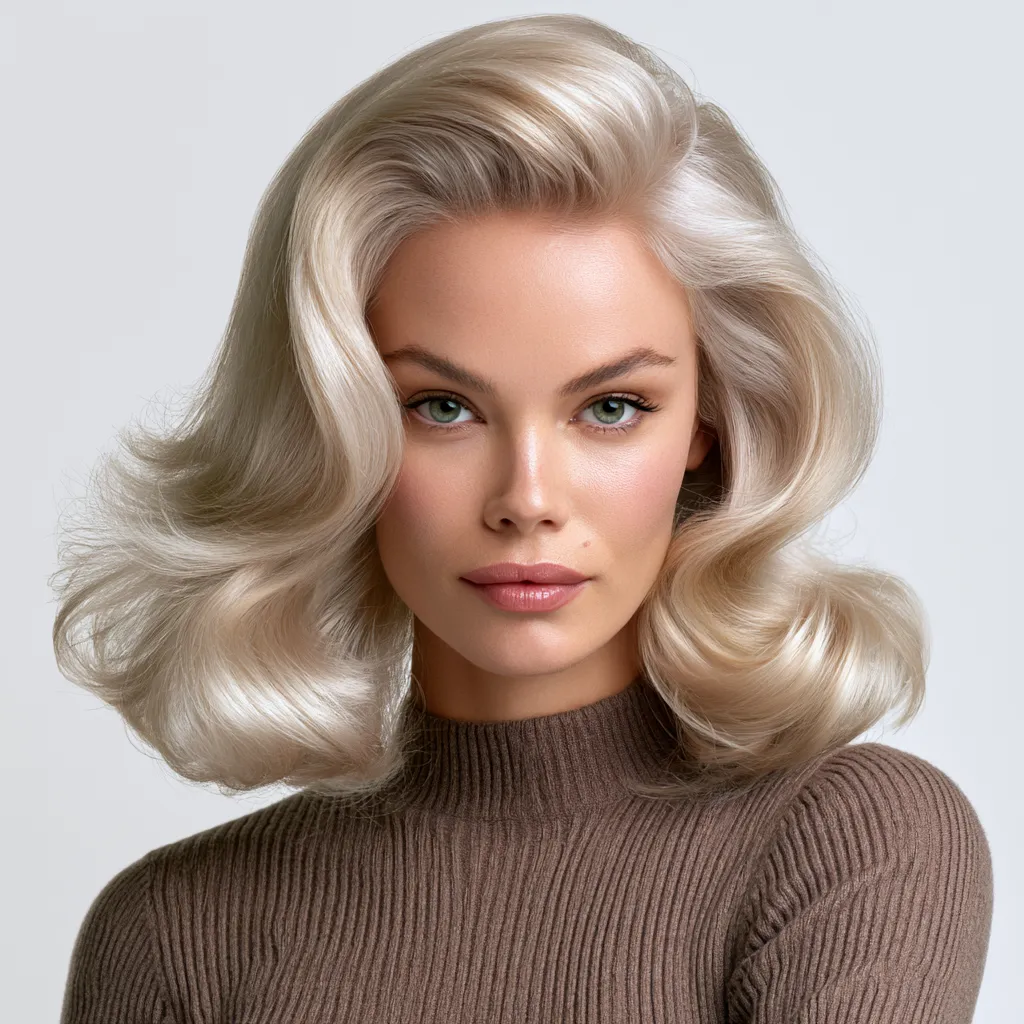
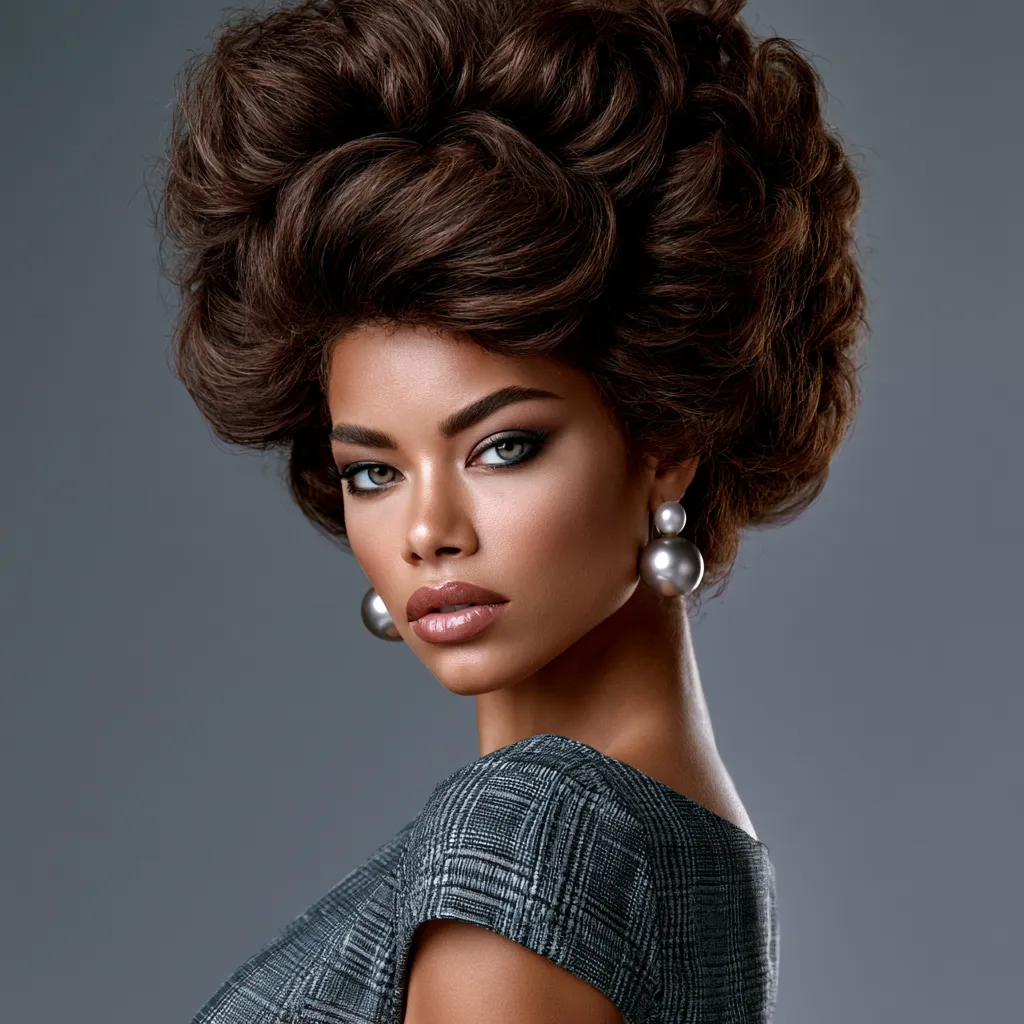
Platinum Bouffant Hair at Full Dramatic Height
Platinum is the most demanding color to bouffant-style because the bleaching process that creates it also strips hair of some of its natural density — and yet the platinum bouffant is the most striking version of this hairstyle you can do. You’re working with thick strands that have been chemically processed, which means you need to rebuild some of the structural integrity before teasing. I reach for Redken Extreme Bleach Recovery Cica Cream ($28) as a leave-in after washing, then apply TIGI Bed Head Bigger the Better Volumizing Blow-Dry Foam ($18.99) at the roots while the hair is about 70% dry. Blow-dry upward from the roots using a round brush, lifting the sections while they dry — this pre-loads volume into the hair shaft before you even start teasing.
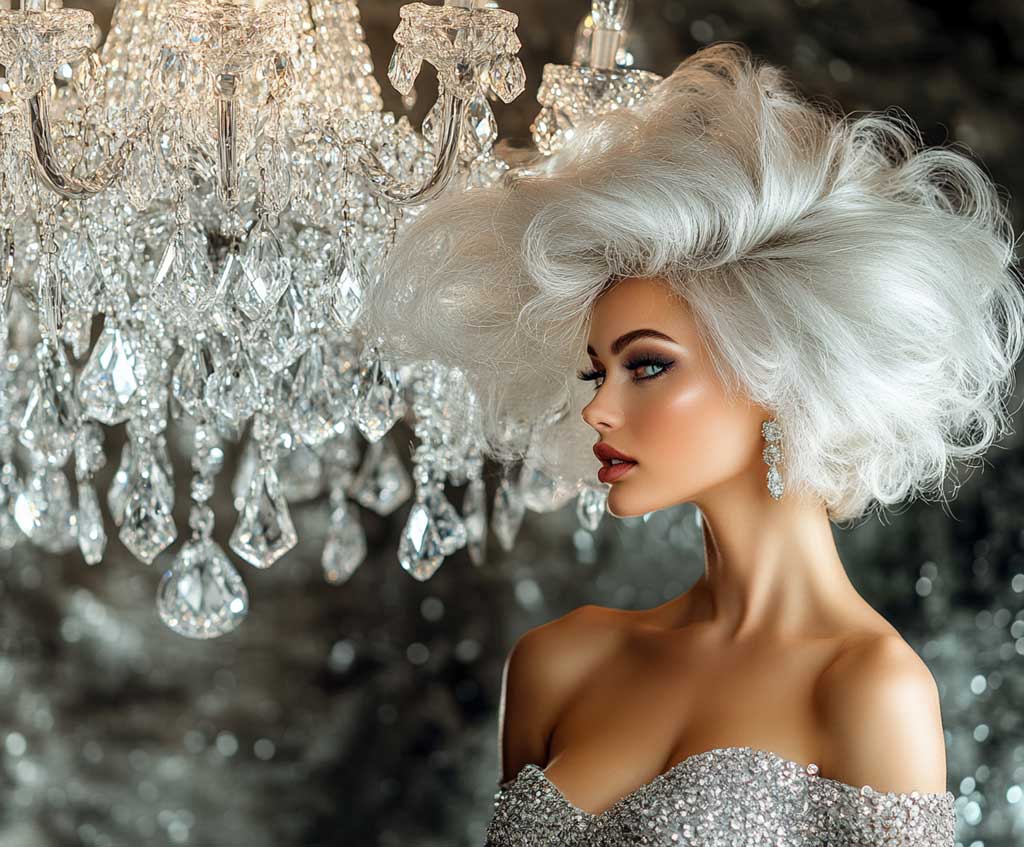
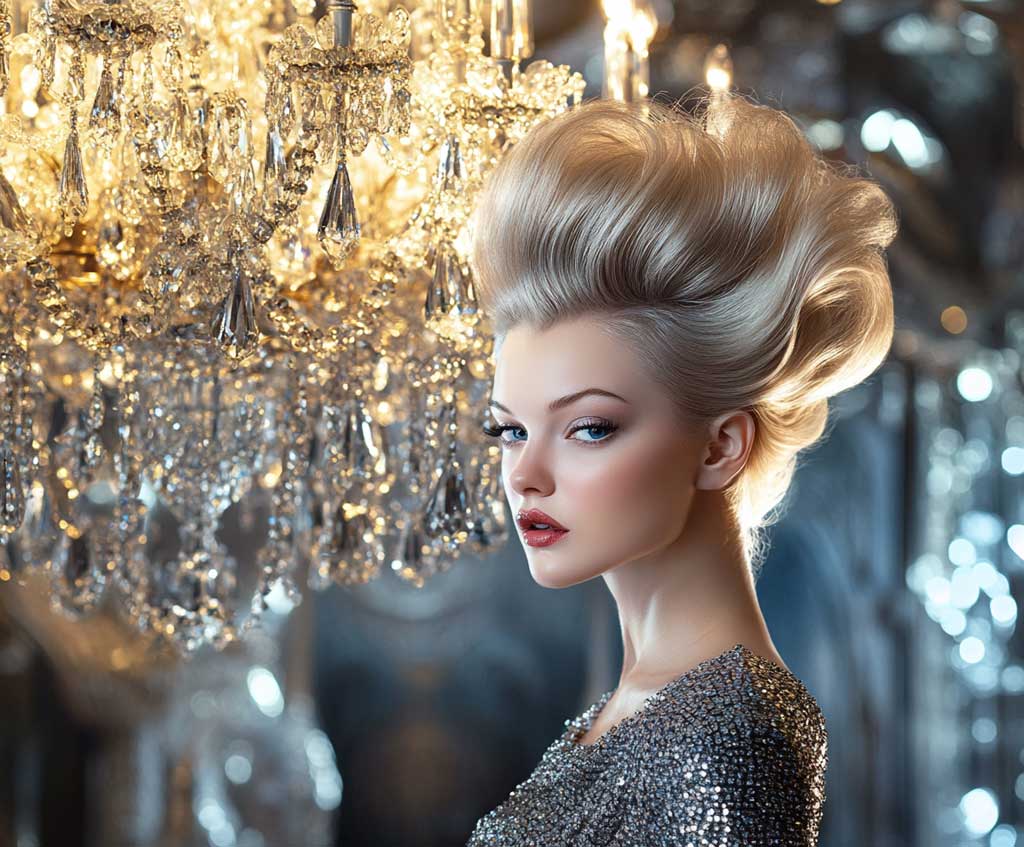
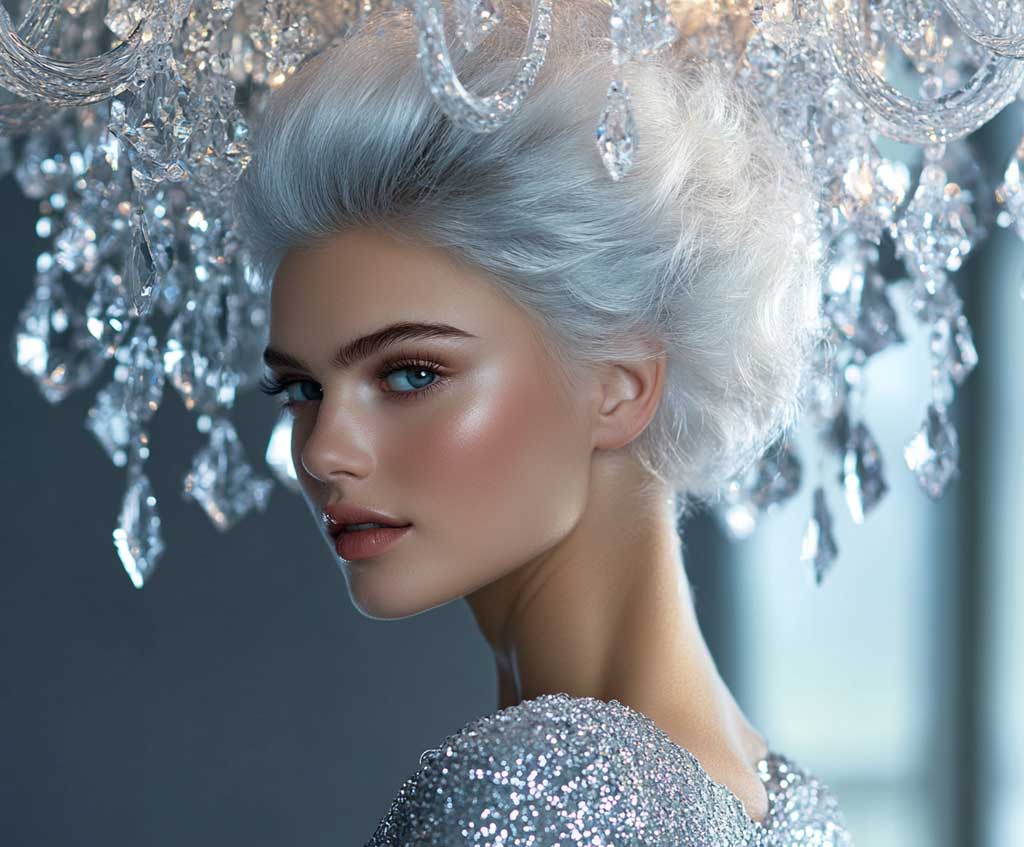

Flat-iron the sides smooth with a GHD Platinum+ ($249) or a more affordable BaByliss Pro Nano ($79) — both deliver the glassy finish that makes the sides read as a deliberate contrast to the crown’s height, not just uncombed hair. Backcomb the crown section using the same layered-section approach as the caramel version, but this time backcomb lighter and more frequently. Platinum hair tangles more easily, so shorter, faster strokes with a fine-toothed comb protect the integrity of the strand. What’s the payoff? The ice-toned color catches the light inside the crown’s structure and makes the height look even more extreme than it actually is — a visual trick worth knowing.
Finish with Paul Mitchell Super Skinny Serum ($24) smoothed along the top layer, then mist with a shine spray like CHI Illuminating Shine Spray ($19). Silver or crystal accessories — not gold — keep the metallic theme consistent. This look is made for high-contrast settings: black-tie events, editorial shoots, or any occasion where you want people to remember the hair first. Wella’s professional tutorial on styling a modern bouffant is worth bookmarking if you want to study the backcombing technique in video form. For a softer take on this same structural shape, voluminous bouffant updos for medium hair show how the same crown-forward silhouette works at shoulder length.
What most people get wrong with platinum bouffants is over-teasing. More backcombing does not mean more volume on processed hair — it means breakage and a frizzy surface that no amount of smoothing will fix. Six to eight passes per section is the ceiling; beyond that, you’re destroying the strand, not building the style.
Final Word
Thick Hair Is the Best Raw Material for a Bouffant — Stop Fighting It
The structural density that makes thick hair difficult to style is exactly what makes a bouffant on thick hair last all day without collapse. Your volume is a feature, not a problem — you just need to redirect it.
The blow-dry foundation is the step that separates a bouffant that holds from one that falls flat in two hours. Do not skip it. Backcomb in layered sections, vary your widths, and pin inward — not flat.
Color changes the read: black reads sleek and dramatic, caramel reads warm and vintage, platinum reads editorial and sculptural. Pick the one that matches the occasion. Save this post before your next event so you’re not searching for it at 6am getting ready.
Related Topics