Jazz age hairstyles from the 1920s are having a real moment, and not just at costume parties. I’ve watched finger waves go from “theatrical” to full red carpet at three separate events this year alone. The looks here cover six approaches — from jet black finger waves to pinned chocolate curls — each one buildable at home with tools you already own. You’ll notice that the difference between a stunning Jazz Age result and a flat, costume-shop vibe is almost always one thing: the right hold product applied to the right amount of dampness.
Some of these 1920s hairstyles take under twenty minutes. Some take forty-five. I’ll be honest about which is which.
Quick Scan
- Finger Waves (Jet Black) — highest drama, needs strong-hold gel and a fine-tooth comb. Allow 45–60 min to set.
- Curly Chin Bob (Platinum Blonde) — fastest flapper look. Curling iron + hairspray, 20 min.
- Rolled Updo (Golden Highlights) — best for weddings. Low nape roll + bobby pins. Formal and structured.
- Side-Part Bob (Chestnut Brown) — lowest maintenance. Blow-dry with inward tuck, done in 15 min.
- Wavy Bob + Feathered Headband (Auburn) — most playful. Curling wand, finger-comb, $12 feather band from Amazon.
- Pinned Curls (Dark Chocolate) — most polished. Set overnight for best results.


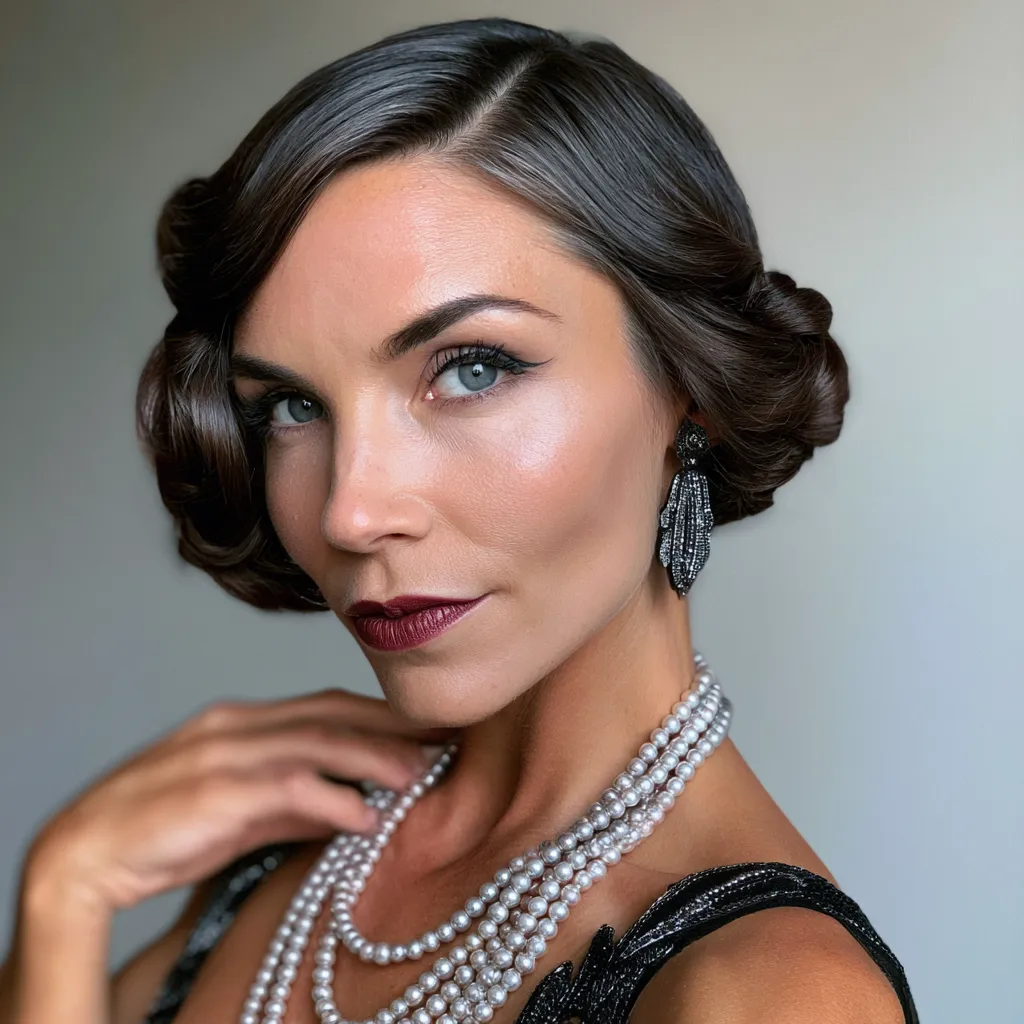
Finger Waves in Jet Black Hold Because of What You Apply First
Finger waves are the signature jazz hairstyle — the one that actually defined the 1920s more than any other single look. Wet hair is the non-negotiable starting point. I’ve tried doing this on dry hair twice, and both times I got a limp, vague suggestion of waves instead of the sharp S-curve you want. Apply Kenra Platinum Silkening Mist or a strong-hold gel like Eco Styler Olive Oil ($4 at Sally Beauty) to hair that’s about 80% damp — not dripping, not dry.
Use a fine-tooth comb to push the first wave ridge toward the face, then press your index and middle fingers down to anchor it while you comb the next section back. The pressure is what creates the definition — a wide-tooth comb won’t give you the same result. Secure each ridge with wave clips (the flat metal kind, about $6 for a pack of 12) and leave them in until the hair is fully dry. Removing them early is the single biggest mistake people make with this style. Sit under a hooded dryer if you have one, or give it a full hour at room temperature.
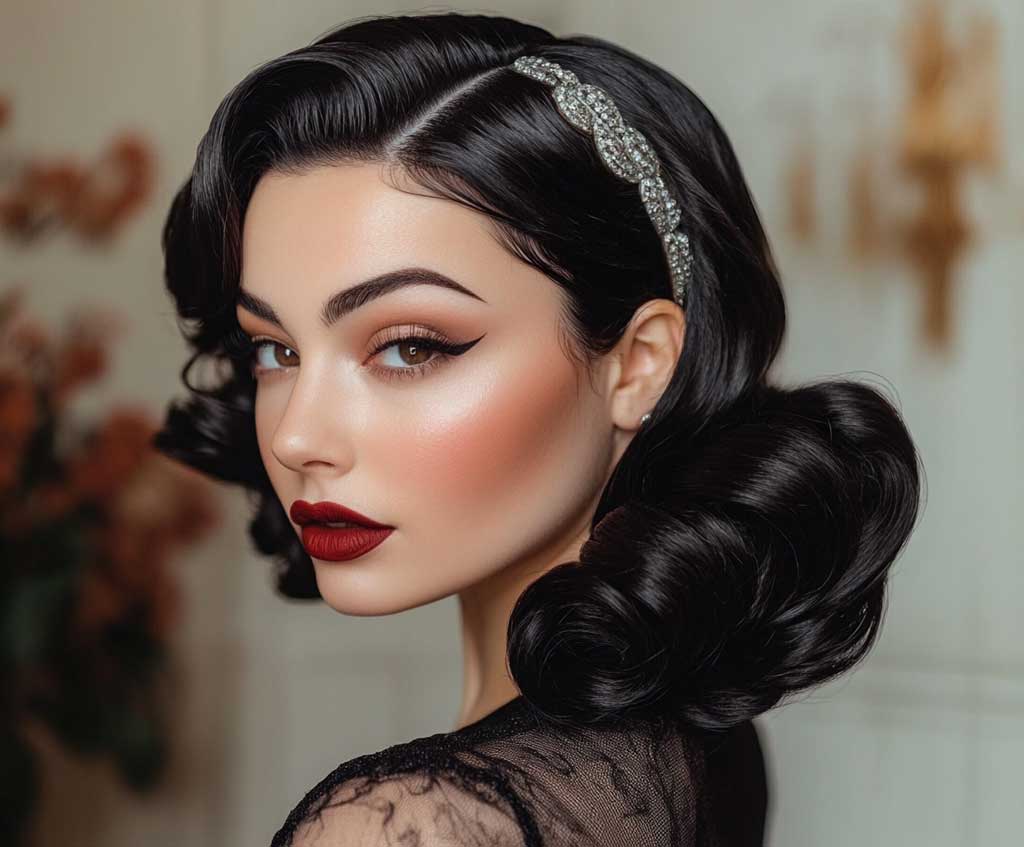
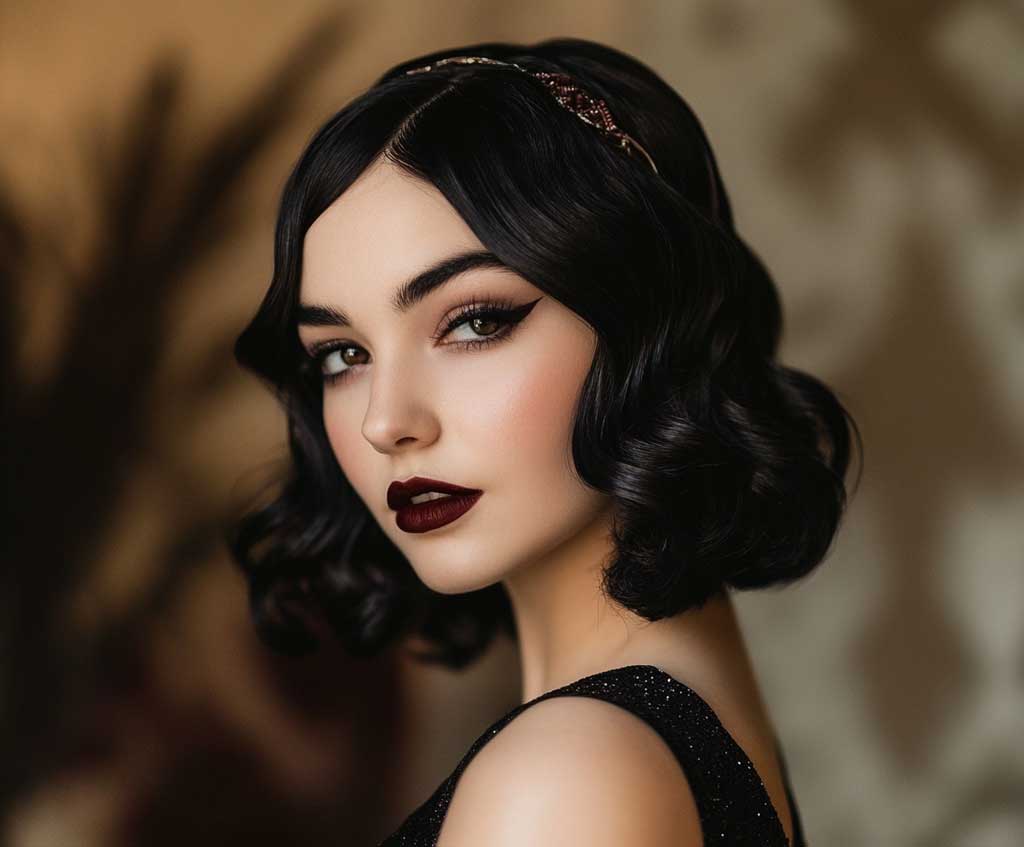
A jeweled headband placed just above the first wave ridge — not at the forehead, but about half an inch back — adds the period-appropriate detail without looking like a Halloween prop. The jet black color does a lot of heavy lifting here: it makes the light-and-shadow contrast of the waves pop in photographs in a way that lighter colors simply don’t. My go-to finishing step is a single pump of Moroccan Oil Glimmer Shine sprayed onto a brush and smoothed lightly over the surface — it mimics the lacquer finish in every 1920s portrait you’ve ever seen.
Finger waves suit short to medium hair best. If yours is past the collarbone, the wave pattern gets heavy and starts to drop by hour three. For long hair, consider the rolled updo section below instead.
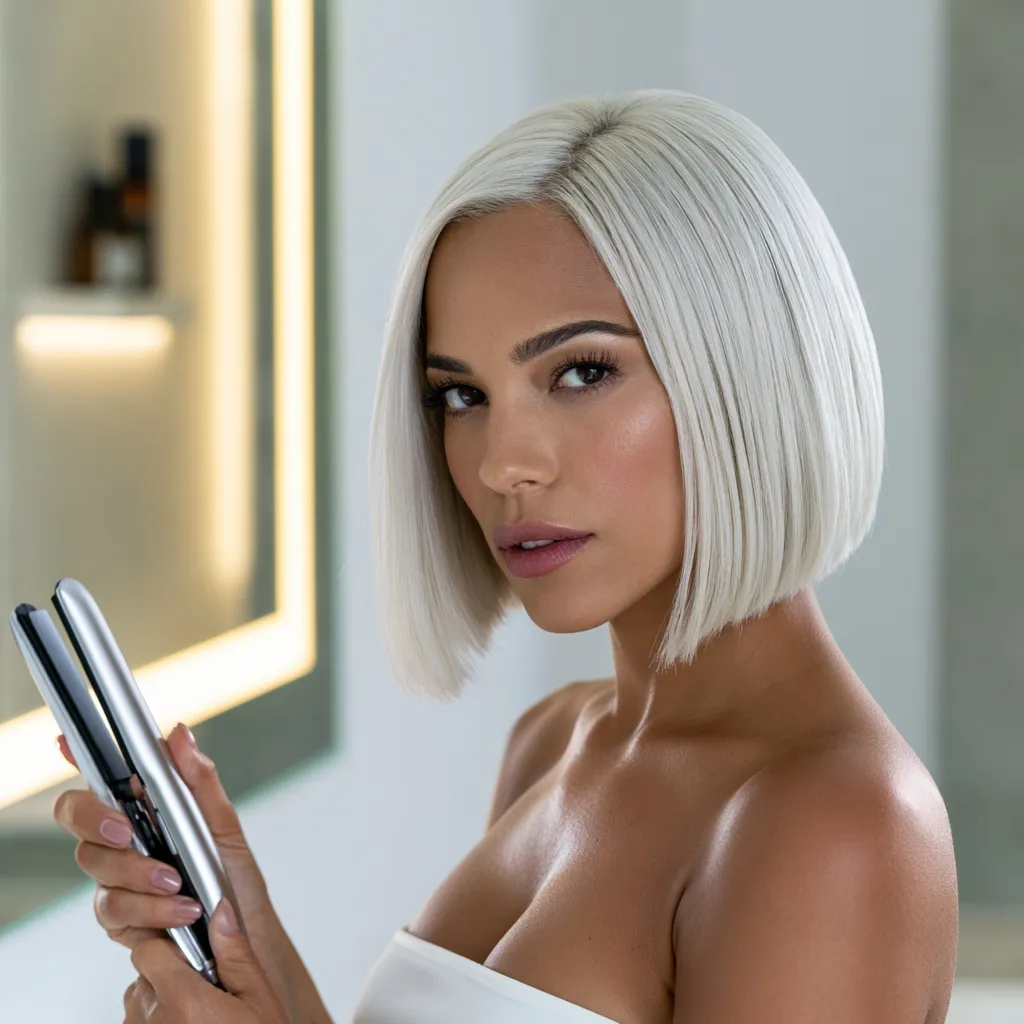
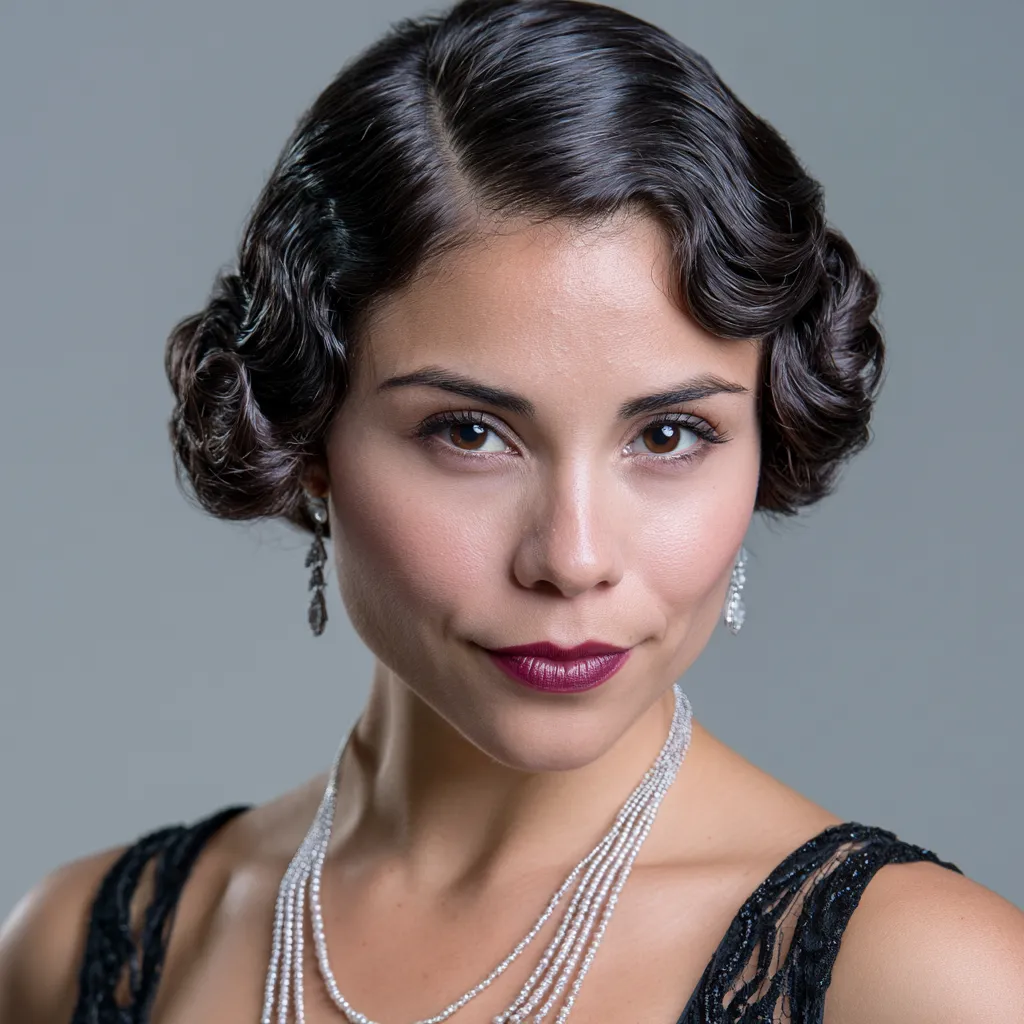
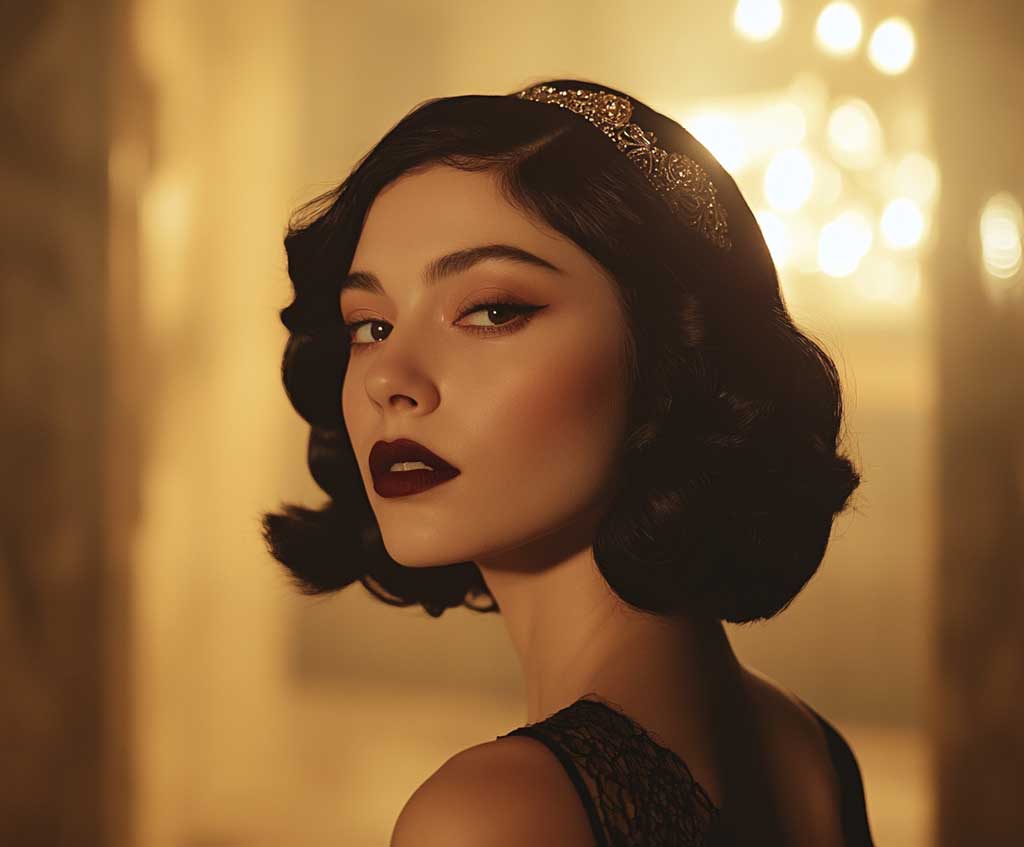
Platinum Blonde Chin Bob Gets the Flapper Shape from One Specific Curl Direction
The chin-length bob with curls is the second most recognizable Jazz Age hairstyle, and platinum blonde is its most dramatic version. You’ll notice immediately that this is not the same as a modern beach wave — the curls need to wrap inward toward the face on the front sections, not away from it. Outward curls look contemporary. Inward curls look 1920s. Use a 1-inch barrel curling iron (the Remington Pro is $28 and works perfectly for this) and hold each section for about 8 seconds on medium heat.
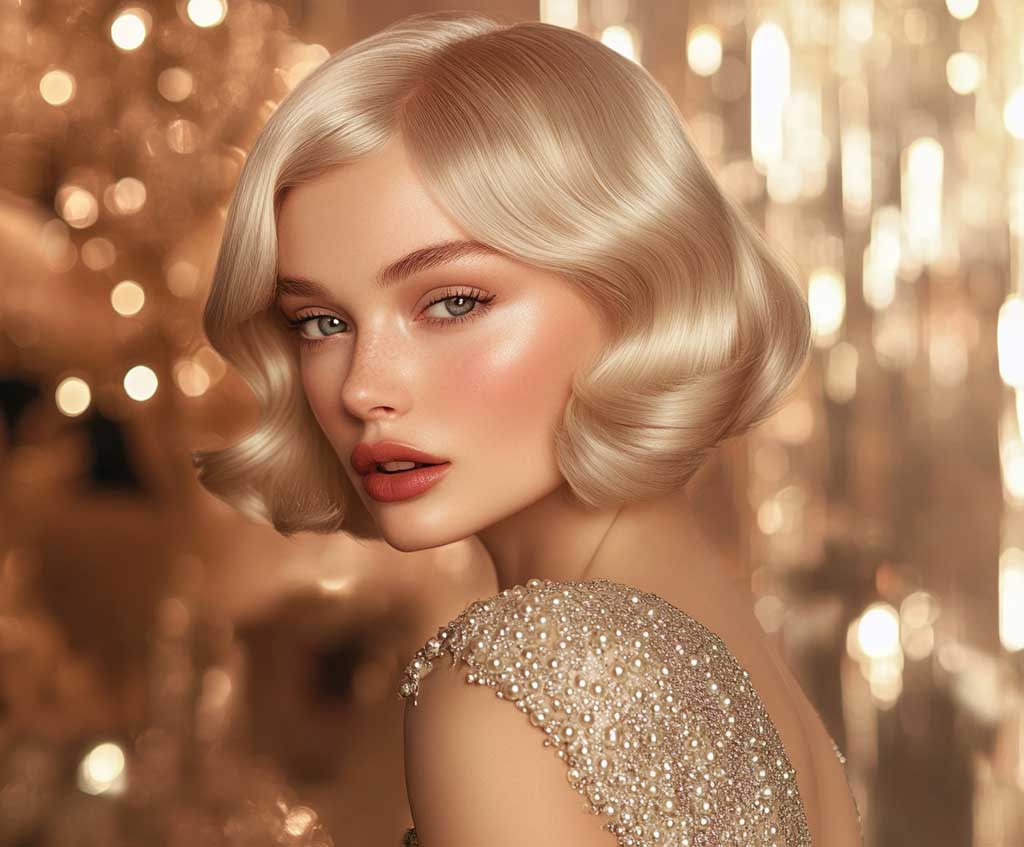
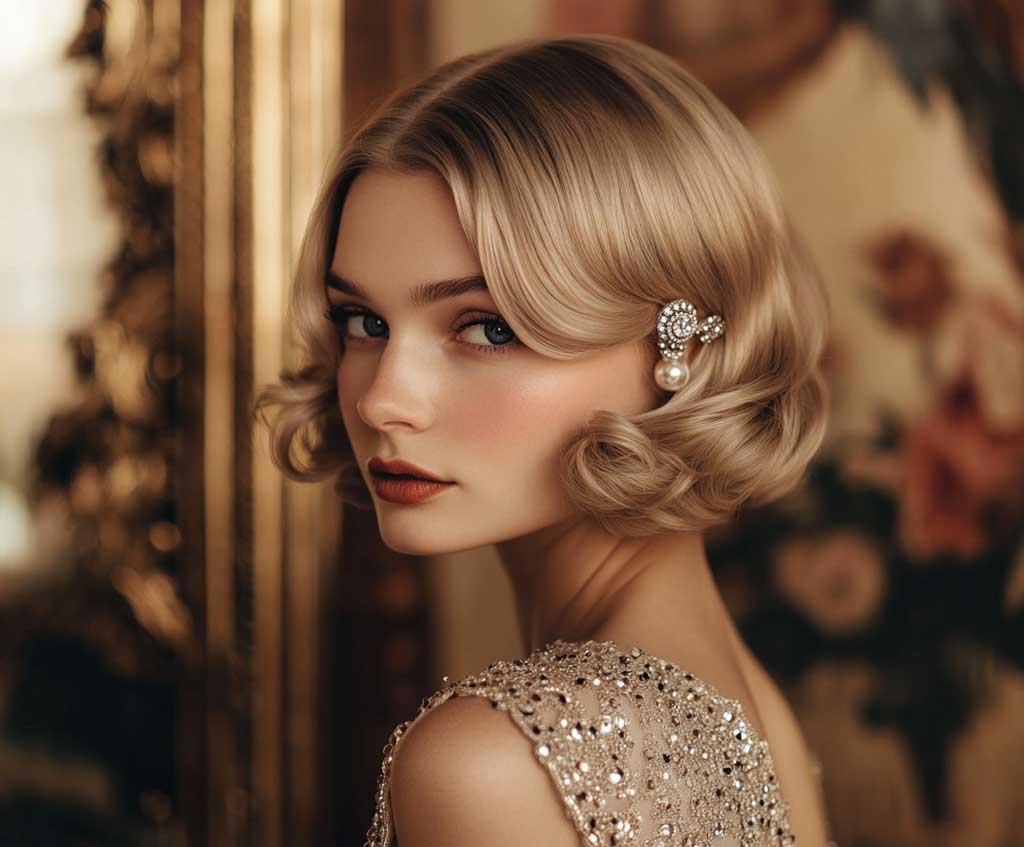
Mist with a light-hold hairspray like Kenra 25 Volume Spray (not a freeze-hold formula — you still want movement) once all sections are curled. Then leave the curls completely alone for five minutes. Don’t touch them. Don’t separate them. The curl needs to cool in its shape before you disturb anything or the wave goes limp. After five minutes, very gently run your fingers through just the ends to soften. The result should read “deliberate 1920s wave,” not “fresh from the salon blowout.”
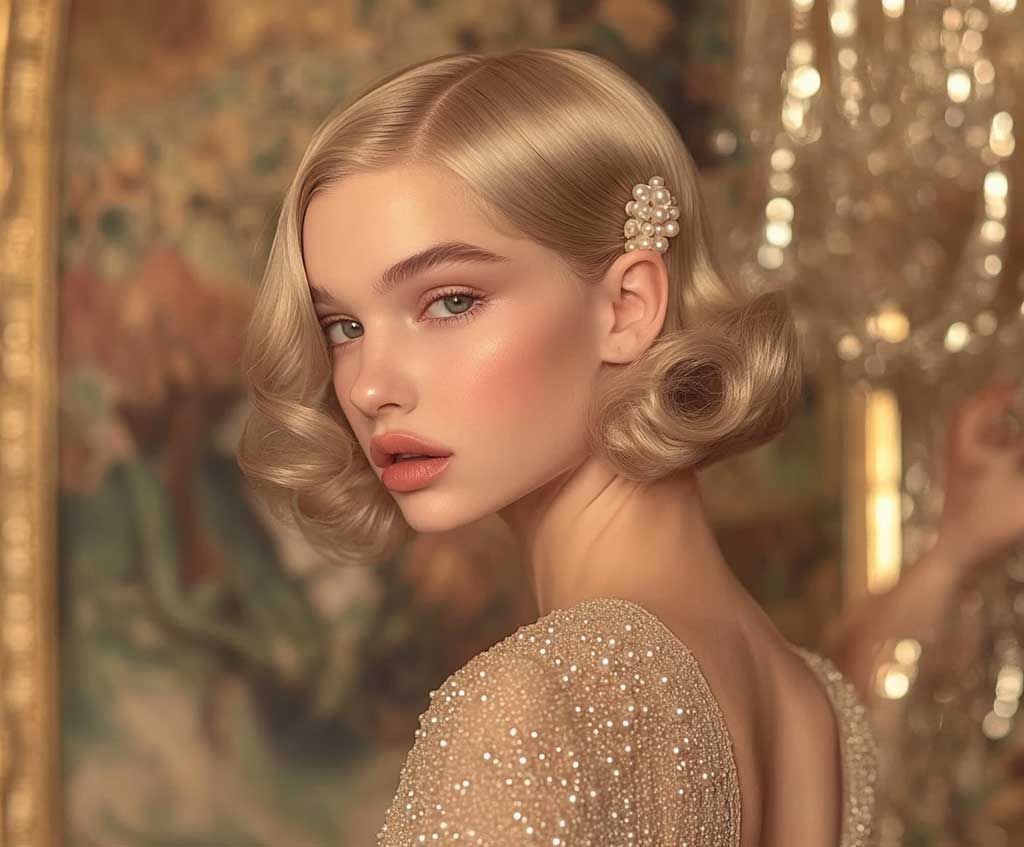
Platinum blonde makes this bob photograph exceptionally well because the highlights pop in every shade of indoor light. A pearl hair clip on one side — offset rather than centered — adds the vintage period detail without overdoing it. I’ve seen people try this with a glittery barrette instead, and it reads closer to New Year’s Eve than Jazz Age.
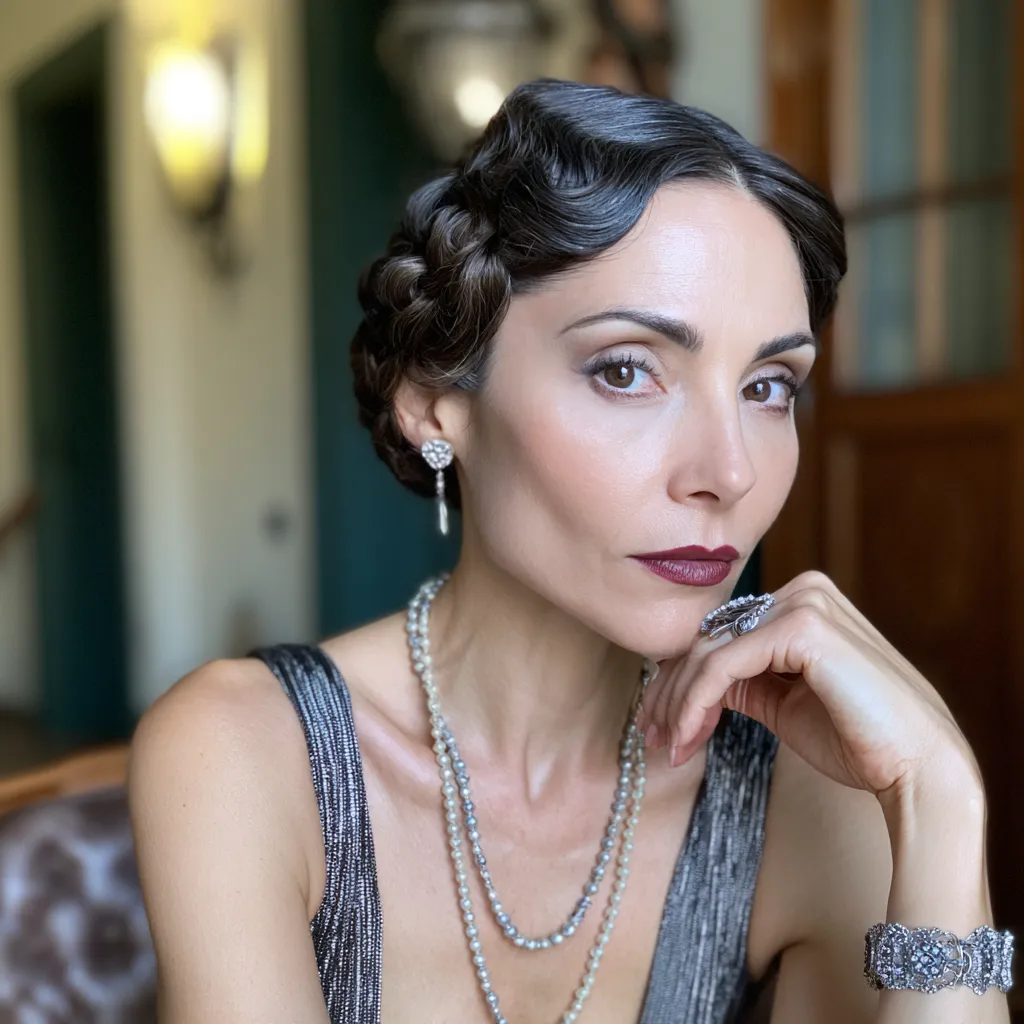
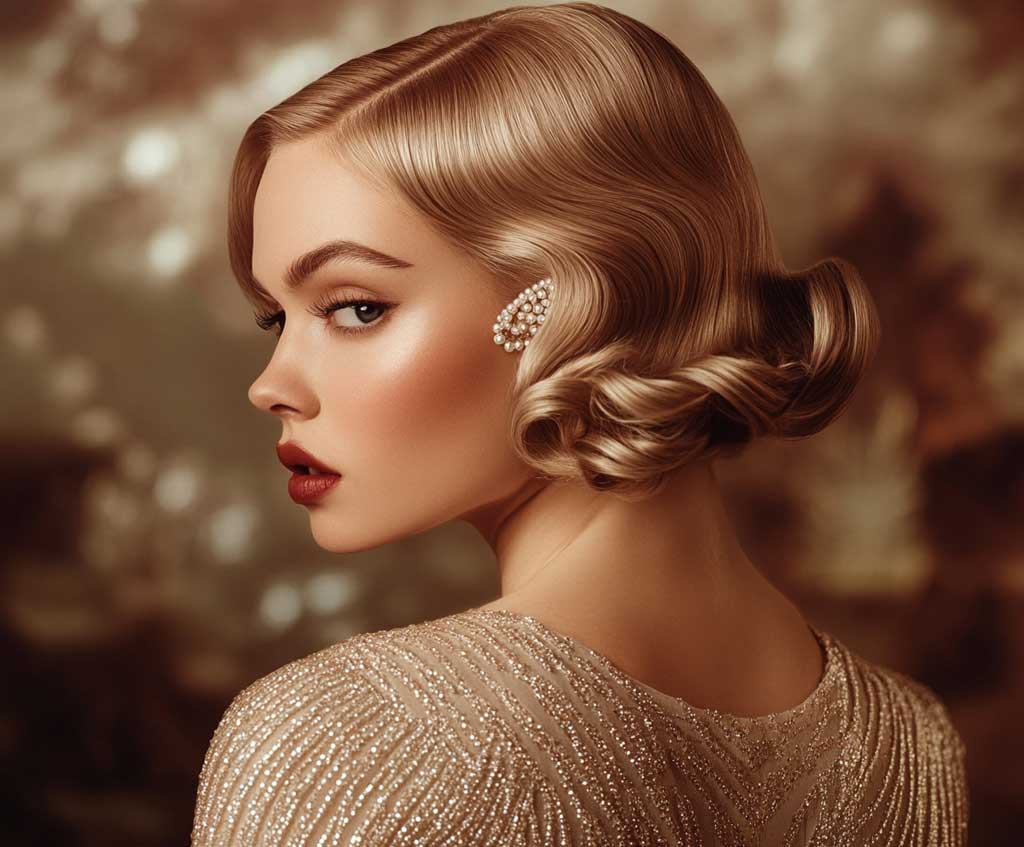
The Rolled Updo with Golden Highlights Reads Wedding-Ready for a Specific Reason
If you’re searching for a 1920s hairstyle that works at a wedding — either as a guest or a bride — the rolled updo is the one. Finger waves are spectacular, but they’re also undeniably bold. The rolled updo with golden blonde highlights lands in more formal territory: structured, elegant, and polished enough to sit next to a cathedral veil without competing with it. I’ve seen this exact style on bridesmaids at two Great Gatsby-themed receptions and it photographed beautifully in both cases.
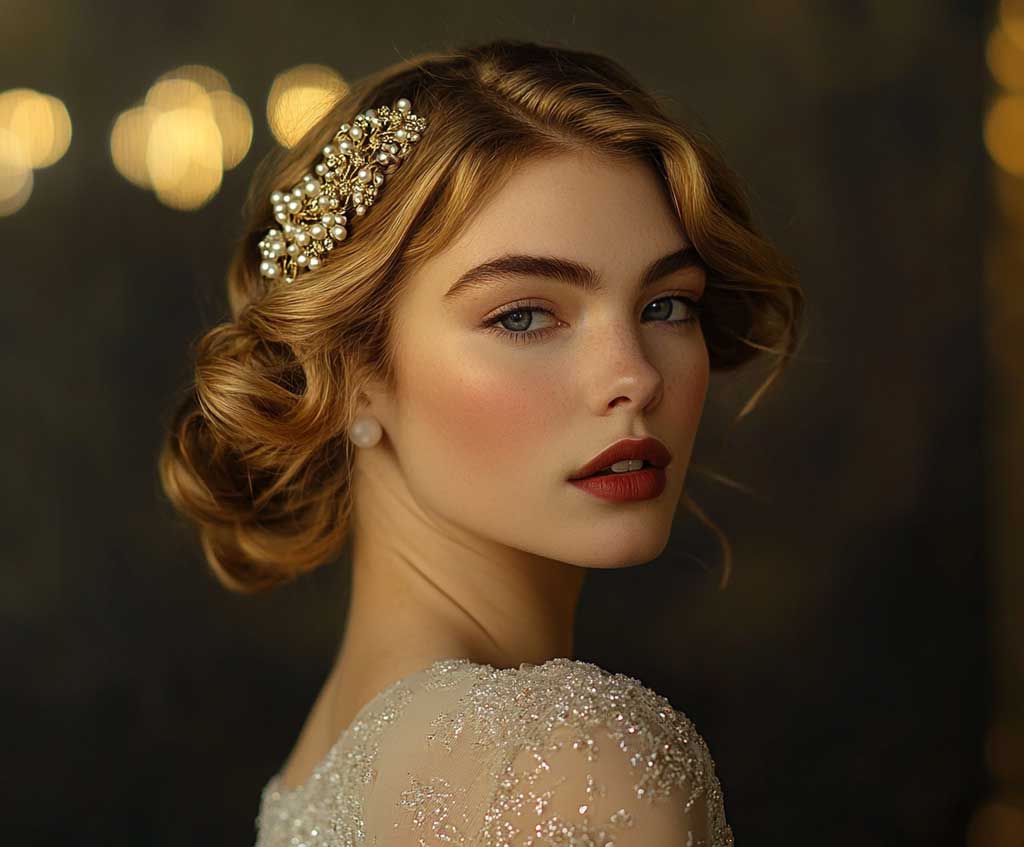


Start by creating very soft waves throughout the hair with a large-barrel iron — 1.5 inches or bigger. Gather all the hair at the nape, twist it once, and roll it upward into a smooth, tight cylinder. Secure with five or six bobby pins placed perpendicular to the roll (parallel pins pop out; perpendicular pins hold). The golden highlights do the work of making this style feel alive rather than severe. Flat, single-tone blonde updos read more 1940s than 1920s — the multi-tonal warmth of highlights is what places this squarely in the Jazz Age.
A pearl-studded hairpin from brands like Goody or a decorative piece from Etsy sellers (search “Art Deco bridal hairpin,” expect to spend $15–$35) placed at the side of the roll finishes the look. Skip the flower — floral accessories push this toward cottage-core, which is a completely different decade.
Don’t Do This
The most common mistake with all six of these 1920s hairstyles is using a texturizing spray before styling. Sea salt spray and texture products create a matte, tousled finish that is the exact opposite of the glossy, sculpted aesthetic the decade demanded. The 1920s was not a “undone waves” era. Everything was deliberate and lacquered. Start with clean, smooth hair, apply either a gel or a light serum depending on the style, and finish with a shine spray — never a matte product. I also learned the hard way that bobby pins in a rose-gold tone look anachronistic against any of these period looks. Use silver or antique brass.
Chestnut Brown Side-Part Bob Requires One Product and One Direction Choice
The short bob with a deep side part is arguably the most wearable of all these 1920s hairstyles. It’s not the loudest look in the room, but it photographs with a quiet authority that the more theatrical styles can’t quite match. Chestnut brown is the right color choice here specifically because it shows the depth of the blunt cut line without the high contrast of jet black. You need that line to be visible — it’s what gives the bob its architectural quality.


Part the hair on a deep side — much further over than feels natural, almost at the eyebrow line. Blow-dry in sections using a paddle brush, directing each section inward at the ends rather than under or outward. That slight inward tuck is the detail that makes this look period-specific rather than just “short bob.” Spray the entire surface with a shine serum before you finish drying — I use Frizz Ease Extra Strength (about $12) because it smooths without stiffening. Does this take long? Fifteen minutes, tops. It’s my go-to when I want a vintage look that still works at a morning meeting.
A small jeweled pin on the heavy side of the part — placed above the ear — adds the 1920s accessory element without requiring a headband. Headbands on this particular cut push it toward costume territory. The pin keeps it editorial. For a subtle upgrade, pair this bob with finger wave details at the temples if your hair is long enough at the front sections.
Auburn Wavy Bob with a Feathered Band Works Because the Headband Does the Styling Heavy Lifting
Soft auburn is one of the most underrated color choices for 1920s hairstyles — it reads warm and romantic rather than high-drama, and it suits a much wider range of skin tones than jet black or platinum blonde. The feathered headband is not an accessory in this look; it’s structural. Place it correctly and it defines the entire silhouette. Place it wrong — too far back, or flat against the head — and you get a look that reads more 1970s bohemian than Jazz Age flapper.


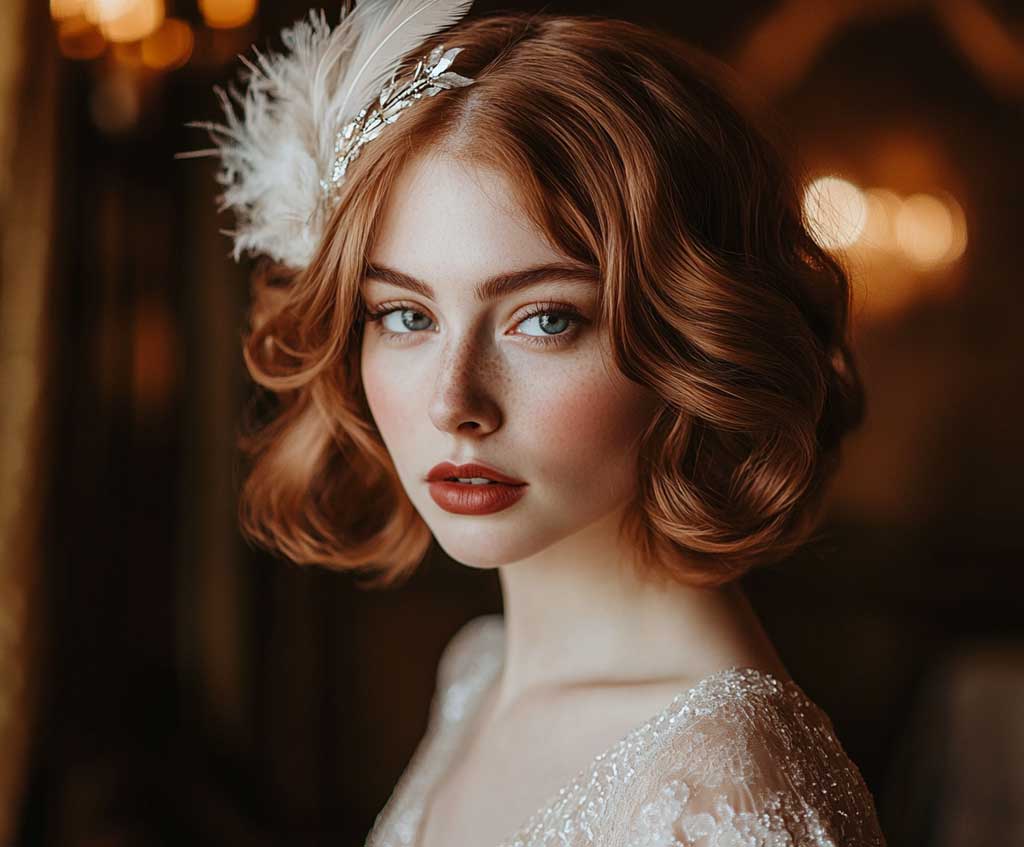
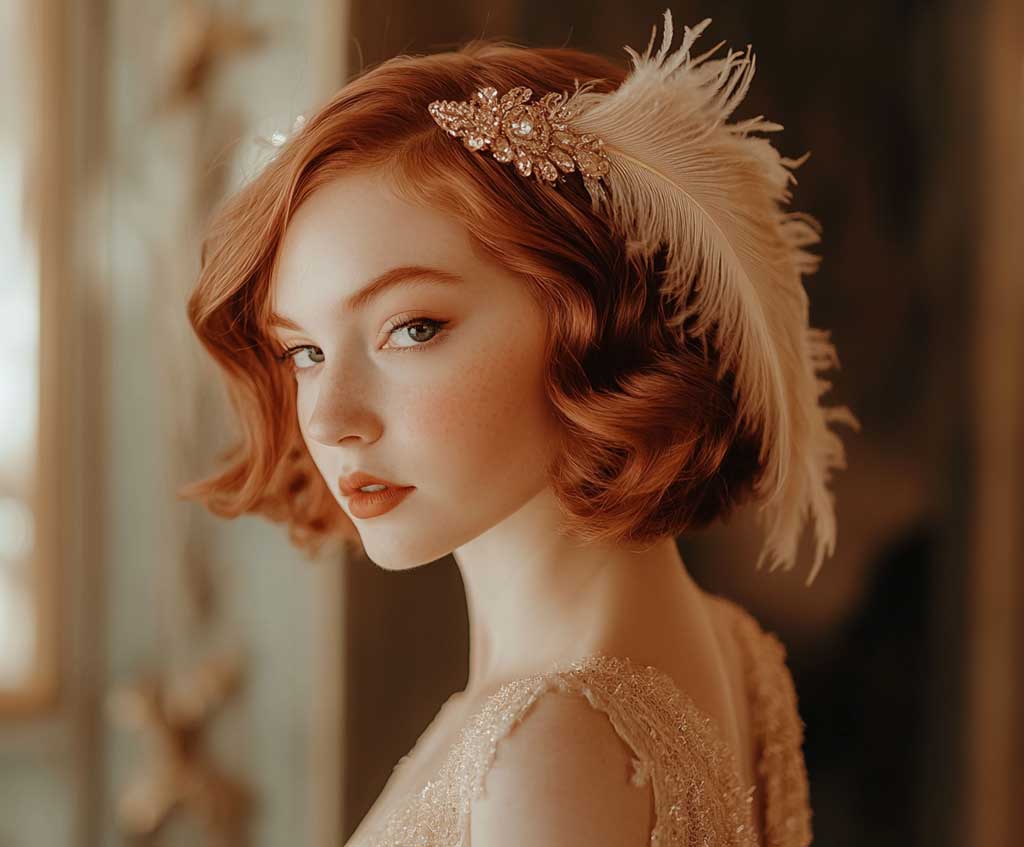
Use a curling wand (not an iron with a clip — wands give looser, more natural-looking waves) and wrap sections around without clamping. Let each section fall, cool for 30 seconds, then very lightly run your fingers through from root to tip. The auburn color is naturally better at showing wave texture than darker shades, so you don’t need product-heavy definition here. Position the feathered headband about 1 inch above the hairline, angled very slightly forward — not perpendicular to the head, but tilted toward the face. That tilt is historically accurate to flapper portraits.
For a party or themed event, this is the easiest Jazz Age hairstyle in the group to pull off without professional help. I stole this trick from a Gatsby-themed bachelorette party I attended in 2023: buy two feathered headbands and wear one as a backup in your bag. They’re fragile and the feathers mat down in humidity. Forewarned is forearmed.
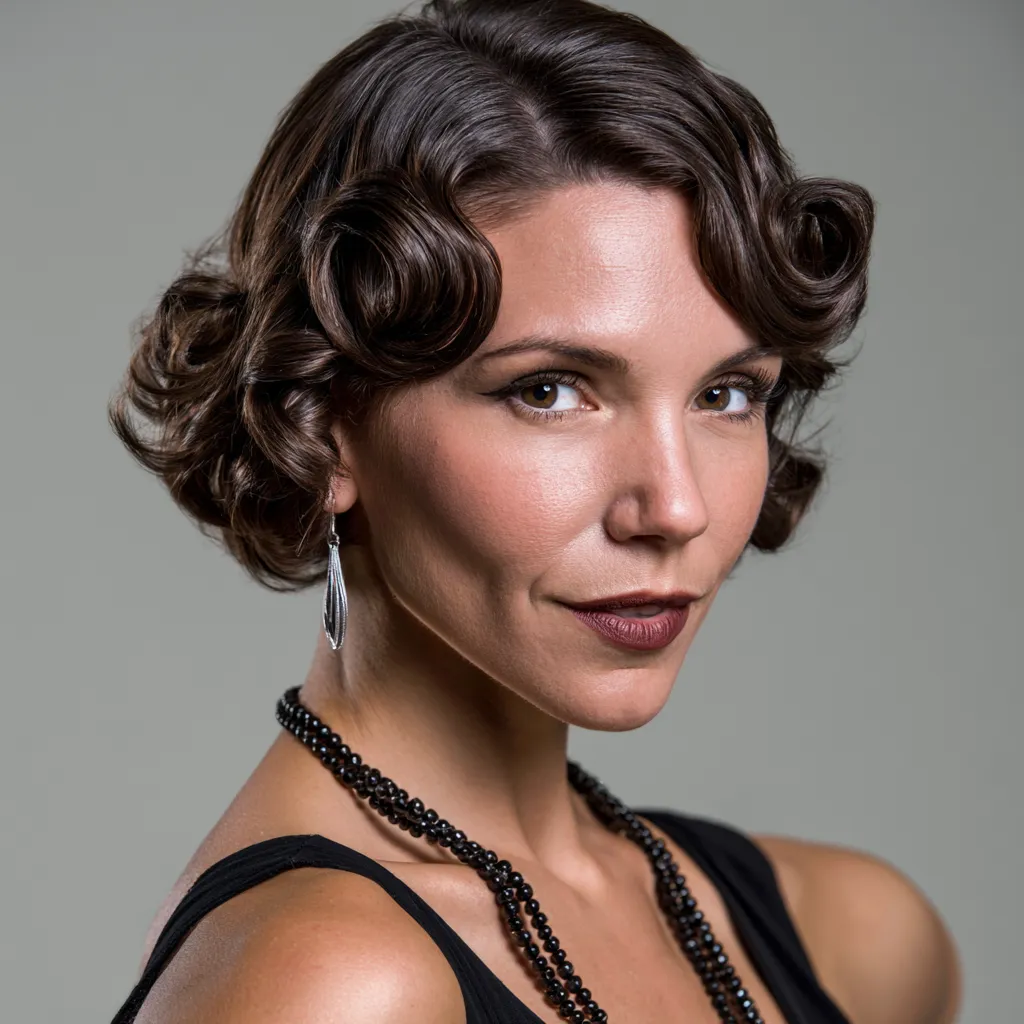
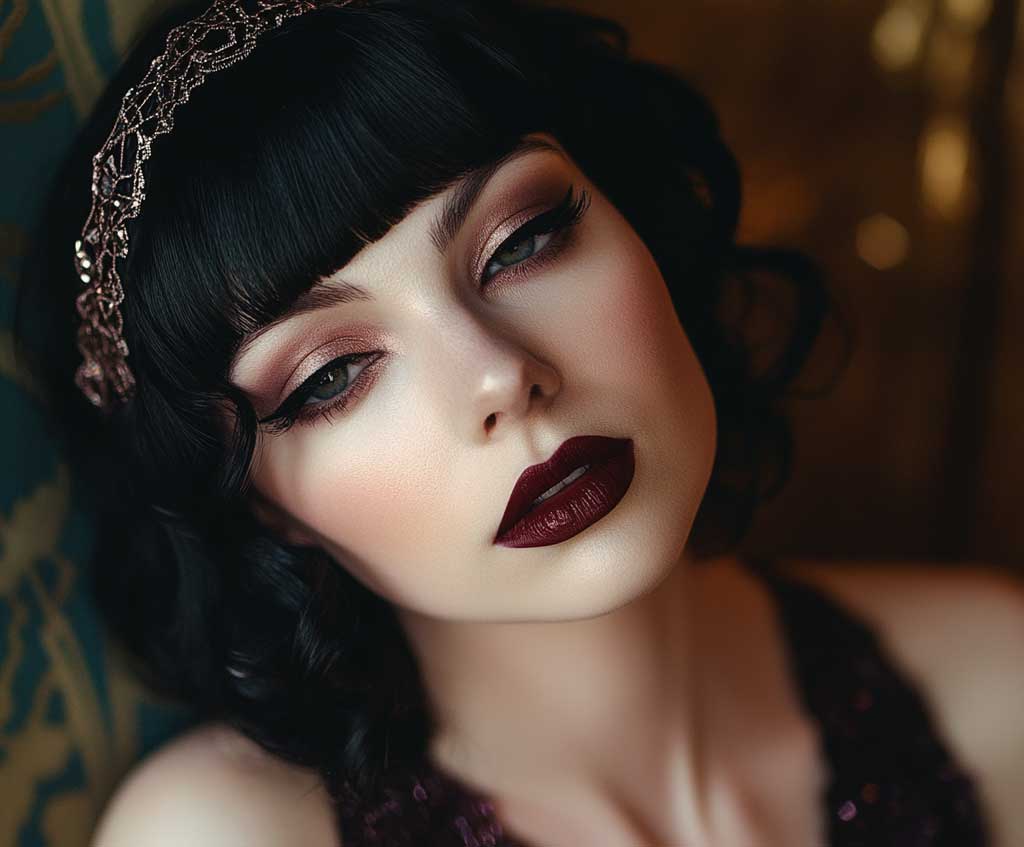
Pinned Curls in Dark Chocolate Brown Are a Formal Look That Starts the Night Before
Pinned curls — also called pin curls — are the most technically demanding of these six 1920s hairstyles, and also the most rewarding when done right. Dark chocolate brown is the ideal color for this style because the depth of the tone makes the curl sculpture visible and dimensional. Lighter colors can look flat with pin curls; dark chocolate makes every spiral distinct. The secret most tutorials skip: you’ll get a better result setting these the night before and sleeping on them than trying to rush through the process in an hour the morning of an event.


Curl sections around your index finger, then slide the curl flat against the scalp and secure with two crossed pins. Work in rows from the nape forward. Apply a light gel before setting — Garnier Fructis Pure Clean Gel ($5 at drugstores) is my go-to because it holds without crunching. Leave the pins in overnight, or sit under a hooded dryer for 45 minutes if you’re in a hurry. When you release the pins, do not brush. Separate the curls gently with your fingers only — a brush will give you a frizzy, undefined mess instead of the sculpted, structured result you’re after.
A beaded clip or sparkling Art Deco pin — I own two of these from Lulus ($18–$24 each) — placed at the side part completes the look with exactly the right amount of jazz-era glamour. Avoid rhinestone clips that look modern and industrial; the setting should look antique, with a soft gold or brass base rather than silver chrome. For more on pairing Jazz Age hair with full period looks, see these 1920s outfit ideas that work outside a costume party.
Pin curls in dark chocolate brown are the correct choice for formal galas, Great Gatsby dinner parties, and black-tie events where finger waves might read as too casual. They’re a labor of love. They’re also worth it.
Jazz Age Hair
The difference between theatrical and editorial is usually one product and one placement decision.
These six 1920s hairstyles work in 2025 because they’re specific — not vaguely vintage, but precisely Jazz Age. Hold matters. Shine matters. Accessory placement matters more than most people think.
Start with the side-part bob if you’re new to this. Graduate to finger waves once you’ve bought your wave clips.
Save this post before you plan your next vintage event.
Related Topics